Wednesday, October 29, 2008

Sabudana Khichdi ( Sago Pearls Khichdi)

This simple and delightful dish comes from Maharashtra, a state in the western region of India. This is traditionally served for breakfast or as a light snack but can also be served as a light dinner. This is one of my favorite dishes and it never fails to amaze me that such simple flavors can come together to form such a tasty final product. 

Sabudana Khichdi photo a26a3ead-6bfc-4a46-830f-f2b8ce73b218_zpscd37d7cb.jpg

This khichdi also evokes some good memories for me. I remember when my mother used to make this I used to "assist" her in peeling the skin off the peanuts and used to consume quite a few of the peanuts along the way and " borrowing" a few soaked sago pearls to play with as my mother was getting this dish ready.

Sago and Tapioca are kind of similar, and one is often mistaken for the other. But there are differences, to find out more about sago  check here  and about tapioca  here

Sabudana Khichdi 2 photo 82bd567b-e2f5-4cfd-91ba-a70677cc9d74_zpsfd461fca.jpg


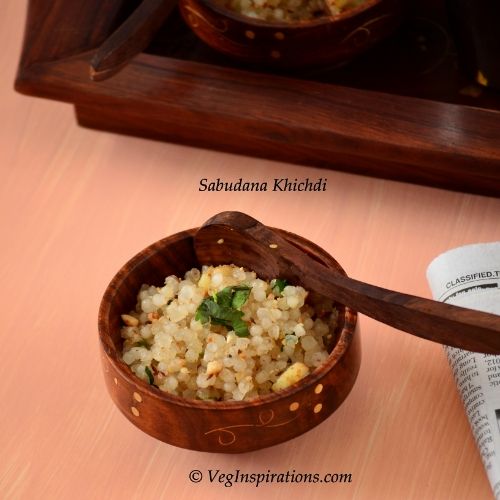
Ingredients and Method to make Sabudana Khichdi

1 1/4 cups of Sago pearls (Sabudana/ Javarsi)
1/2 cup raw peanuts/ or 1/2 cup unsalted roasted peanuts (Mungphali/ Shingdana/Kadalai)
1 large potato or 2 small ones peeled and cut into small pieces (Aloo/Urlakizhangu)
3/4 tsp cumin seeds (jeera/jeeragam)
3 green chillies (cut very finely) (or to taste)
3 tsp oil
salt to taste
half a handful of cilantro (coriander leaves) washed and cut fine for garnish

Soaking time for the sabudana/ sago is about 5 hours.

First wash the sago in water and drain completely leaving about 4 to 5 tbsp of water in it. Every hour or so, add a few more tablespoons of water to the sago (about 2 tbsp each time) and mix the sago well.Do not add too much water to the sago as it will become mushy when cooked and will become a sticky mess. When the sago is about double the original size and soft it is ready to cook.

If you are using raw peanuts dry roast  peanuts until the peanuts are evenly roasted and keep aside. If you choose you may skin the peanuts when cool and grind to a powder in a spice grinder. Do not grind too long, use short bursts of power otherwise the nut butters can cause clumping.You may grind the peanuts to a fine powder or keep it coarse according to your choice.

Heat oil in a large heavy bottomed pan and add cumin seeds to it, when the cumin seeds splutter add green chillies to it.  When the green chillies start turning whitish add potatoes and saute  for a little while until the potatoes are cooked.

Add the sago to this, saute for a minute or so, add the ground peanut powder and salt to taste and saute until the sago seems a little softer and transparent (about a couple of minutes). Do not keep the pan closed with a lid at this stage as the sago will become mushy. 

Garnish with cilantro and serve hot.

This dish tastes best when served hot and fresh on the day it is made. In case you refrigerate it heat it in a microwave before serving.
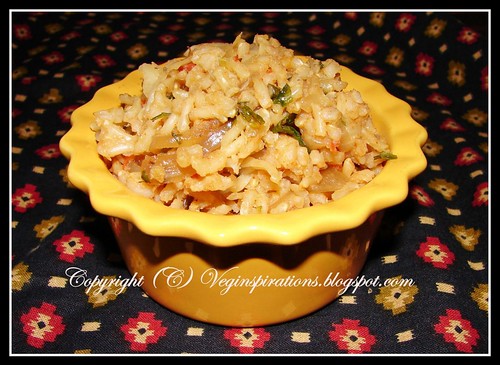
Related Post


Read more ...

Monday, October 27, 2008

Eggless Cornbread

What would you consider the most irritating or frustrating part of watching television ? For me its got to be the loud ads during the break. It happens every time I am getting dinner ready in the kitchen and the television is turned on to the news, just when my hands are occupied with either cutting veggies or kneading some dough, the anchor will announce the ad break and the ad will come on at a jarring volume much louder than the original program. 

Yikes...talk about deafening....I am really not against ads, there are a few of them I actually enjoy watching , but I wish the channels would play them at the same volume as the original program. I understand that the intent is to attract the viewer but most of the times at least in my case I end up turning off the television entirely and play some music. Ah...peace...

Moving on to the recipe of cornbread. On the days that I am looking for something more than plain bread to accompany soups I make this cornbread. I find this a nice change of pace with the addition of spice and sweet corn and find that it  works with soups that tend to have some sweetness to it like the butternut squash with lentils soup  or the  carrot soup.


Ingredients and Method to make Eggless Cornbread
1 cup self raising corn meal
1 cup whole wheat pastry flour
salt to taste ( I used about 1 1/4 tsp for this quantity)
1/2 tsp chilli powder 
1 tsp baking powder
1/2 tsp baking soda
2 tsp brown sugar

1 cup white or yellow sweet corn (either fresh or frozen) (I used frozen white)

1 1/4 cup milk
1/4 cup plain yogurt
3 tbsp extra virgin olive oil
 
2 cubes of light cheese (optional) (about 1.5 oz)

Pre heat oven to 375 deg F

Grease a large glass dish with a few drops of olive oil or any other oil and keep aside. ( I used a 10 X 14 inches glass dish)

In a large bowl mix together all the dry ingredients.

Add the milk and keep mixing. Add the yogurt and mix well.

Add  sweet corn and mix well.

Finally add olive oil and mix well.

Pour this mixture into the greased dish,gently flatten with a knife and place in the oven.

Bake for about 20 to 25 minutes until a toothpick inserted comes out clean.

Cut into little squares and serve with soup of choice.

Variation

Try using finely sliced green chillies according to taste instead of chilli powder.

Add finely chopped cilantro to the corn mixture before baking for a slightly different flavor 


Notes:

Baking times will vary depending on the size and material of your baking dish.

You can replace the whole wheat pastry flour with equal quantity of all purpose flour.
Related Recipes
Read more ...

Thursday, October 23, 2008

Butternut squash with lentil soup

I have heard some people say that they are just not into soups...I have to admit I cannot even imagine not having soup.  I love soups and could happily have them everyday if possible but especially during fall and winter. There is something so satisfying about having hot and hearty soups on cold evenings. 

I have never used butternut squash in my cooking and on my last trip to the grocery store I decided to get some and try it in a soup. I just made this soup up as I went along and added red lentils to make it more filling. I also added some rasam powder to give the soup a kind of Indian touch and liked the taste of the soup. The slight bit of spice and the sweetness of the squash provided an interesting contrast in taste.

For more information about butternut squash and for its other names check here  


Ingredients and method to make Butternut squash with lentil soup.

1 large leek (yielded about 2 1/2 cups of cut leek)
2 tbsp extra virgin olive oil
1 tsp minced garlic
3 1/2 cups of butternut squash (peeled ,seeded and cut into one inch pieces)
1/2 cup whole red lentils (Masoor dhal )
1/2 tsp cumin powder
1/2 tsp coriander powder
3/4 tsp rasam powder ( or 1/2 tsp garam masala or any other curry powder)
salt to taste
4 cups water ( or as required to achieve consistency of choice)


Wash and drain whole lentils and keep aside 

Heat a large heavy bottomed pan and add olive oil to it.

Add cut leek and saute until the leek is transparent.

Add the cut pieces of butternut squash and lentils,all the spices and water and let it simmer until the lentils and butternut pieces are cooked.

Serve hot with crushed pepper on top if you like and have it with bread or cornbread

Serves about 4

Notes:
This soup can be pureed after the squash is cooked and served that way too. The only reason I did not do that was because I wanted to have a chunky type soup this time.

For a variation in taste you could add ground ginger according to taste to this along with the minced garlic too.

Instead of butternut squash you could use pumpkin instead in this soup.
This is my entry into the Original Recipe Event  being hosted by Lore

Since this is a very low fat soup and ideal for people who are on a diet this is also my entry into the Diet Foods event  being hosted by Divya.

This is also my entry into My Legume Love affair being hosted by Sra this month,originally started by Susan

Related Recipes

Read more ...

Monday, October 20, 2008

Wheat and chickpea crackers (Baked Muthia)

Are you one of those people that believe fresh vegetables are more nutritive than frozen vegetables...I have to admit, I believed this for a long time... until I came across a couple of articles on nutrition that say frozen vegetables have the same level of nutrition as fresh ones...whew I was relieved to know that...now if I occassionally buy frozen vegetables I do not have to feel guilty that I am compromising on health for convenience.

On a related note, did you also know when you buy frozen vegetables in plastic bags,you need to check that the vegetables in them are free flowing, as clumping indicates that the item has been thawed and refrozen, meaning loss of nutrition. This was news to me and I am sure I have never checked for clumping when I bought frozen vegetables on the rare occasions I have bought them.So do keep this in mind the next time you are at the grocery :-)

Now to today's recipe,this cracker is actually a spin on the Indian muthia. Muthia,pronounced as Moo-thi-ya, is a dish that originates from Gujarat, a region in the western part of India. It has a steamed version and a deep fried one. My recipe for the steamed version is here, I have never tried the deep fried version and was intrigued when I saw a baked version of this muthia here in Aparna's My Diverse Kitchen.

I thought it would be very interesting to try this. I made some changes to the proportion of ingredients and added baking powder and olive oil making these crackers light and crunchy. The dried fenugreek leaves add a slightly bitter note,but not overwhelmingly so and with the spices used, this cracker turned out to be a very interesting and tasty experiment.


Ingredients and method to make the wheat and chick pea flour crackers (Baked Muthia)

1/2 cup whole wheat flour (atta)
1/2 cup chick pea flour (besan)
1 1/2 tbsp dried fenugreek leaves (Kasoori Methi)
1/2 tsp chilli powder (or according to taste)
salt to taste (I used about 1 tsp)
1/4 tsp cumin powder
1/2 tsp baking powder
4 tbsp olive oil
a little water to knead the dough

a little flour for dusting

Preheat oven to 350 deg F

Line one or two cookie sheets with foil and keep aside

Mix all the dry ingredients in a large bowl.

Add the olive oil,mix well, slowly add a little water and keep kneading until you get a smooth dough that is not sticky.

Divide into three to four equal parts.

With the help of a little flour roll out the dough into a thin circle (as thin as possible)

Place this circle on the lined cookie sheet and use a cookie cutter to score a shape on the circle (or use a pizza cutter to score lines horizontally and vertically)

Bake in the oven for about 10 to 12 minutes (Baking times will vary depending on the thickness of the rolled out dough)

Cool on a wire rack and store in an airtight container.

Here is another view of the crackers...


These crunchy crackers are on their way to the Bookmarked Recipes event being hosted by Ruth.


Related Recipes


Read more ...

Friday, October 17, 2008

Low Fat Pineapple Oatmeal Cookies

Have you heard people tell you that bananas are fattening,I cannot count the number of times I have heard this particular statement from different sources.For some people,this myth is so deeply ingrained that no amount of convincing helps change their minds.Fact is that any weight gain simply happens when the overall calories consumed in a day is higher than the calories burned that day.

Here are some facts about bananas, an average medium sized banana is only about 105 calories and bananas are a good source of fiber, magnesium, and potassium, all of which can help manage blood pressure. They're also a good source of vitamin B6, which helps boost your immune system. And think about it, it is definitely far healthier to snack on bananas than say a bag of chips which for an ounce has about 150 calories  or a large glazed doughnut which has about 299 calories. For more about calories in some of the snacks we consume check out this  website

Coming to a recipe completely unrelated to bananas, here is the recipe of  pineapple oatmeal cookies. I had a can of crushed pineapple that I had opened and wanted to use it up soon. I have been wanting to try making pineapple cookies for quite some time now and after looking around for recipes I did not find any that appealed to me.So I decided to make up the recipe as I went along to make this cookie. The cookies turned out soft and chewy and mildly sweet and made an excellent low fat guilt free snack.


Ingredients and Method to make Low fat Pineapple Oatmeal cookies

1/4 C Whole wheat flour
2 C 1 minute oats
1 tsp baking powder
1/2 tsp baking soda
3/4 tsp cinnamon powder
1/2 tsp salt
4 tbsp brown sugar

1/3 cup egg whites (equivalent to whites from 2 eggs as per the carton)
1/4 C oil
3 tbsp agave nectar
1/4 C honey

1/2 C raisins
3/4 C crushed pineapple with juice (no sugar added )

Preheat oven to 350 deg F

Line a cookie sheet with parchment paper and keep aside

In a large bowl, mix well all the dry ingredients, items 1 through 7

In a separate bowl, beat the egg whites lightly, add oil, honey and agave nectar and mix well.

Fold in the egg and oil mixture to the dry ingredients and mix well.

Add raisins and pineapple with juice and mix well.

Keep this mixture aside for about 20 to 25 minutes until the oats become a little softer and the moisture is absorbed.

Drop spoonfuls of this mixture on the cookie sheet about an inch apart and bake for about 20 to 25 minutes until it turns brown.

Cool on a wire rack and store in an airtight container.

Yields about 20 medium sized cookies


Notes:

Instead of the whole wheat flour you can easily substitute all purpose flour.


This is my entry into Original Recipe Event  being hosted by Lore

Related Recipes


Read more ...

Thursday, October 16, 2008

Mexican Rice


Rarely have I seen recipes that pair cabbage and rice,so when I saw this recipe in a vegetarian cookbook I was intrigued.I have had this cookbook with me for quite some years and refer to it from time to time when I am looking for new ideas but never really noticed this particular recipe until now.

I wanted to give this recipe a try and adapted it to suit our palate and to adjust for ingredients I had on hand. This was a very quick and flavorful rice and is probably going to cause me to look for cabbage at my grocery more often than I do now :-)

Mexican Rice 3


Click here for a printable view of this recipe


Ingredients and method to make the Mexican Rice
2 onions (1 cut fine and 1 sliced long)
1 cup shredded cabbage
2 small tomatoes (blanched and cut into small pieces)
1 1/4 cup long grain brown rice
1 tsp minced garlic
1 tbsp soya sauce
1/2 tsp chilli powder (or according to taste)
handful cilantro for garnish cut fine
salt to taste
4 tsp extra virgin olive oil or any other oil

Blanch the tomatoes. (Blanching is a process where you soak the tomatoes in very hot water ( near boiling) water for a few minutes.When the skin on the tomatoes cracks carefully remove the tomatoes from the hot water using tongs and place in a bowl of cold water.When tomatoes cool remove the skin from the tomatoes and then cut into small pieces)

Wash the long grain brown rice and keep aside.

Heat a large pan add one teaspoon of oil, add the sliced onions(the long sliced onions) to this and saute for a few minutes on medium high heat until the onions are transparent.
Remove the onions from the pan and keep aside.

In the same pan add another teaspoon of oil and add the shredded cabbage and saute until the cabbage is cooked but still a bit crisp (do not make it very very soft) Remove the cabbage from the pan and keep aside.

In the same pan add the rest of the oil and add the fine cut onions and saute until transparent. Add the minced garlic to this and saute for a few seconds.Add chopped blanched tomatoes and saute until the tomatoes are soft.

Add brown rice to this saute for a minute, add water as required ( I used approximately 1 3/4 cup of water ) add salt to taste and close with a lid and cook on medium low until rice is cooked. Check while this is getting done and add water if required.The rice needs to be cooked until each grain is separate and not mushy.

Add soya sauce,chilli powder and mix well.

Add the sauteed onions and cabbage and mix well. Add cilantro for garnish and serve hot.

Serves about 2-3

Use this as a base for any mexican dish like burritos etc.

This is my entry into the Rice mela event being hosted by Srivalli (Thanks for letting me know about this Divya)


Read more ...

Monday, October 13, 2008

Rice Crackers


I have already mentioned in the past how much I like to munch on crunchy snacks so I will not go into it again this time. Suffice to say that my interest in having healthy and crunchy snacks led me from making wheat barley sesame crackers  to making this rice cracker with a detour in between making a couple of wheat crackers that were not worth mentioning.

This one worked out well and was the perfect tea time snack. The only problem with these rice crackers are that they do not last as long as I wish they would  and keep disappearing a little too quickly  :-)


Another view of the crackers


Ingredients and method to make Rice crackers
3/4 cup rice flour
1/2 cup chick pea flour (besan) (gram flour)
3 tbsp cornmeal
2 tbsp wheat germ
1/2 tsp baking powder
salt to taste (I used about 1 tsp)
1/2 tsp chilli powder (or according to taste)
3 tbsp brown sesame seeds
5 tbsp extra virgin olive oil
approximately 1/2 cup water

Either some flour for dusting or 2 large ziploc bags 


Preheat oven to 350 deg F

In a large bowl add all the dry ingredients and mix well.

Add olive oil and mix well.

Add water slowly few drops at a time and keep kneading the flour until the dough is soft but not sticky. Knead for another minute or so.

Make 5-6 large lemon sized balls of the dough.

Roll out this dough into as thin a circle as possible ,you can do this in two ways, either the traditional way using flour for dusting or place a ziploc or any other heavy plastic bag on a smooth surface and place one lemon sized ball on it and flatten with hand, place another ziploc on it and then proceed to roll it out as thin as possible.

Line a cookie sheet with either parchment paper or foil and gently place the rolled out dough on this. Remember to remove the ziploc from both sides of the dough.

Use a pizza cutter or knife to score lines horizontally and vertically on the dough.

Bake in the oven for 7 to 12 minutes.

Baking times will vary depending on the thickness of the rolled out dough.

Cool on a wire rack and  break the crackers at the scored lines. Store in an airtight container.

Enjoy with tea /coffee or just as a snack.

This is my entry into the Culinarty Original recipe event being hosted by Lore


Now onto other things, Mahimaa has given me the Rocking Girl Blogger Award, thanks so much Mahimaa.


I would in turn like to pass this award on to 

Related Recipes
  
Read more ...

Friday, October 10, 2008

Low Fat Pineapple Kesari (Indian sweet with semolina)

First let me start with a brief introduction,Kesari is a very popular sweet from Southern India. It is also a cousin to Sheera which is similar but not the same as kesari and is made in the western region of India. More about Sheera in another post.Coming back to Kesari this is made with copious amounts of sugar and clarified butter and is invariably served at Indian weddings and also made at home for special occasions.

Normally I do not like the traditional form of kesari since it tends to be cloyingly sweet and hence avoid making this sweet if possible. Last week when an occasion to make this arose it got me wondering if I would be able to make Kesari both mildly sweet and low calorie too. I decided to give it a try and used unsweetened crushed pineapple to add some sweet to it naturally and used some agave nectar and sugar to sweeten it further.

This kesari turned out exactly the way I wanted it to taste, mildly sweet with the pineapple adding just a little something extra,which made it quite interesting. This is the first time I tried using agave nectar in an Indian sweet and I am happy to report it works just as well as it does in cookies and cakes,there was no discernible taste from the agave nectar and it does not interfere with the flavor of this recipe.


Click here for a printable view of this recipe

Ingredients and Method to make Pineapple Kesari
2/3 cup cream of wheat (rava) (semolina)
5 tsp clarified butter (ghee)
8-10 cashew nuts (plain and unsalted)
2 tbsp raisins
1 3/4 cups water
2/3 cup crushed pineapple (with juice)(no sugar added) (I used canned)
4-5 strands saffron
4 tbsp sugar
4 tbsp agave nectar
1/4 tsp cardamom powder

In a large heavy bottomed container roast cream of wheat in 2 tsp of clarified butter on medium high until it turns slightly golden brown.Take care to keep stirring and do not let this cream of wheat burn.Remove the cream of wheat when done and keep aside in a separate bowl/plate.

In the same container add another tsp of clarified butter and roast the cashew and when the cashews start turning golden add the raisins and saute quickly for a few seconds.Remove from heat and keep aside in a separate bowl/plate

In the same container heat the water and allow it to boil. When it starts boiling add sugar,agave nectar,saffron strands and crushed pineapple and let it boil for another minute.

After the sugar has melted add the roasted cream of wheat and mix well seeing that no lumps are formed.

Keep a lid handy as sometimes the mixture could start splattering at this point. Keep stirring until the cream of wheat absorbs all the water and becomes thick.

Add the balance of clarified butter and the roasted cashews and raisins. Also add the cardamom powder at this time,mix well and serve hot.

Serves about 2-3

Notes:

Saffron food color can be added to enhance the look of this dish,I normally avoid adding any food color so I used just a few strands of saffron

In case you want it much sweeter double the quantity of sugar and agave nectar.

Do remember that agave nectar is much sweeter than sugar so in case you use just agave nectar keep that in mind and adjust it accordingly.

Related Recipes
Sweet Sesame Rice
Read more ...

Wednesday, October 8, 2008

Instant Oats Dosai ~ Savory Indian crepes made with oats

Dosai (crepe) is an integral part of the diet of most people from South India. Dosai usually means a crepe made out of rice and black gram lentil. The normal procedure to make this is to soak the rice and lentil overnight, then grind the mixture to make the batter which is then left to ferment for about twelve hours and only then is it used to make the crepe.This incredibly delicious dish is very popular and this batter is quite convenient to have at hand for quick lunches and dinners or snacks too.

Of course this is not the only type of dosai made in Indian homes, there are a wide variety of recipes.Some of these recipes call for the use of different types of flours mixed together with water and seasonings for flavor.In the interest of time and convenience I prefer the latter type of dosai when in a hurry.
But none of the traditional recipes of dosai ever use oats in them.A pity that,  because oats is definitely one of my favorite cereal grains. Not only is it chock full of health benefits, but it is also so versatile and can be used in a variety of recipes, both sweet and savory.

I experimented with using oat flour in making this dosai for the first time and just made up this recipe as I went.We loved the taste of this and this recipe has definitely earned its place in my kitchen :-)

 Instant Oats Dosa ~ Savory Indian crepes made with oat and wheat flour

Click here for a printable view of this recipe

Ingredients and method to make Savory Oat Crepe (Oat Dosai)

1 1/2 cup oat flour * (see notes below )
1 cup wheat flour (atta/ godumai maavu)
3/4 cup Semolina (rava)
salt to taste (approximately about 2 tsp )
3 cups of water (approximately)

For tempering (optional)
2 tsp oil
3/4 tsp cumin seeds (jeera/ jeeragam)
5 small green chillies cut very fine (or according to taste) (hara mirch/ pachai molagai)

handful of cilantro (coriander leaves/ hara dhania/ kothamalli) cut very fine
Few spoons of sesame oil (or any other flavorless oil)  to shallow fry

In a large bowl mix the oat flour,wheat flour, semolina and salt well

Add water a little at a time to the mixed flours and keep mixing as you add water.Make a thick batter of pouring conistency

In a small pan heat the oil, add cumin seeds and when it splutters add green chillies. When the green chillies start turning color,pour the entire oil with the cumin and green chillies into the batter.

Mix well and keep aside for about fifteen minutes.

Heat a tawa/skillet/ griddle on medium high heat.

Pour a ladleful of the batter on the skillet and spread quickly into a thin circle.(for really crisp dosai/crepe make this as thin as possible for softer ones it can be a little thick)

Pour few drops of sesame oil on side facing upwards.

When the lower side is done (it gets a little brown) use a spatula to flip the crepe and let it cook on the other side for a little while.

Flip over to check if done (there will be small pinkish brown spots )

Here is a video clip of the process. It is not of this dosai, but it gives you an idea of how this process is done....


Serve hot with choice of chutney/ sambar/ spice powder/ molaga podi

Yields approximately 15 to 16

Notes :
For oat flour, process/ grind quick cooking oat meal ( I used Quaker 1 minute oat) in a spice grinder/ mixer until powdered fine.

The tempering/ seasoning is optional, I have made this dosa with and without and it tastes good either way. 

If you are looking for instant dosa varieties, here are a few more....
 

Instant Multigrain Dosa ~ Savory multigrain crepes

Instant Ragi Oats Dosai ~ Nachani dosa ~  Savory Finger millet and oats crepe

Instant Buckwheat dosai ~ Kuttu atta dosa ~ Buckwheat flour crepes
Read more ...

Monday, October 6, 2008

Ellu Sakkarai Pongal- Sweet Sesame Rice

Growing up I do not ever remember having any kind of sakkarai pongal with ellu (til) in it. Sakkarai pongal is a kind of a sweet rice that is sweetened with jaggery. When my mother in law mentioned this dish to me some time back I wondered how it would taste but put aside the idea of making it in favor of making savory sesame rice. In rice dishes I almost always favor making savory dishes rather than sweet ones. They are so easy to pair with a vegetable side dish to make a complete meal. This weekend though I had the opportunity to try this sweet rice and we liked it a lot.

The use of jaggery in this sweet also makes it a little more diet friendly for those that are avoiding sugar and watching calories.Jaggery is a type of sugar made out of sugarcane and is used a lot in Indian cooking. It is considered to be more wholesome than refined sugar since it retains more mineral salts.For a more detailed article on jaggery and the different names of jaggery check out this link.

Ellu Sakkarai Pongal photo 58a176e2-8f6a-483c-a1b3-783b24517bf8_zpsb44ddfa2.jpg


Click here for a printable view of this recipe 

Ingredients and method to make Ellu Sakkarai Pongal/ Sweet Sesame Rice.

1 and 1/2 cups of cooked rice (either brown or white) (I used brown)
6 tbsp brown sesame seeds (til/ ellu)
1 cup grated jaggery (see notes)
2 tsp clarified butter (ghee/ nei) 
5 cardamom seeds powdered fine

Optional garnish
1 tsp clarified butter/ghee/nei
1 tbsp broken pieces of cashew nuts (kaju) 

Pressure cook rice until soft. I used brown rice, so for about 1/2 cup of uncooked rice I used about 1 cup of water. If you are using white rice, cook as per manufacturers directions. Some kinds of white raw rice require about 1.5 cups for 1 cup of rice and some require 2-3 cups of water. Remove from heat. 

Dry roast brown sesame seeds until they turn a little more brown and keep aside. When cooler grind the sesame seeds into a reasonable powder, it does not have to be very fine.

In a large heavy bottomed pan place the grated jaggery with cooked rice and place on medium to low heat. Keep stirring frequently until the jaggery melts and allow the mixture to simmer for a few minutes.


When the mixture begins to thicken slightly, add powdered sesame (til/ ellu) and mix well.
The copyright of this content belongs to Veginspirations.com

Add clarified butter and cardamom powder to this mixture and keep stirring it on low heat.
When the  mixture starts thickens a little more, remove from heat. Do remember that once it cools a little it thickens a bit more. If you plan to garnish, heat clarified butter in a small pan. Add broken cashew pieces to it and stir until the cashews turn an even reddish color. Remove and pour entire mixture on the pongal.

Serves about 2

Notes:
If you like your sweets very mild, then you might want to reduce the quantity of jaggery to about 3/4 cup .

Read more ...

Friday, October 3, 2008

Carrot Cilantro Soup

Cilantro is very easily my favorite herb,this herb is so versatile and fragrant, it enhances the taste of every dish that it is used in. Having said that, I have to admit I have never used cilantro in a soup and especially carrot soup at that.

That is probably the reason why this title in a vegetarian cookbook kind of jumped out at me. The idea of cilantro in a soup tickled my imagination but the cream and other spices mentioned in the recipe did not appeal to me,so I adapted this recipe. I wanted to showcase the flavors of the cilantro and the coriander seed powder and decided to cut out all the other stronger spices with that end in mind.

The verdict...this soup was a success and the potato added sufficient creaminess to the soup so I did not miss the cream and the color was really beautiful. Take a look at it........


Click here for a printable view of this recipe

Ingredients and Method to make Carrot cilantro soup
1/2 large yellow onion or 1 small yellow onion cut into small pieces
3 large carrots cut into cubes carrots (yielded about 1 3/4 cup)
2 medium white potatoes peeled and cut into small pieces (yielded about 1 cup)
1 inch piece of ginger
1 1/2 tsp coriander powder
salt to taste
3 tsp extra virgin olive oil
2 1/2 cups of water ( or as required )
handful cilantro cut fine for garnish

Heat oil in a large heavy bottomed pan, add the onion and saute until onions are transparent.

Add in the ginger and coriander powder and saute for a few seconds.

Add potatoes, cubed carrots, salt to taste and water and simmer on medium high heat for a little while until the potatoes and carrots are cooked.

Keep aside until a little cooler.

Puree this cooked carrot potato onion mixture in a blender until smooth.

Heat this pureed mixture and add water if required to adjust consistency.

Garnish with cilantro and serve hot with bread or salad of choice..

Serves about 2-3

This is my entry into the Herb Mania-Coriander event being hosted by Siri

Related Recipes:
Vegetarian Split Pea Barley Soup
Read more ...

Wednesday, October 1, 2008

Natural Super Food Almonds

Almonds are one of the amazing wonder foods provided by nature.This small nut packs a powerhouse of nutrients that we need in our daily diet.One ounce of almonds provides about 12 percent of our daily requirement of protein and contains no cholesterol.

It also provides about 35 percent of our daily allowance of vitamin E, which is a valuable antioxidant with many cancer fighting properties. They are also a great source of minerals like magnesium,phosphorous ,zinc,calcium,folic acid and loads of healthy fiber.

Most of the fat contained in almonds is mono unsaturated fat that is good for maintaining healthy cholesterol levels. Now if all this information makes you want to grab some almonds and munch on them immediately..WAIT.


Click here for a printable view of this article

It seems that to get the maximum nutrition out of almonds the best way to get them is to soak them overnight and have them the next morning.This is because almonds contain enzyme inhibitors that get neutralized by soaking them.Additionally soaking also makes the almonds easier to digest and helps our body to increase the absorption of vitamins from the almonds.

Another benefit ,if you have these soaked almonds in the morning they are also said to assist in stabilizing your blood sugar throughout the rest of the day.

So do remember to soak those almonds and have them each morning and also remember to have them in moderation as all nuts are high in calories.

For more information about the health benefits of almonds,you can check out a substantive article here
Read more ...