Thursday, June 25, 2009

Badam Halwa ~ Indian Almond Fudge

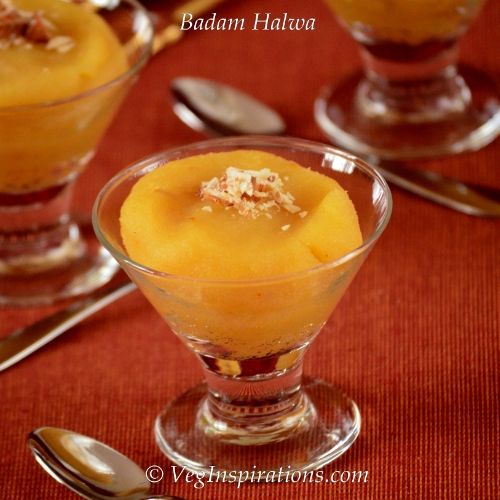
Badam halwa is an Indian sweet that can best be described as a kind of fudge made with almonds. It is one of my fathers favorite sweets. Every time he visits an Indian restaurant he definitely looks for this item on the menu hoping that the restaurant offers this item. So when he visited me last time it was an absolute no brainer for me to decide to make this sweet for him. That first attempt at making this sweet tested my patience....why?? does it take that long to make this fudge ....not at all. This is a pretty quick and simple sweet to make but the first time I attempted it, I was not aware that soaking almonds in hot water helps to peel the skin easily, instead I soaked almonds in regular cold water and struggled to peel the skin which took a long while, hence the reference to my patience being tested.

Badam halwa ~ Indian Almond Fudge | Veg Inspirations

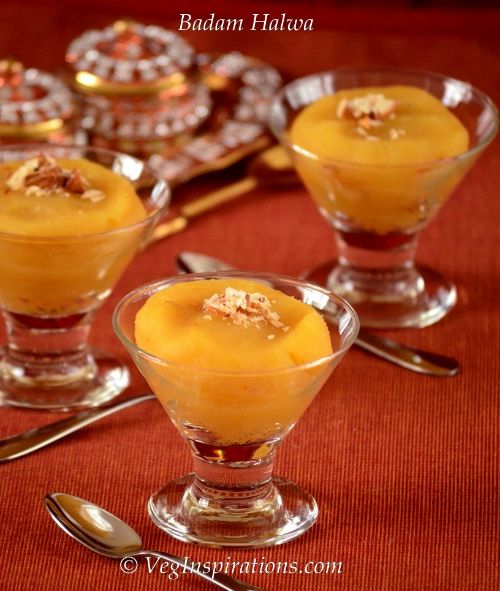
Anyway since then I have made this sweet many many times and it is now among my favorite sweets too. This simple sweet which requires a minimum of ingredients can be made easily and tastes absolutely divine. Its the perfect thing to celebrate any occasion/ milestone or just to make any ordinary day/ weekend just a
tad bit more special :)

  Badam Halwa ~ Indian almond fudge | Veg Inspirations  

Click here for a printable view of this recipe

Ingredients and method to make Badam Halwa
1 cup of whole raw almonds (badam)
3/4 cup of sugar (or a little less for a milder sweetness) (shakkar/ sakkarai)
a pinch of good quality saffron (kesar)
4 tsp of clarified butter (ghee/nei) or according to taste (optional)
milk as required  (approximately 1/4 -1/2 cup) (doodh/ paal)

 Heat sufficient water ( it should be enough to cover all the almonds) on high heat until it comes to near boiling temperature. Remove from heat and add raw whole almonds to the water. Let almonds soak in hot water for about 15 to 30 minutes.

Cool until touchable, then gently press the almond slightly or rub the skin slightly and the skin peels off entirely.Continue this process until all almonds are skinned.Grind almonds in a blender adding water or milk as required to make a smooth paste ( I used milk this time)Keep ground almond paste aside.

Warm 2 tsp of milk and add a pinch of saffron to it and let the saffron dissolve in that.
 The copyright of this content belongs to Veginspirations.com

Add almond paste, sugar and saffron + milk mixture together in a heavy bottomed pan and place on medium to medium high heat and stir frequently. Add clarified butter / ghee to this mixture at this point and mix well.Keep a lid handy as more moisture in the mixture will cause some splattering.If this happens just close with a lid, leave a very small gap for the moisture to evaporate and let the mixture evaporate a little.

Keep stirring until the mixture thickens and the mixture starts to leave the sides and comes together in the center. I remove mine when a little cooled mixture is able to be rolled, then I know it is done. Remove from heat and cool to room temperature. Store in an airtight container. The halwa can be kept without refrigeration for a period of about 3 - 4 days.
Read more ...

Monday, June 22, 2009

Whats in my milk ?


Definitely an odd question I would say and if you had asked me this question a couple of years back I would have innocently and perhaps naively answered that it was just milk. Of course that would have been before I read about rbst, rbgh and palmitate. What are all these things, well rbst and rbgh are terms interchangeably used to refer to a growth hormone administered to cows to increase the output of milk. There is some controversy with regard to the effect of this rbst and rbgh on the human body with some studies showing that it may have a negative impact on our bodies and may make humans more vulnerable to some types of diseases. For a detailed article on rbst and rbgh click here

Milk 4


Since I read about this I have switched to rbst free milk and actually drive extra miles to go into a grocery that I would not otherwise frequent just to get this type of milk. Then a week back I read about palmitate. What is palmitate and what is it doing in my milk, the explanation I found online for this is that palmitate is a oral form of vitamin A that is added to fat free and low fat milk to add back some of the vitamins that are removed from the milk along with the fat. So if it is vitamin A then it should be good for us right?...... there should be not problem in having that right?...... how I wish that were the case!

Unfortunately WHO has some concerns that this form of vitamin A when taken in our diet may make us more susceptible to cardiovascular diseases. Of course wiki also mentions that there are not enough studies to back this concern raised by WHO. If you want to read the explanation given in wiki for palmitate click here

Frankly all these artificial enhancements to milk make me very wary and now in addition to looking for rbst/ rbgh milk I have also switched to using whole milk instead of low fat or fat free. I would much rather workout the extra calories from the milk I consume than have to worry about the side effects of artificial additives in my milk. There is a side benefit I get since I switched from low fat to regular milk.....the milk tastes markedly better than the low fat version. How do you feel about such additives, please share your thoughts in this matter, I would love to hear how you feel on this topic!

Read more ...

Thursday, June 18, 2009

Indian Milk Pudding (Paal Payasam )


Here is a treasure from south Indian cuisine, an Indian pudding that is made with just milk, sugar, rice and flavored with cardamom powder and nuts. This payasam is featured in almost all tamilian celebrations from weddings to birthdays to anniversaries and its presence on the menu invariably causes a great deal of expectation, at least on my side.

Paal means milk in tamil (one of the languages spoken in southern India) and payasam is the tamil term for any sweet preparation which has a thicker consistency than milk but not quite as thick as evaporated milk. The simple description of this sweet is deceptive in the sense that it is not adequate in explaining the creaminess or the awesome taste of this sweet.

The best thing about this desert besides its awesome taste is that it is very simple to prepare and can be prepared with everyday items found in our kitchens.It does not have a very complicated procedure to make and even beginners in the kitchen can attempt this dessert successfully. In addition this one is always well liked by people with a sweet tooth like me, making it a great menu addition when entertaining guests.

 Indian milk pudding- Paal payasam photo 8c73a4ef-2107-4906-bff8-a8ea642302ce_zpsbfeee956.jpg


Ingredients and method to make paal payasam
4 cups whole milk
1/4 cup long grain basmati soaked in water for 30 mins
1/2 cup sweetened condensed milk
1/8 tsp cardamom seed powder
1/8 cup sugar (optional) (or according to taste)

Optional garnish
1 tsp clarified butter (ghee)
3 tsp broken cashew pieces


Soak basmati rice soaked in water for 30 mins.

In a large very heavy bottomed pan mix milk, condensed milk and sugar and heat on medium to medium low heat and let it simmer for a few minutes.

Drain basmati rice and add to this milk and let it cook until soft.

Simmer the milk on a low heat stirring often until it reduces to about 1/2 of its original quantity.

When the rice is cooked and the milk is reduced to half, add cardamom seed powder and remove from heat.

Heat clarified butter and add cashew pieces to it, when the cashew pieces begin to brown a little remove from heat and add it to the payasam.

Serve hot or cold

Serves about 2-3

Notes

I used both the condensed milk and sugar and it was sufficiently sweet, not too much or too little, if you like milder sweets you could exclude the additional sugar and just use sweetened condensed milk

Everyone seems to have their preferences with regard to consistency, if you like a thicker consistency allow it to simmer a tad bit longer, and if you like your payasam a tad bit thinner, remove it from heat a tad bit earlier. 

Read more ...

Monday, June 15, 2009

Red Kidney Bean and Vegetable Cutlets (Rajma Cutlets)

How would you like it if you could sleep and help yourself maintain a healthy weight or even lose a little weight because you slept, that would be really cool wouldn't it? If you think that is impossible, read on to know a little more about an interesting connection between sleep and weight loss that might surprise you.

Did you know that people who slept less than five hours gain more weight over time than those that sleep seven to eight hours . Studies have found that sleep deprivation causes the body to increase production of the hunger hormone causing us to crave more food during the day. Some studies also show that when we are deprived of sleep we tend to crave more fattening foods.So if you are among those that sleep less than five hours here is a good reason to sleep a little longer....you don't have to feel bad about missing those late night shows on television anymore...after all health comes first doesn't it ? :-) If you would like to read a more detailed article on this topic click here

Moving on here is a healthy and protein rich cutlet made with red kidney beans (rajma) that I made to use as a filling in sandwich made with my oat pav (bread). Try this for a healthier version to the regular all potato / bread cutlets, this one does not compromise on taste and it is quick and simple too.

Red Kidney Bean/ Rajma Cutlets


Ingredients and Method to make red kidney bean cutlets

1 cup red kidney beans soaked for about 8 hours with a pinch of soda (soda is optional)
4 small potatoes
2 cups mixed vegetables ( I have used any combination of green beans, corn, green peas, and carrot)
4 slices of day old bread (powdered in a spice grinder to a coarse mixture) (yielded approx 1 and 1/2 cups of bread crumbs)
1/4 to 1/2 cup fine semolina (semolina flour/ rava) (see notes)
1/2 tsp red chilli powder (optional) (or according to taste)
1/2 tsp garam masala (optional or to taste) (my recipe for homemade garam masala can be found here
salt according to taste

1 tbsp oil
1 tsp cumin seeds
3 Thai or Indian green chillies (or to taste)
1 inch piece ginger grated fine/ minced

a little extra oil to shallow fry the cutlets

Soak red kidney beans for about 8 hours or overnight with a pinch of soda (the soda is optional)

Drain red kidney beans and place in a pot with fresh water and simmer on a low heat until cooked. Alternatively drain red kidney beans and place in a pressure cooker with sufficient water and cook until soft. Drain any excess water after cooking the kidney beans and keep the beans aside.

Cook potatoes with skin either in the pressure cooker or stove top or microwave until soft and keep aside.

When the potatoes are cool, peel potatoes, mash them and keep aside.

In a heavy bottomed pan heat oil and add cumin seeds to it. When cumin seeds begin to sizzle, add green chilies and ginger and stir a couple of time. Add mixed vegetables, salt to taste, chilli powder, garam masala, sprinkle a few drops of water and cook on a low flame until the veggies are tender crisp. 

Add mashed potatoes to the cooked vegetables and mix well.

Add cooked red kidney beans to this mixture and mix well. Using the back of you spatula or a potato masher, mash the mixture gently until most of the vegetables, beans and potatoes get mashed. Alternatively, cool all the vegetables, add to a food processor and process until the veggies all break down into coarse mixture.

Add bread crumbs to this mixture and mix well. Add semolina a little at a time, mixing well. At this point, the mixture will be thick and you should be able to form a patty/ cutlet with it.
The copyright of this content belongs to Veginspirations.com 

Cool slightly and form into lemon sized or orange sized balls,depending on how large a cutlet/ patty you want to make, and flatten it slightly.

Heat a flat pan/ griddle/ tawa on medium high, place the flattened cutlets on them and add a few drops of oil around the cutlets. Turn over and fry the other side similarly.

Serve hot with ketchup as a snack/ appetizer or use as a patty in your burger or in a sandwich

Yield will depend on the size of the cutlets.

Notes:
The quantity of semolina will depend on how moist the mixture is, too moist may need 1/2 cup, lightly moist may need just 1/4 cup or a little more. Add the semolina a little at a time assessing once or twice to see if you are able to form a patty/ cutlet with the mixture. 

Read more ...

Wednesday, June 10, 2009

Oat Pav (Bread)

Since I have already mentioned what a pav is in this post , I will not go into it again. This rustic Indian bread has a special place in our hearts and I love the texture and softness of this bread. Unfortunately the all purpose flour does not satisfy the health conscious part of my mind and the wheat version does not completely satisfy R's taste buds. With the intention of satisfying both our requirements and making a healthier version of pav, I thought of adding oats to it.

The good thing about adding oats in breads is that it does not make the bread too dense or interfere with the taste of the bread, both of which I feel wheat does, so I like to experiment with oats in my bakes more than wheat. It also helps that oats is an amazing super food and I keep looking for as many ways to include this grain in our diet. I was amazed at how perfect the pav tasted and this one turned out special because it satisfied both my health consciousness and R's taste buds, in short, a real winner :-)

Oat Pav 6


Ingredients and method to make Oat Pav
1 1/2 cups all purpose flour (maida)
1/2 cup oat flour (rolled oats powdered in spice grinder until fine) (store bought oat flour would work just as well)
1/2 cup quick cooking steel cut oats
1 tsp salt
1 cup warm water
3 tsp sugar
2 1/2 tsp active dry yeast
2 1/2 tsp unsalted butter + a little additional butter to brush on top of the bread
+ 2 additional tsp unsalted butter (optional)

This bread works slightly differently from the usual breads in the sense the kneading is done after 30 minutes of mixing all the ingredients. This lets the steel cuts oats soak up some of the moisture and become a little more soft and cooked.

In a large bowl, mix all purpose flour, oat flour, steel cut oats and salt and keep aside.

In a small bowl add warm water and add sugar and yeast to it and let the yeast rise for about 5 to 10 minutes.

Add this warm water +sugar + yeast mixture to the flour mixture and mix well . This will be a little sticky at this point. Let this sit for about 30 mins.

After 30 minutes add butter (at least 2 1/2 tsp of butter + additional 2 tsp of butter if you are using it ) to this dough and knead well until the dough is soft and non sticky. Add a little flour if required (I did not need additional flour)

Let this dough rise for about an hour.

When the dough has doubled in size, gently fold it down and divide the dough into large lemon size rolls.

Line a baking sheet/ tray with parchment paper and place the divided dough about 1/2 an inch apart.

Cover this with a moist kitchen tissue and let it rise for another hour.

Pre heat oven to 375 deg F.

When the divided dough has risen and doubled in size, you will find that the dough is joined at the ends.

Place the baking sheet/ tray in the oven and bake for about 15 minutes or until the tops of the bread begin to brown.

Remove from oven and brush with a little butter on the top of the bread and place back in the oven and bake an additional 5 minutes.

Remove and serve hot with either bhaji (mixed spiced vegetables) for pav bhaji or use in sandwiches or burgers

This healthier version of pav is off to Madhuram's Low fat baking event
Read more ...

Sunday, June 7, 2009

Chocolate Fudge (Burfi)

Did you know that there are some communities in India where parents do not visit their married daughter at all, and if they have to visit, they will never eat anything or even drink water there. I am not sure what is the reasoning behind this thought but this is a practice that exists. Yes I did say exists....as in happening even in this generation, not only in the past and not just in Bollywood movies. You know the ones where there are lines spoken by some characters in the movie that goes something like " Main apni beti ke ghar ka ek boond paani bhi nahi loonga" which translates to " I will not have even a drop of water at my daughters home" although I have to admit it loses something in the translation. There is something about actors with deep voices delivering even such nonsense lines with perfect credibility that makes those scenes look not quite as ridiculous as they would seem otherwise, I guess that is why they are known as actors :-) I think I would have laughed for hours if someone had asked me to repeat a line like that.

Anyway I digress........ the reason for me bringing this up was that I heard of such a family recently where the parents do not visit their married daughter at all.....never.....nada....zip. This surprising fact made me wonder about the situation on different levels. Firstly that such a custom is being practiced in the twenty first century and also because I wondered about how both the daughter and her parents feel about such a practice. Do all of them ever think of all the time they are losing when they could be spend some time together. What a lost opportunity isn't it.....

Speaking of opportunity, I am one of those people that is always ready to seize the opportunity to ......have sweets! Insignificant you think? not if you have a sweet tooth such as mine!  Knowing my weakness for sweets I restrain from making them or buying them unless I know that there are people around who are going to share with me. Otherwise I know I would land up eating more than I should :-)  I got presented with just such an opportunity recently and came up with this idea and recipe to make this choco fudge. I was trying to re create a homemade sweet I remember having during my childhood. I just guessed at the ingredients and was very happy with the outcome of this sweet. The fudge was soft, sweet and chewy and since this sweet is flour-less it is also great for those that are avoiding gluten or avoiding all purpose flour. 

Photobucket

Here is another view of this fudge..........
Photobucket


Ingredients and method to make  Choco Fudge / Burfi

2 cups whole milk
1 cup non fat or any other dry milk powder
1/4 cup unsweetened cocoa
1/4 cup clarified butter (ghee)
1/2 cup almond meal (powdered whole almonds)
1 cup sugar (or according to taste)
1/4 cup sweetened condensed milk (optional)
one or two drops of clarified butter / ghee to grease a plate

Grease a slightly deep plate or any tray with a few drops of clarified butter and keep aside.
Mix all the ingredients of the fudge in a large heavy bottomed pan and place on the stove.
Heat this mixture and keep stirring it until the mixture thickens. Just keep the heat on medium so that the mixture does not burn or char.
The mixture needs to thicken till it begins to come together in the center and leave the edges of the pan. Will start to seem like a soft lump.
One way of judging if the fudge is done is to remove a very small amount off the heat in a spoon and cool it. Roll it between your fingers and it should roll and keep its shape, then the fudge is nearly done.
The copyright of this content belongs to Veginspirations.com 

Pour this mixture on the greased plate and level it with a knife.

Let cool for a few minutes and before it hardens, level again with the back of a cup.

Cut with a knife into desired shapes, either squares or diamonds. Or cool the fudge and and roll it into little balls like I have done in this picture above.

Refrigerate the unused portion of the fudge and use within a couple of days for best freshness

Notes
This fudge is not going to be too hard and is not meant to be too, after cooling thoroughly and even refrigerating it, you will find that this continues to be a soft, chewy fudge.

Read more ...

Tuesday, June 2, 2009

Oat Banana Bread with Condensed Milk


Its been a while since I baked anything, so the sight of three over ripe bananas in my fruit bowl failed to evoke the usual feelings of guilt I feel when I see over ripe bananas. Why guilt you wonder? well....... somehow having over ripe bananas makes me feel guilty because I feel responsible for not having consumed these bananas, or put them to some use before they got to this stage. This time though it actually made me feel some anticipation as I was cooking up ideas in my head as to what bakes I would try with these bananas.

After discarding the ideas of muffins and cakes (too much butter and sugar in each of these to make me happy) I finally settled on wanting to make banana bread....again :-)    Only I wanted to try something different from the types of banana bread I have made in the past. As is often the case with me, I was unable to find time to research out a good recipe for the same. So I did what I do when I lack time, I just made up the recipe as I went along and crossed my fingers and hoped for the best.The bread turned out soft, moist, fluffy and sufficiently sweet and I am looking forward to having ripe bananas soon so that I can make another round of this bread.


Bananaoatmealbread edited


Ingredients and Method to make Oat Banana Bread with condensed milk
1 cup rolled oat flour (See notes)
1 cup all purpose flour (maida)
1 cup whole wheat flour (atta)
1/4 tsp salt
1 tsp baking soda
1 tsp baking powder (aluminum free) , 
1/2 tsp cinnamon powder

3 large ripe bananas (yielded 1 1/2 cups of mashed bananas)
3/4 cup sweetened condensed milk (sweetened evaporated milk)
1 tsp vanilla essence
1/4 cup oil
1/4 cup milk

Pre heat oven to 350 deg F

Grease a bread loaf pan made with metal or glass with a drop or two of oil and keep aside.

Mix oat flour, AP flour and Whole wheat flour in a large bowl. Add to this salt, soda, baking powder and cinnamon powder and mix well.

The copyright of this content belongs to Veginspirations.com

Add condensed milk to this mixture and stir it in slowly. Add mashed bananas and mix it in to this mixture.

Add oil, milk and essence and mix well. The mixture should be of dropping consistency.

Pour the mixture into the loaf pan and level it gently.

Place the pan into the oven and bake for about 35 to 45 minutes until a toothpick inserted into the center of the bread comes out clean.

Cool, slice and serve.

Notes

I just processed rolled oats in my spice grinder until it yielded me fine flour. You can use store bought oat flour for this bread too .

If you like your bread very sweet like cake, then you can increase the condensed milk to 1 cup and do not have to add 1/4 cup of milk.

Update: This picture is from a subsequent time I made it when I baked the bread in a bundt pan. It takes a little less time to bake when baked in a bundt pan but not much, about 5 to 6 minutes less. 

Read more ...