Showing posts with label Craft tips. Show all posts

Wednesday, March 6, 2013

Simple Strawberry Ice Cream and a faux mosaic frame made with recycled cds :)

First let me start with the faux mosaic frame :) I have a stack of unusable cds/dvds that I've never really figured out what to do with, they just continue to lie in some part of the closet collecting dust. Recently I had one of those "Well duh !! Why didn't I ever think of that? " moments. These moments, I have noticed, happen often, especially when I am browsing the internet:)   I discovered that cds can be cut into little pieces. I have no clue why I never ever thought of cutting cds before, but I was really glad I did.  The best part is that they are really easy to cut up too. So the next thing was to figure out how to use it....

Faux Mosaic Frame (VI) photo 5626babe-8c3a-42a7-b0a1-695545f74f63_zpsb8ac6aae.jpg

This frame was the first thing I thought of to decorate with the cd pieces. I had a couple of unfinished wood frames that I was planning to paint or stain to a different color, but I just placed the cd pieces on them and loved the look of it. So I decided to give the frames a kind of faux mosaic look. If you are interested, check out this post for a detailed tutorial on this frame.

Moving on to the strawberry ice cream. It feels strange to talk about ice cream when the weather outside is almost freezing.  But here's the thing, R enjoys frozen treats even in freezing cold weather while all I want is a piping cup of chai tea when the weather turns cold.

Simple Strawberry ice cream

Recently we had a little warm up for a couple of days before the weather got all cold again. And I thought it might be a good time to treat R to a batch of homemade ice cream. Since I had a large box of strawberries lying in my refrigerator, the choice of which flavor ice cream to make was kind of a no brainer. This is an ultra simple recipe that hardly requires any effort at all. Just puree, mix and churn in an ice cream maker and voila, a yum frozen treat. If you do not have an ice cream maker I have provided a link below to make this ice cream without one. This turned out to be a perfect treat and I have to admit, I have been digging into it even though the weather has gotten back cold again.....hmmm maybe R is onto something :)

 Strawberry ice cream

Click here for a printable view of this recipe

Ingredients and Method to make Strawberry Ice cream (Adapted from this Carnation recipe)
2 cups fresh strawberries
1 can (12 fl oz) evaporated milk
a pinch of salt
1 tsp lemon juice
3/4 cup granulated sugar

Clean and prep the strawberries. Puree strawberries with a little evaporated milk. Pour in a large bowl.

Add a pinch of salt, lemon juice and sugar and mix well or give it a turn in the blender for it to mix well.
The copyright of this content belongs to Veginspirations.com

Use ice cream maker to churn this ice cream as per manufacturers directions. Mine requires the mixture to be chilled for a couple of hours and then churned in the machine. If you do not have an ice cream maker than place the mixture in the freezer. When it begins to freeze around the edges, remove and stir it vigorously with a whisk or spatula. Return to freezer and continue this process every 30 or so minutes, stirring at least five to six times. Allow it to freeze and serve. If you want more details on this process check out this post
Read more ...

Tuesday, February 5, 2013

Saffron and cardamom flavored sprouted wheat cookies and DIY sunburst mirror

Let me begin with the Sunburst mirror first :) Ever since I made this chrysanthemum mirror  I have had mirror fever on my brain and I have been wanting to make a few more. Finally this week I got a chance and conveniently happened to have all the material I needed on hand.  This mirror unlike the first one that I made was really quick to put together and my only issue with it is that the color I used seems a little light, would probably use a darker color next time. Other than that I loved it :) If you want to check out the step by step tutorial for this mirror check out this link

DIY Sunburst mirror 2

Moving on.... I think I have mentioned earlier that my cousin Sandhya and I regularly exchange health and nutrition tips with each other on our phone chats. During one such conversation she mentioned that she has now gotten hooked on to using sprouted whole wheat flour. Since I am always keen to try new and healthy ingredients this one went right on top of my shopping list and on my very next visit to Whole foods I picked it up.  

Saffron and Cardamom flavored sprouted wheat cookies

Since then I have used sprouted wheat flour in everything from chapathis/ phulkas (Indian flat bread) to pizza base to cookies and enjoyed it in all forms. When comparing sprouted wheat flour and regular wheat flour I do not see any significant difference in taste and texture.  These cookies with saffron, cardamom and pistachios are something I have begun to make regularly  with sprouted wheat flour. You could easily use whole wheat flour in this recipe if you do not want to use sprouted wheat or do not have it on hand. This cookie has a very Indian kind of flavor, it turns out consistently delicious and is a perfect quick treat to go with a cup of chai :)


Sprouted wheat cookies with cardamom and saffron

Click here for a printable view of this recipe

Ingredients and Method to make Sprouted wheat cookies
3/4 cup sprouted wheat flour (can be substituted with regular whole wheat flour/atta)
3/4 cup unbleached all purpose flour (maida)
3/4 tsp baking powder
5 green cardamom seeds powdered fine (elaichi/ elakkai)
1 1/2 tbsp finely cut pistachios (optional) (see notes)
3/4 cup sugar
1/4 cup clarified butter (ghee/nei)
2 tsp milk + 2 generous pinches saffron
1/2 cup cold whole milk

Pre heat oven to 350 deg F. Line a tray with parchment paper and keep aside.

In a small bowl assemble the wheat flour, apf, baking powder, cardamom seed powder and pistachios and mix well.

Warm 2 tsp milk slightly and add 2 generous pinches of saffron to it  and keep aside for a few minutes

Cream clarified butter + sugar until it comes together. Add the flour mixture to it and mix well.

Add cold milk a little at a time and mix well. Finally add the saffron + milk and mix well.

Pinch a little dough, roll and flatten and place in the pre lined tray about an inch apart. Score with the tines of a fork if you wish.
The copyright of this content belongs to Veginspirations.com

Place tray in the oven and bake for approx 15 to 20 minutes or until the cookies turn a creamy brown.

Remove and cool, store in an airtight container and enjoy :)

Notes:
Pistachios are optional, I have made these cookies both with and without the pistachios and these cookies taste awesome either way :)
Read more ...

Tuesday, January 29, 2013

Chewy Orange flavored Almond cashew cookies and a quick DIY cake stand :)

Being a food blogger means that the kitchen section of any store is always appealing. I always end up spending quite a bit of time looking through different gadgets and dishes that I can use in my kitchen and as props in my pictures :) On one such trip a pretty cake stand caught my attention, I was very keen to buy it. But I balked a little when I saw the price tag. Buying a pricey cake stand when I hardly ever bake cakes just seemed a little over the top for me :)

Sometime later when I was browsing pinterest I came across a super simple diy cake stand made with a candle stand and a plate that I loved. I didn't pin the tip so I do not have the link for it, but the idea stayed with me. The one that I saw was spray painted , but when I decided to make it, I just bought a glass candle stand and a large glass plate and put it together with my glue gun and skipped the paint entirely. Here's how it looks...............

 DIY Cake stand

I am glad I hadn't purchased the one I saw in the store, this one worked out so much better for me:) Now the only thing I need to do is to bake more cakes so that I get to use this stand frequently :) Will keep you all posted on whether I really do end up baking more cakes:)

In the meanwhile here are some orange flavored almond cashew cookies that I bake when I am completely out of any kind of snacks. This one is super simple, does not use any butter and is really fast to make. I use almonds and cashews in it to amp up the nutrition slightly.It does not require any special ingredients just the usual stuff I keep around the home, so it is easy to put together.  

Orange cashew almond cookies

In addition I just love any bakes with orange flavor in them. So these cookies are my go to cookies not only because these cookies can be whipped up really fast at short notice, or its simplicity, but also because of its flavor and taste :) 

Orange flavored cashew almond cookies 1

Click here for a printable view of this recipe

Ingredients and Method to make Chewy Orange flavored almond cashew cookie
1/3 cup cashew nut powder
1/3 cup almond meal (powdered almonds with skin)
1/2 cup unbleached all purpose flour (maida)
3/4 tsp baking powder
1/2 cup sugar
1/4 cup plain yogurt
1 tbsp oil
1 tsp orange extract

Pre heat oven to 350 deg F

Line a cookie sheet with parchment paper and keep aside.

In a large bowl, mix together cashew nut powder, almond meal, all purpose flour, baking powder and sugar and mix well.

Add yogurt and mix into the flour mixture.

Add oil  + orange extract and mix well into the cookie mixture.

Spoon a little of the mixture onto the pre lined tray about an inch apart.
The copyright of this content belongs to Veginspirations.com

Place in the oven and bake about 15 to 20 minutes or until the edges of the cookie begin to get a golden brown. Remove, let sit for a few minutes, then remove from tray and cool thoroughly. Store in an airtight container and enjoy as an anytime snack.
Read more ...

Wednesday, October 3, 2012

Vegan Cucumber Salad with peanuts and sesame (Gujarati style) and a cool way to recycle cans :)

The other day when I was browsing through pinterest, I came across this idea of recycling cans by gluing rope on it and using it to store small items,  especially in the bathroom. I didn't book mark the site so I do not have a link ,  but the idea stayed with me and I couldn't wait to give it a try :)
My first try was with an empty can and some sisal rope and the result............


The second time I tried this with some polyester rope in a different color, just for some variety :) Here is how that turned out ...... I thought the sisal rope was far easier to handle and covered better, so I got done with it faster. The poly rope on the other hand took a little longer and had to be pressed down so that it did not move too much.


While I was at it, I decided to try making a little basket with the leftover rope. This one did not need any cans at all. Not sure if this one will ever serve any functional purpose but I thought it has the cute factor going for it. If nothing it might be used as a prop in some of my food photos :)


Finally moving on to the salad. Got the idea for this salad from a book on Gujarati cuisine that I bought recently. Strangely the book does not have any author mentioned, only the publisher. Maybe because the publisher just compiled a lot of traditional Gujarati recipes together and did not use the work on any one author ? Not sure why, in any case this salad which was categorized as a Surati (a region in Gujarat) salad looked really interesting to me. I loved the idea of using some peanuts and sesame seeds to add some crunch to the salad. Tweaked the recipe to suit our tastes and loved the end result. This salad has already become a favorite of mine and have made it quite a few times since I first tried it :)


Cucumber salad with peanuts and sesame


Click here for a printable view of this recipe

Ingredients and Method to make Cucumber with peanuts salad
3 large cucumbers cut into small pieces (with skin)
1 tbsp coconut oil
a pinch of asafoetida
2 Thai or Indian variety green chilies cut very fine (or to taste)
1 1/2 tbsp split chick pea lentil ( chana dhal/ kadalai parappu)
1 1/2 tbsp brown sesame seeds (ellu)
salt to taste
1 tsp sugar
1/4 cup dry roasted peanuts without skin (coarsely powdered)

For Garnish
2 to 3 tbsp freshly grated coconut (can be substituted with frozen grated coconut thawed to room temperature)

Place the cucumber pieces in a large salad bowl.

In a small pan heat oil, add asafoetida to it, Immediately add split chick peas (chana dhal ) to it and stir on low to medium low heat until the chick peas turn reddish. Add green chilies and stir until the chilies get whitish spots.  Add the brown sesame seeds and stir a few times. Pour the entire seasoning on the cucumber pieces.
The copyright of this content belongs to Veginspirations.com
Then add salt to taste, sugar and mix well. Add dry roasted and coarsely powdered peanuts and mix well.

Finally garnish with grated coconut. Serve the salad chilled or at room temperature.
Read more ...

Tuesday, June 26, 2012

Nutrition Packed Banana Strawberry smoothie and a Chrysanthemum Mirror :)

If the part about the mirror in the title baffles you, let me try and explain. No, this site hasn't suddenly transformed into a home decor blog, it still continues to be a food blog:)  But regular readers of this site know that from time to time I share interesting links and other tit bits that I come across in this space. This time that tit bit happens to be this chrysanthemum mirror I made:)   I got the idea for this mirror from Kristi who blogs at Addicted to decorating. She has so many wonderful ideas, but this one was just something I fell in love with and wanted to try immediately. After spending a week, collecting all the items I would need to make this mirror, I spent the next week devoting any extra hour I got into this project and at the end I was rewarded with this.............

 Chrysanthemum mirror

It is not the most perfect effort, I am sure if I tried this again I would be able to perfect it a little more. But it turned out fairly well and it definitely helped in filling a bare wall in one of our rooms so I'm happy :) For step by step pictures hop over to Kristi's blog post 

Moving on, the right kind of food is very important after a workout. Foods that are a good balance of carbohydrates and protein are said to help in repairing/ replenishing muscles after a workout. Ideally the sooner these foods are consumed after a workout the quicker you recover. Smoothies, I find are the best kind of workout food. Especially smoothies such as this one that I have begun to make frequently. It has milk,  bananas, strawberry, oatmeal, chia seeds and almonds. Power packed with a good balance of carbs and protein. This also makes for a great breakfast, since it is very nourishing and filling, if you are not into working out very much :) 

Banana Strawberry Smoothie

Click here for a printable view of this recipe

Ingredients and Method to make Banana Strawberry smoothie
1/4 cup 1 minute oatmeal cooked until soft (I microwaved it with 1/2 cup of water for a couple of minutes)
1/4 cup almonds
3 tbsp chia seeds
3 large bananas cut into small pieces
6 large strawberries cut into small pieces
1 1/2 cup milk
2 tbsp brown sugar (or to taste)(optional, can be substituted with white sugar)

Cook 1 minute oatmeal in the microwave until soft and keep aside.
Soak chia seeds in a little bit of milk for a few minutes and keep aside.
The copyright of this content belongs to Veginspirations.com

In a large bowl, add  all the ingredients including cooked oatmeal and chia seeds + milk. Using a hand blender blend everything together until smooth. Alternatively add all the ingredients to a large blender jar and blend until smooth. Chill and serve chilled. Refrigerate balance if any and use up within a couple of days.

Suggested Variation:
This smoothie can also be made with bananas and pears. Just substitute the strawberries in this recipe with 1 large pear de seeded and cut into small pieces and puree along with bananas and other ingredients. Optionally add 1 tsp vanilla extract for this quantity of smoothie for a little additional flavor.

Read more ...

Thursday, May 31, 2012

Curried Red Swiss Chard and Chick Pea Soup and some quick Kitchen art :)

First the kitchen art :)  I have a narrow wall in my kitchen that needed something to pretty it up a little. I had been searching for something appropriate but most of the art I came across, either did not fit the space or looked generic.  Last week I came across this idea and this idea for wall art that really appealed to me. Loved the simplicity of the idea and the use of silverware in the art pieces, made me think that it might a great fit for my kitchen space.

Since there is no way to know than to try it out,  I  did !! This is the first time I have seen an idea and tried it out within a week. Usually my home decor projects take much longer than that. Anyway it did not take too long to get the art work ready, it actually took longer to finalize on the frames and the fabric I would use. I decided not to spray paint the silverware and the frames, thought their original colors would work better for my space. Hung the frames as soon as I completed it and took pictures too, this is how it looks in my kitchen :) We definitely love it and every time I enter the kitchen now, my eyes are automatically drawn to that wall and I keep turning to look at it even while I am cooking :)


Moving on, I use red swiss chard frequently, mostly in curries, occasionally in this adai and sometimes in this roti. This time I decided to use it in a soup. I based my soup roughly on this recipe and tweaked it to bit by adding Indian spices and  finished it with some lemon juice for a hint of tartness.  The soup turned out well, the addition of lentils and chickpeas makes this very filling and it works well as a one dish meal with some bread on the side. We thoroughly enjoyed it and I am happy to have one more recipe that I can regularly make that uses red swiss chard :) Okay this has been one long post, so I am going to end it now. Enjoy your weekend everyone and I will see you all in this space next week :)

 Red swiss chard and Chickpeas soup

Click here for a printable view of this recipe

Ingredients and Method to make Red Swiss chard and Chickpeas soup
1 cup dry chickpeas soaked for 6 to 8 hours in sufficient water with a pinch of soda (soda optional)
1 1/2 cup split red lentils (masoor dhal)
1 large bunch red swiss chard cut finely (remove tough stalks)
1 large red onion cut fine
2 Thai or Indian variety green chilies cut fine
1 to 2 tbsp olive oil
salt to taste
1/2 tsp red chili powder (or to taste/ can be substituted with cayenne )
1 tsp garam masala (or  to taste/ can be substituted with any other curry powder)
 Water or Vegetable stock as needed ( I used approx 4 cups)
Juice of 2 small lemons ( or to taste)

Drain soaked chickpeas, fill with fresh water and cook either in the pressure cooker or stove top until soft.(I used the pressure cooker)

Rinse split red lentils and keep aside.

In a large heavy bottomed pan heat oil. When hot add onions and stir until the onions are transparent. Add green chilies and stir a couple of times. Add rinsed lentils and water/ stock and allow the lentils to simmer until it is half cooked.
The copyright of this content belongs to Veginspirations.com

Add chopped red swiss chard, salt to taste, chili powder, garam masala, adjust water/ stock as required and let it simmer until the chard and lentils are both cooked. Add cooked chickpeas and simmer for a few minutes until the flavors mingle.

Remove from heat, add lemon juice and mix well.

Serve with bread of choice ( I served this with some jalapeno bread ) 

Read more ...

Wednesday, October 19, 2011

Instant Oat vermicelli dosai and Instant fabric art :-)

Sometimes when I am working on my site and am wondering what to write, I end up staring at the walls in my pc room hoping inspiration strikes. Well staring at my bare walls definitely provided inspiration...........but of a completely different kind, I got inspired to do something to dress up my bare walls. A while back, I had come across an idea on television to use fabric to make quick art and ever since I saw it I have been wanting to try it. I ordered some fabric, bought a canvas in the right size and stapled the fabric to the canvas and voila, instant, quick and simple fabric art:-) Now my dressed up wall looks like this........:-)

Photobucket

If any of you are interested in seeing the step by step pics of this art,  let me know and I will update this post or separately post the steps in the future.

Moving on, a couple of months back, I had dosai (Indian savory crepes) planned for dinner, but the only things I could decide on about the dosai was that it would be the instant kind and be something with oats in it. At the last minute I decided to glance through my reader to see if any of my friends had something unique that I could try. I came across this recipe on my friend EC's site that caught my interest and sounded perfect for a light dinner. I tweaked the recipe a little, changed a few ingredients and quantities and added flax for some added nutritional punch. The verdict...... vermicelli added a very unique dimension and some crunch to this dosai, and the dosai was both interesting and delicious. If the idea of giving vermicelli a completely different avatar appeals to you, give this dosai a try :-)

Instant Oat Vermicelli Dosai

Click here for a printable view of this recipe

Ingredients and Method to make oat vermicelli dosai
2 cups one minute oats dry roasted (or quick oats)
1 cup vermicelli (semiya) dry roasted
1/2 cup rice flour
salt to taste ( I used approximately 2 tsp)
1 cup plain yogurt (curds/ dahi/thayir)
1 1/4 cup plain water (or as required)
1 inch ginger
3 thai or Indian variety green chilies (or to taste)
7 -8 Curry leaves cut into small pieces
2 tbsp finely cut cilantro (coriander leaves/ kothamalli)
3 heaped tbsp flax seed meal (powdered flax/ alsi/ ali virai) (optional)
a little sesame oil to shallow fry the dosai

Dry roast oats, cool to room temperature, powder in a spice grinder/blender/mixer until fine and add to a large bowl. Dry roast vermicelli and add to the powdered oats.

Add salt to taste, curry leaves, cilantro and flax seed meal and mix well. Mince together ginger and green chilies and keep aside.

Whisk yogurt until it is smooth and keep aside. Add yogurt to flour mixture slowly making sure it mixes well with the flour mixture.

Then add water to the flour mixture and mix slowly to make a thick-ish batter. Add ginger- chili to it and mix well.

Allow this mixture to sit for a little while. Heat a flat pan/ griddle/ tawa on medium heat.
The copyright of this content belongs to Veginspirations.com

Pour a little batter in the center and quickly make a circle as thin as possible. If you find that you are not able to spread easily, pour the batter around the tawa in a wider circle (as you would for rava dosai) and spread to form a thin circle.   Pour a few drops of sesame oil around the circumference of the dosai. Flip over when the lower side cooks to a golden brown and cook the other side. When the other side as light golden brown spots, remove from heat.


Serve hot with chutney of choice/ molaga podi /sambar of choice

Notes:

The thicker the batter, the easier the dosai is to handle while flipping over, it also results in a more crisper dosai. If the batter is slightly more runny the dosai turns out soft but a little more difficult to handle. So do keep that in mind when you are adding water to the batter. When in doubt err on the side of a thicker batter it is much easier to correct than a runny batter.

Read more ...

Wednesday, September 15, 2010

Rajma ~ Red Kidney Bean curry and a recycled cardboard remote tray

Some of you might be wondering what a recycled cardboard tray has in common with rajma. Nothing really....... it is just that I came across an idea recently, and I could not resist sharing it with my readers in this post. Cardboard boxes always got flattened and dispatched to the recycle bin in my home..... until recently, when I came across this idea to reuse carboard boxes in different avatars around the home.

Once this idea entered my head I could not shake it off and had to try it asap. Luckily for me, I had a few cardboard boxes that had managed to escape my recycle bin, and I tried making a few things with them. One of the items I made was this remote tray. All I used for this was a little glue and fabric scraps leftover from an earlier sewing project and voila...... the cardboard box got transformed into an environment friendly remote tray :-)

 DIY Remote Caddy

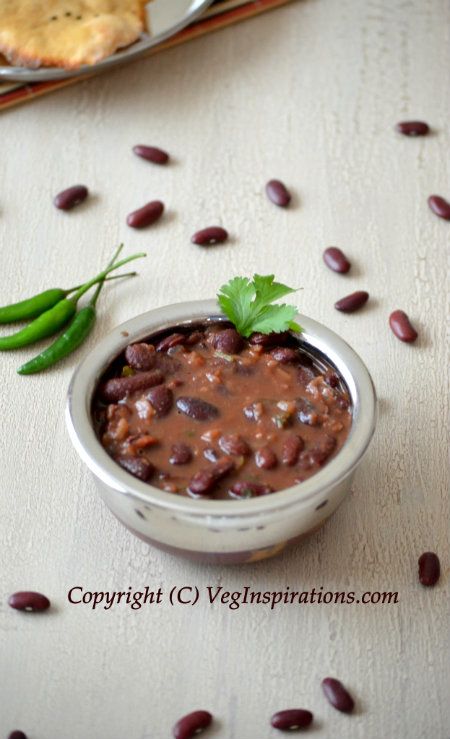
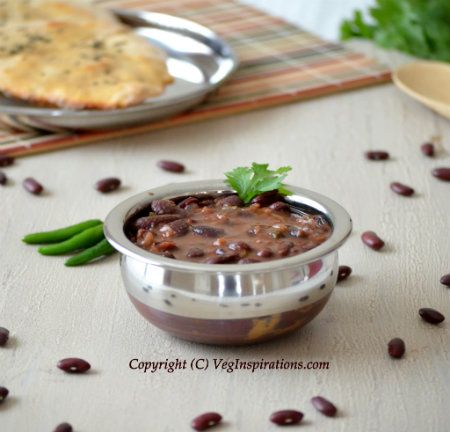
Moving on to rajma. Rajma refers to a classic red kidney beans curry from north Indian cuisine. There are many variations of this curry, but personally I prefer a simpler version of rajma. So I make mine with a minimum of spices so that the spices do not overwhelm the taste of the red kidney beans completely. This simple curry is very versatile, it works just as well for simple family dinners as it does for parties or entertaining guests.

Rajma ~ Red Kidney Bean Curry | Veg Inspirations

 Red Kidney Bean Curry~Rajma | Veg Inspirations

Click here for a printable view of this recipe

Ingredients and Method to make Rajma
2 cups dry red kidney beans soaked for 8 hours or so in plenty of water with a pinch of baking soda (soda is optional) (see notes)
1 large onion cut very fine (pyaaz)
5 small tomatoes (or 3 medium ones) cut very fine
1 tbsp oil
1/2 tsp minced ginger (adrak)
3 Thai or Indian variety of green chilies cut fine (or to taste)
1/2 tsp minced garlic (lehsun)
1/2 tsp red chili powder (or to taste)
1/2 tsp garam masala (or to taste)
to make your own garam masala check out this post
salt to taste
handful cilantro (coriander leaves) cut fine for garnish (optional) ( I did not use it this time)

Heat oil in a large heavy bottomed pan. Add onions and saute until transparent. Add green chilies, minced ginger and garlic and stir for a few seconds.

Add tomatoes and cook until soft and mushy. While the tomatoes are cooking, drain the bean soak water and keep the soaked beans aside.

Add garam masala and red chili powder to the cooked tomatoes and stir a few times.

Now add the soaked beans, water as required and bring to a boil. Lower heat and allow the beans to simmer and cook until soft but not mushy adding water if required (see notes). Add salt as required and allow to simmer for a few more minutes for the flavors to blend.

Garnish with finely cut cilantro leaves if using and serve hot with plain steamed rice or some Indian bread like rotis or naans.

Notes
If you want to know why I soak beans with a pinch of baking soda and the reason why I drain the bean soak water check out  this post .
In case you run short of time, you can soak the red kidney beans in water that is a little hotter than just warm for about 5 hours, it works just as well as the usual 8 hour soak.

You can also precook the beans in a pressure cooker or on the stove top and add to the pan after adding the garam masala and red chili powder. If you precook the beans, you can add salt immediately after adding beans to the onion+tomato mixture and then allow to simmer for a few more minutes, remove from heat and serve hot.

This curry with red kidney beans is off to the MLLA Event the 27th edition being hosted by Susan
Read more ...