Showing posts with label Italian. Show all posts

Wednesday, October 8, 2014

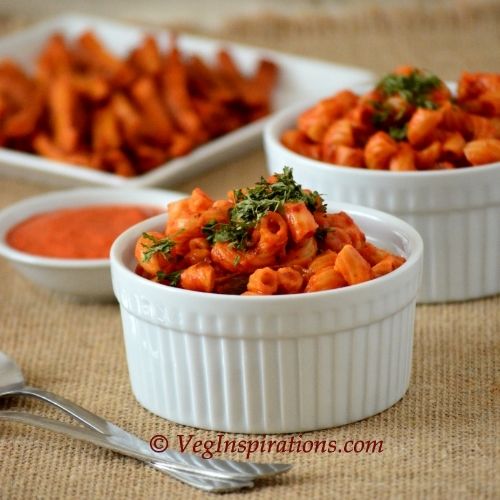
Penne pasta with veggies

Ever since the first time I tried this pasta sauce, I have been wondering how it would turn out if instead of processing the veggies into a sauce, I sautéed the veggies and tossed them with cooked pasta. Each time I made the sauce I kept thinking I needed to try it with just sautéing the veggies. Since I do not make pasta very often these days, my plans to experiment kept getting deferred.

Finally a few weeks back , pasta was back on the menu and I got to try this version of pasta. This version definitely comes under the category of " winner" in my book, it was quick, easy and flavorful. I've made it a few times since and it turns out consistently good. If pasta is on your menu too, give this quick, easy version a try and as always let me know what you think about it :)


Click here for a printable view of this recipe

Ingredients and Method to make penne pasta with veggies (adapted from this recipe)
4 cups multi grain penne pasta ( or any other kind )
1 large garlic clove or 2 small cloves (peeled and cut fine)
1 large red onion sliced lengthwise
2 cups of finely cut tomatoes (3 med large tomatoes)
1 zucchini cut into 1 and 1/2 inch matchsticks
2 green bell peppers cut into 1 inch piece long matchsticks about 1/4 inch wide
2 - 3 Tbsp extra virgin olive oil
1 and 1/2 tsp dried basil
1/2 tsp dried parsley
3/4 tsp dried oregano
3/4 tsp crushed red pepper ( optional, or to taste) ( can be substituted with black pepper powder to taste)
salt to taste

Prepare pasta as per manufacturers directions, drain and keep aside. Prep all the vegetables and keep aside.


Heat oil in a large heavy bottomed pan, add onions and garlic to it and sauté until onions turn translucent. Add tomatoes and stir until tomatoes are soft and mushy. 


Add zucchini and green bell pepper pieces, salt to taste, all the spices and stir until the veggies are soft, cooked yet firm.


Add prepared pasta and toss / mix with the vegetables. Serve immediately.


This quantity serves approx 4 to 5

Notes:
Recipe can be easily halved.


If you are looking for pasta recipes, here are a few more

Mushroom Pasta with Roasted Red Bell Pepper Sauce

Low fat Vegan Pasta Sauce

Thai Inspired Pasta
Read more ...

Thursday, January 23, 2014

Sun-dried Tomato Pesto

 For the longest while now I have wanted to make my own sun dried pesto. I vaguely remember trying one version a long while back, but I did not note down the recipe that time. Every time I make paninis I think I should make my own pesto, but somehow find some kind of pesto already in my refrigerator and I put it off for another time.

Last week I had planned to make this grilled vegetable paninis one day and thought it would be the perfect time to try out the sun dried tomato pesto that I have been planning for so long. I assembled all the ingredients and a few minutes later, the pesto was ready :) And it tasted just awesome, very fresh and flavorful. This has to be the easiest thing I have ever tried in the kitchen, it made me wonder why I ever buy pesto when making it is so simple :)

Sundried Tomato Pesto

Click here for a printable view of this recipe

Ingredients and Method to make the Sun-dried Tomato Pesto (Adapted from this recipe)
1 cup sun-dried tomatoes (the kind that is packed in oil, drained)
1 cup freshly grated parmesan cheese
1/4 cup fresh parsley
2 tsp dried basil (or 2 tbsp fresh basil if you have that)
2 garlic cloves (peeled and cut into small pieces) 
4 Tbsp extra virgin olive oil (you can reserve the oil from the sun-dried tomatoes and use here too)
salt to taste
pepper to taste
1/4 tsp crushed red pepper (optional) 

Assemble all the ingredients. Process in a food processor, mixer/ blender until all the ingredients are ground and  the mixture forms a coarse paste.
The copyright of this content belongs to Veginspirations.com

Remove and store in an air tight container in the refrigerator. The original recipe says this should last a month in the fridge, but I have never kept it that long since mine does not last as long. Will update if I end up storing it for a month :)


Read more ...

Wednesday, May 9, 2012

Vegan Italian Lentil Soup

Buying anything other than fruits and veggies seems to require quite a bit of time spent in reading labels these days. And labels have become so much more complicated haven't they? There are so many new ingredients used in each type of food that you feel like you need a degree in chemistry to figure out what is really used in the food. When I read about instances such as this one, it doesn't help much either and makes me feel like  I really need to learn much more about a lot of ingredients I see in labels of different foods.

One of the ingredients I see frequently is something called carrageenan. I have seen it in some ice cream labels and fruit flavored yogurt packs too. I knew carrageenan was used in place of gelatin but did not know anything about what it was made of, whether it is vegan or vegetarian, that kind of thing. Finally a few days back I got around to looking it up and found that carrageenan is a kind of  seaweed extract. There are several types of it that are used in baking and cooking, some have a gelatinous property and some don't. It is said to be a vegetarian and vegan substitute for gelatin. If you want to get more details, here is the wiki entry for it.

I was relieved to learn that carrageenan was vegan/vegetarian. I have been avoiding buying anything with it because I did not have any information about it. That said I am still a little on the fence about it and would like to know more about it before I start to buy stuff that has this ingredient. If you have come across this ingredient and know more about it do share the information below, I would love to hear your opinions on this ingredient :)

Moving on, usually whenever I plan to make some soup I start to think of which bread will be good with it. This time it happened the other way around :)  I wanted to make rosemary foccacia bread and I wondered which soup would taste good with it. After taking stock of my pantry and vegetable bin, I decided upon this lentil soup that seemed quick and simple. I tweaked the recipe a little, skipped the cheese to make this a vegan soup and changed out the herbs a bit. The result was this hearty delicious soup that tasted very good with the wheat foccacia bread I made to go with it. We loved the soup so much I have already made this a few times now and I am sure will make it frequently in the future too :)

Vegan Italian Lentil Soup

Click here for a printable view of this recipe

Ingredients and Method to make Italian lentil soup

1 1/2 cups whole dry lentils (whole masoor dhal)  soaked for 30 mins in sufficient water (the same kind used in this salad)
1 medium onion cut fine
1 can 14.5 oz diced tomatoes
2 large carrots cut into 1/4 inch pieces
3 celery sticks cut very fine
3/4 cup dry multi grain elbow pasta (or any other small pasta)
2 tbsp extra virgin olive oil
1 tsp minced garlic
1 tsp Italian seasoning
1/2 tsp dried rosemary (optional)
salt to taste
pepper powder to taste

Soak lentils in sufficient water for about 30 minutes.

In a large heavy bottomed pan heat oil, add onions and saute until transparent. Add minced garlic and stir a couple of times. Add  diced tomatoes, carrots, celery, soaked and drained lentils and water (or vegetable stock) as required and allow the vegetables and lentils to cook until almost done.
The copyright of this content belongs to Veginspirations.com

Add elbow pasta, salt to taste, Italian seasoning, dried rosemary, pepper to taste and allow the soup to simmer until pasta is cooked. Adjust water/ stock if required and simmer for a few more minutes until the flavors mingle.

Serve hot with bread of choice. I served this with rosemary foccacia bread.

Read more ...

Thursday, June 16, 2011

Tandoori Paneer Pizza

Thanks all of you for your responses to the two questions that I had asked in my last post. I enjoyed reading  all your comments and descriptions on both the tandoori sauce guessing game and how puffed rice is made.Amy shared a youtube link in the previous post on how the Chinese make puffed rice. It was a very interesting video, thanks Amy for sharing it with me. I have uploaded the video here if any of you are interested in seeing this video. 

For those of you who played along on the guessing game, the title of this post has already given away the answer on what I did with the tandoori sauce. My blog friends Deepa, Harini-Jaya and Sowmya, you can all take a bow because you all guessed the answer correctly. When I visited India last year, I tasted a tandoori pizza at a local Pizza hut that I really liked. I have been wanting to recreate that pizza since I got back. This is my take on that pizza. This pizza turned out fabulously, the tandoori sauce and the paneer added a very unique and interesting flavor to the pizza . Since I made the sauce ahead, it also took very little time to assemble this pizza. So if your weekend plans include pizza, do give this pizza a try and let me know what you think about it :-)

Tandoori Paneer (Indian cottage cheese) Pizza-Fusion Pizza- Indian style pizza

Click here for a printable view of the Tandoori Paneer Pizza

Ingredients and Method to make Tandoori Pizza
1 red onion cut lengthwise
1 green bell pepper (capsicum) deseeded and cut into thin long strips
2 cups of paneer cubes (Indian cottage cheese)  (Here is how you can make your own paneer)
2 cups of other vegetables like peas and corn (optional)
Shredded cheese as required
Tandoori sauce as required ( I used approx half the quantity of sauce made as per this recipe)
Pizza base as required ( I used approximately 3- 8 inch oat wheat pizza base made as per this recipe )
Red pepper flakes (optional)

Preheat oven to 425 deg F

Apply tandoori sauce on the pizza base, followed by the shredded cheese, toppings and paneer cubes.

Place in the oven for approximately 20 mins or until the paneer and cheese have light brown spots on top of it.
The copyright of this content belongs to Veginspirations.com

Remove, slice into wedges and serve hot with some red pepper flakes if you want.
Read more ...

Monday, November 22, 2010

Grilled Veggie Panini and a surprising discovery about my plant :-)

Some of you may remember this pretty dahlia  picture that I posted in summer, it was my very first dahlia bloom. I fully expected that with the arrival of fall, my dahlia plant would stop blooming completely. I was surprised to discover that not only does the plant continue to bloom, the blooms amazingly have changed color and are now a beautiful deep golden color. I am not quite sure what to make of it.....but I am enjoying the sight of these blooms every chance I get. If any of you experienced gardeners have an idea if dahlia commonly changes color in the cooler weather, do let me know .......

 Grilled Veggie Panini

Moving on to the grilled veggie panini, ever since we got this panini maker, I have been making and enjoying  many varieties of panini. This is the first time that I used the panini maker to grill vegetables and I was very nervous about it, but it worked out really well. The vegetables grilled evenly and  turned out flavorful.

Grilled Veggie Panini

In fact the veggies tasted so good straight out of the panini that I thought of tossing it together like a salad or side dish and eating it just as it is.....only this time I ended up using it entirely in the paninis. If you like veggie paninis, this simple, quick and flavorful panini may be something that you might be interested in....

Grilled Vegetable panini photo 952c1159-1696-4516-a682-d4d76e8baf8d_zps0f60659b.jpg


Click here for a printable view of this recipe.

Ingredients and Method to make Grilled Veggie Panini
1 zucchini
1 small yellow squash
1 Japanese eggplant (can be substituted with other types of eggplant
1 green bell pepper (capsicum/ koda molagai)
All vegetables except bell pepper cut into 3 parts, then sliced lengthwise.Bell pepper deseeded and cut into thin lengthwise strips.

4 tbsp extra virgin olive oil
1/2 tsp salt ( or according to taste)
3/4 tsp crushed red pepper (or according to taste)
1/4 tsp paprika (optional)
1/4 tsp dried basil.

Sliced Italian bread as required
Sun-dried tomato pesto as required. Updated to add: You can find my recipe for sun-dried tomato pesto here
a little extra virgin olive oil to apply on the bread

In a small bowl, mix together oil, salt, crushed red pepper, paprika if using and dried basil and mix well.

In a small bowl with a lid, add 1 tbsp of the above mixture, then slices of one vegetable, then toss it so that  each slice is evenly coated with this mixture.Remove and keep aside.

Proceed in this manner for all the vegetables. Grill the vegetables in batches in the panini maker or a grill if you have one. Make sure not to grill more than one type of vegetable at one time in the panini maker to ensure even grilling.

Apply sun dried tomato pesto on one side of two slices of bread. Layer one bread with a few slices of each type of vegetable, then place the other bread on top. Brush a little olive oil on the outer side of each bread slice and place in pre heated panini maker. Remove when golden and serve hot with choice of soup or salad.
The copyright of this content belongs to Veginspirations.com

I was able to make approximately 4 paninis with this quantity of vegetables. The quantity of paninis will depend on how much vegetables you stuff into each one :) If you have leftover veggies you can serve/eat it like salad or a side dish, it tastes pretty delicious.

Notes:
If you go not want to grill the vegetables, you can also bake it in the oven. Pre heat oven @ 400 deg F (approx 200 deg C) toss the vegetables in the oil flavor mix until evenly coated, line a large tray or two trays with parchment paper/ aluminum foil. Place the vegetables in it in a manner that it does not overlap. Place in oven and bake for 15 to 20 mins or until the vegetables are cooked yet firm. Remove and proceed with the rest of the recipe in the same manner.
Read more ...

Monday, October 25, 2010

Tomato Mozzarella Panini and Cuisinart Gr-1Panini Maker Review

Panini is a type of Italian sandwich, usually made with breads like ciabatta, grilled in a sandwich press and served hot. The first panini I tried was a tomato mozarella panini at Panera bread, this panini soon became a favorite and I looked forward to it, whenever I visited Panera bread. The combined flavors of sundried tomato pesto, fresh basil and mozarella in a grilled sandwich is simply delicious.

Thanks to CSN stores I now get to make this and more varieties of paninis in my own home. I have done a review of the panini maker below and I have to admit I just love this gadget, it is such a fabulous addition to my kitchen. In the short time that I have had it, I have already tried so many different types of panini.

Since tomato mozarella panini is such a favorite I started with that one first. I tried it a few times with ciabatta bread, a couple of times with some other types of Italian bread. Instead of using fresh basil, which is a little difficult to find right now, I used a pinch of dried basil. The verdict.....this panini exceeded my expectations and I was so happy with it, every variation of it tasted very good. It is also great that it can be put together in a matter of minutes making it ideal for quick dinners or lunches. 


Tomato Mozarella Panini

Here is another view of the panini......

Tomato Mozarella Panini

Click here for a printable view of this recipe

Ingredients and Method to make Tomato Mozarella Panini
Ciabatta bread or any other Italian bread as required
Mozarella slices as required
Tomato slices as required
Sundried Tomato Pesto as required
Crushed red pepper flakes as required (optional)
pinch of dried basil (optional, see notes)
a little Extra virgin olive oil to brush on the bread

Switch on the panini maker to pre heat.
The copyright of this content belongs to Veginspirations.com

To assemble the panini, cut a ciabatta bread horizontally. Apply sundried tomato pesto to both sides of the bread, layer one side of the bread with tomato, mozarella, sprinkle a pinch of basil and a little red pepper flakes if using. Place the other bread on top.

Brush the outer sides of the bread with a little olive oil and place in  the pre heated panini maker. Close and hold down gently for a few seconds. When done, remove and serve hot with soup of choice.

I think this Minestrone soup, or this Minestrone with pesto  would go very well with this Panini.

Notes
In case you want to use fresh basil, use about 2 to 3 leaves, washed and cut into small pieces in each panini

Cuisinart GR-1 Griddler Panini and Sandwich Press Review

Finally here is the review of the Panini maker that I first referred to in this post. As I mentioned before, CSN stores is one of the largest growing online specialty retailer with over 200 stores offering a wide range of products. Whether you want a bathroom sink or some cookware, some lighting or home decor CSN stores seems to have it all.

They recently approached me to do a product review from their site.They sent over this Cuisinart Panini and Sandwich press to use and then do a review. Thanks CSN for giving me this opportunity. A panini maker has long been on my list of things to buy and the idea of making different variations of paninis in my own home is very appealing. 


Photobucket

Here is another view of the panini maker...............

Photobucket

How does this panini maker work?

It has a preset temperature and all you have to do is to plug it in, the red light comes on and it starts to heat to the preset temperature.This panini maker does not have an on/ off switch, so you need to plug it in to start the machine and pull out the plug to stop it. 

When the preset temperature is reached, the light turns green indicating the unit is ready to be used. It just takes a few minutes for the light to go from red to green.

It has non stick surface and so far, since I began to use it, clean up has been a breeze. After the unit cools down, I just wipe it with a damp kitchen tissue and follow up with a dry tissue and it is clean and ready to be stored. The panini maker also comes with a scraper, but I have never needed to use it until now.

Some favorite features of this panini maker....

The flexible floating hinge makes it easy to make paninis that are both thin or thick.

Pretty large surface, can handle more than two paninis at the same time.

When plugged in, the unit heats up fairly fast, it gives me just enough time to put together the panini. Usually when I am done assembling the panini, the units light turns green indicating that it is ready, I just place the panini and close the lid and in a few minutes, I have an evenly hot and golden brown panini ready to eat.

Has a neat cord storage at the back that allows me to wrap the cord out of sight.

Features that would have been nice to have in this panini maker................

One minor quibble with this unit is that it cannot be stored upright, so it occupies a little more space in my kitchen. It would have been nice if this panini maker could be stored upright.

The other small quibble is that it would have been nice to have an on /off switch, other than this I have really not seen any big cons to this panini maker.


Disclosure:

This is an honest product review. My review was not influenced in any manner by CSN stores or Cuisinart. In compliance with FTC rules, I disclose that this product was provided free for the purpose of a review. This was not a paid endorsement nor have I received any compensation in any form to do this review.
Read more ...

Tuesday, September 21, 2010

Pasta with Roasted Red Bell Pepper Sauce and some humor.

Recently, I received an email with pictures of a lot of billboards and road signs. Not ordinary road signs, but ones that are unintentionally funny, some of them, downright hilarious. I posted a couple of them here. Notice the second one......that particular sign had me in splits. I think I am never going to look at lime juice in the same way ever again :-)

Pasta with Roasted Red Bell Pepper Sauce

Moving on,  I rarely make pasta sauce from scratch, but when I came across this idea I  was instantly intrigued. I tweaked the recipe a fair bit, customizing it to our taste. The end result was a sauce that tasted pretty awesome.I used to think that making pasta sauce would be a very time consuming job, but it really turned out to be quite simple and quick.

Roasted Red Bell Pepper Pasta Sauce

Baking the peppers does not require much supervision, and after removing it from the oven, the only other step is to puree all the ingredients.This sauce tastes delicious over just plain pasta too, but if you want to add more veggies to the pasta you can try this with mushrooms or green bell pepper or any other vegetable of choice. It tastes pretty good in all combinations :)

 photo bc9b457c-5775-46ea-9584-a7307bff6f10_zps5a4b3d12.jpg

Click here for a printable view of this recipe

Ingredients and Method to make Mushroom pasta with red bell pepper sauce

For the pasta
1 large onion sliced lengthwise
8 oz (approx 266 gms) of button mushrooms sliced thin (can be substituted with 1 large or 2 med green bell peppers (capsicum/kodamolagai) deseeded and cut into thin long strips.
3 cups of dry whole grain or multi grain pasta (of any variety. I have used penne/ elbow pasta for this recipe most often ) ( I use barilla) cooked as per manufacturers instructions.
red bell pepper sauce as required (recipe below)
1 tbsp extra virgin olive oil
1/2 tsp minced garlic (or to taste)
1 tsp crushed red pepper (or to taste)
salt to taste

For the sauce (see notes)
2 Large Red Bell peppers cut into thin strips
1/4 cup plain yogurt
1 dry red pepper/ dry red chili
1 tsp dried parsley
1/2 tsp salt

Pre heat oven to 450 deg F

Place red bell pepper strips on a foil lined cookie sheet or flat tray and bake in the oven for 20 minutes or until small brownish/blackish spots begin to appear on the bell peppers. Turn once in between. It may take a little more or less time depending on the thickness of the bell peppers.

Once it is done, remove bell peppers from the oven and cool to room temperature. Puree the bell peppers along with dry red pepper, parsley, salt to taste and the yogurt to a smooth paste. Add a few tsps of water if required and blend again. Keep this sauce aside. (I did not need any water for this sauce)

Prepare pasta as per manufacturers directions. Drain and place the pasta in a large bowl and keep aside 

Heat oil in a heavy bottomed pan. Add garlic and stir until the garlic has browned a little. Add onions and saute till transparent. Add mushrooms (or bell pepper if using that) and stir until  cooked and soft yet firm.
The copyright of this content belongs to Veginspirations.com

Add crushed red pepper, salt to taste and the pureed sauce and mix well. Allow the sauce to heat for a few minutes. Add this sauce on top of the pasta, mix well and serve immediately or place pasta on individual plates, and pour sauce as required over it and serve.

serves approximately 2 to 3

Notes:
If you like the flavor of roasted garlic and want a stronger garlic taste, you can place a clove or two of garlic along with the red bell pepper in the oven to roast a little and then puree along with the red bell pepper.

If you do not want any additional vegetables, this sauce can be served over plain pasta too. I've had it with sauce and a sprinkling of parsley and crushed red pepper, tastes good that way too :) 

Read more ...

Wednesday, March 24, 2010

Pasta with carrots and asparagus

Usually my day starts out with creating a to-do list for the day. I make such a detailed list, that most of my family members tease me about needing to write down everything. I am a compulsive list maker and start my day with a to-do list and then keep adding stuff in it as the day goes by and striking out the ones that I have already completed. Mostly at the time that I do this sometimes semi- boring task of creating a to-do list, I also simultaneously log into my email to check on mails.

On some days just seeing the long list of tasks at hand for the day seem to weigh me down :-) So a little humor at the time is much appreciated and I seem to have a family of cousins and other relatives that are always willing to oblige. The results are that on most days when I check my email I find some humorous piece forwarded to me that brings a smile on my face. I recently shared one and here is another one that I came across.... you all must have read Murphy's law.... this one is somewhat on similar lines,  it says......

------------------------------------------------------------------------------------------------------------

Law of Queues: If you change queues, the one you have left will start to move faster than the one you are in now .

Law of Mechanical Repair : After your hands become coated with grease, your nose will start to itch.

Law of the Alibi: If you tell the boss that you are late because you had a flat tire, the next morning you will have a flat tire

Law of the Result : When you try to prove to someone that a machine won't work, it will

--------------------------------------------------------------------------------------------------------------
Does this not seem the way it happens to us sometimes, at least I can attest to the ones on queues/ lines and greasy hands, only mine are when I am cooking :-)

Speaking of cooking, here is a simple pasta salad that I made inspired from a Vegetarian Times cookbook that I borrowed from the library. The, recipe of this salad, suggested it as a cold salad and and the ingredients mentioned in the original recipe were vastly different from the ones I finally used. I served this salad hot because it was a really cold evening and cold salad was not quite what I was in the mood for, but it worked very well as a hot salad. I absolutely loved this simple,quick and elegant pasta salad and it turned out to be a great way to use up the fresh asparagus I found in my local groceries :-)


Photobucket

Click here for a printable view of this recipe

Ingredients and Method to make pasta with carrots and asparagus
3 cups dry shell pasta
2 large carrots julienned
10 stalks asparagus (heads cut off, balance cut into 2 inch pieces and then quartered lengthwise)

1 tbsp oil
1/4 finely cut fresh parsley
salt to taste (approx 3/4 tsp)

Whisk together
1 tbsp jalapeno mustard
1 tbsp olive oil
1 tbsp crushed red pepper (or to taste)

Cook the shell pasta as per manufacturers instructions and keep aside to drain.
Heat oil in a large heavy bottomed pan and add the carrots and asparagus and saute for a few minutes until it is cooked, yet crisp not too soft. Remove from heat.

Add the cooked and drained pasta, salt to taste and and the whisked jalapeno mustard+ olive oil+ crushed red pepper and give it a good toss until the pasta and vegetables are coated with this mixture.

The copyright of this content belongs to Veginspirations.com
Add some more crushed red pepper if required. Add parsley and mix it in too.


Serve hot, at room temperature or cold.

Serves approximately 2 to 3

This salad is off to the Healthy Inspirations Event- Salad being hosted on this site and to the Cooking with Pasta event being hosted by Sowmya


Update (03/25/10): Srimathi has started a new event called My food finds Event. She tells me that this pasta fits her theme too because of the jalapeno mustard, so as requested Srimathi, here is a picture of the jalapeno mustard, which I bought at the local grocery and used in this pasta, which is now off to the MFF Event too
Read more ...

Tuesday, March 10, 2009

Vegetarian Minestrone Soup

Sometimes, even though I try and plan my meals around the vegetables I have on hand, I find that there are one or two veggies that go bad before I get to them. This frustrates and upsets me quite a bit because I feel guilty about the wastage. I try my level best to collect tips and tricks that increase the shelf life of veggies and fruits. I thought it may be useful to share some of these tips that I have picked up over time with my readers. In the interest of keeping this post to a reasonable length I am sharing just a few tips in this post, I will continue to share some more tips in my forthcoming posts. So here goes....

The best way to store celery is to remove it from plastic cover and firmly wrap it in aluminum foil and store in the refrigerator. I tried this one and the celery lasted a couple of weeks for me. I was not able to test it longer since I always tend to use up my celery in a couple of weeks time :-)

Honey dew and cantaloupe melons should always be stored separately as they react and rot faster if stored together. I realized when I came across this tip that I have never had a chance to put this one to test because I seem to purchase these melons one at a time and never together :-)

The third and last one is that leaving stalks on foods like tomatoes and strawberries lengthen their shelf life. I have tried this for tomatoes and it really does work. 

Another idea that works for me is to use up veggies that I have in small quantities in making soup. This way the veggies that are not sufficient for a stand alone dish gets used up along with a lot of others and helps clear out the refrigerator.It also helps that soups are one of my favorite foods, especially when the weather is cold. We had some really cold weather last week when a storm system dumped snow in our area.This turned out to be the perfect occasion for this minestrone soup which just happens to be one of my favorites. I have made this soup often since the first time I tasted this at a restaurant and decided I loved the soup enough to try and make it at home. The recipe has evolved over time and this is how I make this soup regularly now.

  photo cfecd181-04ab-404d-b64d-21ce15c5cb50_zps1590fbe0.jpg


Ingredients and Method to make Minestrone soup

1/2 cup dried cannelini or any other white beans soaked in water with a pinch of baking soda for about 6-8 hours (the soda is optional) (alternatively you can use equal quantity of red kidney bean (rajma) )
1/2 cup any small type dried pasta (I usually use multi grain shell or elbow pasta for this soup)
2 medium sized onions
2 medium carrots
4 stalks of celery (or 3 large zucchinis cut into 1/2 inch pieces)
3 very large tomatoes
1 tsp minced garlic
2 bay leaves
1 tsp Italian seasoning
freshly ground black pepper powder to taste (optional but recommended)
3 cups of water/ vegetable stock
2 tbsp oil
Garnish with crushed red pepper to taste (optional) 

Drain and rinse the soaked beans and place in a pot, cover with sufficient fresh water and let it simmer until the beans are cooked. ( I filled  water for about 1/2 an inch above the beans and it was sufficient for me until the beans were cooked.) Or for faster cooking, cook the beans in a pressure cooker until soft yet not mushy.Keep the cooked beans aside
In a heavy bottomed pan heat oil and add onions and saute until the onions are transparent.
Add minced garlic and saute for a minute.Add tomatoes and saute until the tomatoes are cooked and are soft and mushy.
The copyright of this content belongs to Veginspirations.com
Add carrots, celery if using or zucchini, Italian seasoning, salt to taste and about 3 cups of water or stock and let the vegetables cook.
When the vegetables are cooked and slightly soft, add the cooked beans and freshly ground black pepper powder and let it simmer for a few minutes (about 10 minutes) Add water to achieve required consistency
Add the dried pasta and cook for an additional 10 minutes until the pasta is cooked. 
Serve hot with any bread of choice. I usually serve this with wheat rosemary focaccia bread

Serves approximately 3 to 4


Read more ...

Tuesday, February 24, 2009

Pesto Pizza with Oat Wheat Crust

Oat and Oat flour are fast becoming my favorite resource in baking breads. Oats,  in addition to being ultra healthy, add such a wonderful texture to bread. Also unlike whole wheat flour, oat flour does not seem to make the bread too dense and makes it easier to make bread healthier without compromising on the lightness of the bread. 

After having experimented with oat flour in loaf bread a few times, I thought of trying oat flour in pizza crust. I have also been wanting to try the idea of adding a small amount of cornmeal to the pizza crust, since I read somewhere, that doing so,  makes the crust a little more crunchy. The verdict....the pizza crust turned out fantastic, we loved it even more than the whole wheat crust I regularly make. The crust was slightly crunchy on the outside and chewy on the inside, just the way I like  it:-)    Try this if you are looking for a healthier alternative to the all purpose flour crust but find the whole wheat a little too dense for  your liking.


Ingredients and method for the crust
1 1/4 cup oat flour (I powdered Rolled Oats in my spice jar of my blender to get flour)
1 cup whole wheat flour (atta)
1 cup all purpose flour (maida)
1 tbsp active dry yeast
2 heaped tbsp cornmeal
1 tsp sugar
3 tbsp olive oil
1 1/4 tsp salt
1 tsp Italian seasoning (optional)
3/4 cup warm water
1/2 cup warm milk

For the pizza
2 tbsp pesto 
toppings according to choice (I used onions, mushrooms, bell pepper)
Crushed red pepper (according to taste) (Optional)
Shredded pizza blend cheese (a combination of cheddar and mozzarella) (according to taste) 

Mix the oat flour, wheat flour, all purpose flour, cornmeal, salt and Italian seasoning in a large bowl and keep aside

Place warm water in  a bowl add active dry yeast and sugar to it and mix well. Keep aside for about 5 to 10 minutes until it froths up.

Pour this water and warm milk as needed to knead into a soft pliable dough. Knead for about ten minutes.

Add olive oil to this and knead again for a few minutes.

Keep covered in a warm place for about an hour to an hour and a half. (I place this in my oven with the light on)

Remove, punch down gently and knead again for a minute or two and divide the dough into three parts and keep covered in a warm place to rise again.

Pre heat oven to 425 deg F

Roll the dough to required thickness and apply pesto sauce.

Top with toppings of choice and finally add grated cheese

Bake in oven for about 15 to 20 minutes until the cheese on top is melted and beginning to brown slightly.

Remove, cut into wedges and serve  hot.

This yielded me about 3 eight inch crusts of medium thickness.

Notes
You can use store bought oat flour instead of grinding rolled oats.

Read more ...

Wednesday, February 11, 2009

Lemon Pasta Salad

After all the cold and freezing temperatures we have had recently, this week we saw a surprising warm up. The weather was almost spring like, so what did I do to celebrate? Other than using the opportunity to go for long walks that I missed a lot these past few weeks, I also made a light summery lemon pasta salad. The idea was to recreate a dish I remember having in a  restaurant once, and I put together ingredients that I thought would have been used in the original recipe. The bad news was that this was not exactly what I was looking for,  and the good news....this tasted pretty good too and I am looking forward to making this many more times in the spring and summer. I thought the earthy taste of celery and the light citrusy taste of the lemon provided an interesting contrast in flavors and the spice from the crushed chilli flakes added the right hint of spice without making it spicy. 

Before moving on to the recipe I just wanted to share a tip I picked up from my mother in law. Just before extracting juice from a lemon, place the lemon (uncut) on a flat counter or a flat surface and with the palm of your hand exert gentle pressure and roll the lemon a few times. Then cut the lemon and proceed to extract the juice as usual. This makes it easier to juice the lemon and yields more juice from the lemon. Try this tip the next time you use a lemon, it really does make a difference :-)

Photobucket


Ingredients and Method to make Lemon Pasta Salad
250 gms (8.8 oz ) of whole wheat spaghetti  (half of a regular pack of spaghetti) (can be substituted with equal quantity of angel hair pasta too)
1 large carrot grated
2 stalks of celery cut very fine
2 tbsp olive oil
Juice of 1 small lemon (or to taste) (see notes)
handful Italian parsley (cut fine)
1/2 tsp Italian seasoning
Crushed red chilli flakes (according to taste)
salt according to taste

Cook spaghetti as per manufacturers instructions and drain and keep aside.
In a large bowl add grated carrot and cut celery and mix together.
Add cooked spaghetti to this and mix well.
In a separate bowl add olive oil and juice of one lemon,salt according to taste and Italian seasoning and give it a good mix.
 The copyright of this content belongs to Veginspirations.com
Pour this mixture on the pasta  + vegetables and mix well.
Add crushed red chilli flakes as per taste and mix again.
Garnish with Italian parsley and serve cold.
Serves approximately 3

Notes
In case you do not plan to use red chilli flakes, you may need to reduce the amount of lemon juice slightly maybe use half the quantity
You can also use other types of multi grain spaghetti or even plain regular spaghetti for this dish.

I am sending this pasta off to Its a Vegan World - Italian being hosted by Vaishali
Since this pasta got created entirely in my kitchen this one also is off to the Original Recipe Event being hosted by Lore


Lemon-dill Lentil Orzo Salad on Foodista

Read more ...

Thursday, December 18, 2008

Minestrone with Pesto

Minestrone is the name for a thick variety of Italian soup that contains seasonal vegetables and also sometimes contains pasta or rice.Common ingredients to this soup include onions, tomatoes, celery, carrot and beans. This soup has always been a favorite of mine, both while eating out at Italian restaurants and also when I am in the mood for hearty Italian soups at home.

In all the time that I have had this soup I have never had a variation of this soup with pesto in it. So I was intrigued when I saw this variation mentioned in a cookbook. I did not waste any time in trying this variation and adapted the recipe to work with the ingredients I had on hand and to suit our taste. I thought the addition of pesto took this soup to another level and I thoroughly enjoyed this soup along with savory oat muffins. Try this minestrone when you are looking for something simple and hearty yet with an unusual touch to it.


Ingredients and Method to make Minestrone soup with pesto

1 cup white beans (cannelini or northern beans) to be soaked for 8 hours

1 large onion cut fine
1/2 cup carrots cut into 1/2 inch cubes
1 cup frozen peas
4 stalks of celery cut into small pieces (yielded about 1 heaped cup of cut celery)
2 large tomatoes cut into small pieces (yielded about 2 cups of cut tomatoes)
2 medium potatoes peeled and cut into half inch pieces (yielded about 2 cups of cut potatoes)

2 tbsp olive oil
1 bay leaf
salt to taste
1/4 tsp celery seeds
1/2 tsp Italian seasoning
3 tbsp pesto sauce
1/2 tsp chilli powder (optional)

Soak white beans in sufficient water for 8 hours with a pinch of baking soda (adding soda is optional)

When the beans have soaked for 8 hours, rinse them thoroughly and place them in a large heavy bottomed pan with sufficient water and let it cook until soft.
(when the water initially boils, there may be some heavy froth on top,you can skim and remove this froth and let the beans boil in clear water)

When the beans are cooked remove and keep aside.

In the same pan, heat olive oil and add cut onions to it and saute until transparent.

Add tomatoes and saute until the tomatoes become soft and mushy

Add all the vegetables and saute for a minute.

Add water (about 4 cups) and all the herbs and spices (except the pesto sauce) and let it simmer until the vegetables are cooked.

When the vegetables are cooked, add cooked white beans and pesto sauce and adjust water to get required consistency and simmer for another 5 minutes.

Serve hot with any rustic bread  or savory muffins to make a complete meal

Serves about 3 to 4

Both Ramya  and VG   have given the Yum blog award to this site. Thanks to both of you for thinking of this site for this award. 

I would in turn like to pass this on to Pearls of East, Indhu, Varsha  , Sumathi , Navita   and Pavani  

Related Recipes
Read more ...

Tuesday, November 18, 2008

Simple and Quick Whole Wheat Pizza

The first time I made pizza from scratch including the crust was a long time back. In those halcyon college days when everything seemed adventurous and lack of ingredients or the long process involved did not faze me or my cousin who used to hang out with me and who joined me in my kitchen adventures.The first step in making the pizza involved a trip to various stores around our block armed with a long list of ingredients that included basics such as all purpose flour, yeast and marinara sauce, since all of these items were completely absent from my pantry in those days. My oven at that time was a tiny space ship shaped portable oven that had a small circular glass on the top that we would keep looking into to see how the baking was proceeding. Maybe it was beginners luck or maybe it was because we followed the recipe to the letter but our first attempt at pizza itself was a wonderful success.We thoroughly enjoyed both making and having it :-)

Wheat Pizza photo 
ba831b14-c807-4546-8268-38b92be0d413_zps83cf4744.jpg

After that one time of making pizza from scratch, pizza has always meant either dine in or to go, until recently when I started making my own pizza base again.  After several attempts and experiments with varying  different quantities of flours, I now have a version that has become my go to version for whole wheat pizza.
Updated to add: I have now included bread machine instructions at the bottom of the recipe

Simple wheat pizza photo e95e4318-5c8e-4c60-a194-7246763dfec5_zps3bf9c6be.jpg

Click here for a printable view of this recipe

For the crust.
2 and 1/4 cups whole wheat flour (atta)
3/4 cup all purpose flour (maida) (see notes)
1/4 cup vital wheat gluten flour (optional, see notes)
2 heaped tbsp cornmeal (makkai ka atta)
1 1/4 cup warm water
1 tbsp active dry yeast
1 tsp sugar
3 tbsp olive oil
1 tsp Italian seasoning (optional)
a little extra cornmeal for dusting.

For the toppings
Marinara sauce as required
choice of toppings (about 1 cup per pizza) (I have used any combination of onions, bell pepper (capsicum), mushrooms, jalapenos and pineapples during my various tries with this pizza and liked all versions)
Shredded Cheese as per choice
For cheese I tried a new type of grated cheese available in the grocery called pizza blend cheese which was a mixture of mozarella and cheddar, but you can use mozzarella cheese that is usually used in pizza too.
a little olive oil to apply on top (optional)
serve with a little crushed red pepper flakes (optional)

Dissolve yeast + sugar in warm water and keep aside for 5 to 10 minutes until slightly frothy

In a large bowl mix together all the flours, salt and Italian seasoning

Add water with yeast and olive oil to the flour mixture and knead. Knead for a few minutes, apply a tsp of olive oil to it and keep aside in a warm place to rise for about an hour. (I placed it in my oven with the oven light on so that it would provide some warmth)

After the dough doubles, flatten it a little and divide into two or three balls. Let the divided dough rise again for about an hour.

Pre heat oven to 425 deg F. Roll one of the balls of dough into a thin crust or regular crust with a help of a little cornmeal if required.If you are adventurous you could try tossing the dough to stretch it or use your fists to stretch and shape the dough too, I just rolled it out normally this time :-)

Once rolled out, brush on a little olive oil on top, then spread marinara sauce as required.

Add cheese as required, then toppings as per choice.
The copyright of this content belongs to Veginspirations.com

Bake in the oven for about 20 mins to 25 mins depending on thickness until the crust is crisp and the cheese is melted and slightly golden on the top. Sprinkle a few crushed red pepper flakes on top (optional) and enjoy the pizza while still hot.

If not using all the dough refrigerate the balance dough for a day or two and remove and use as required.

Yield will depend on thickness and size of crust. (I have gotten about 3 personal sized pizzas with this quantity or one extra large pizza base depending on how I rolled it out )

Notes: I have made this with all whole wheat flour too in the past, but find that a combination of whole wheat flour, all purpose flour and vital wheat gluten gives me the best results. If you get whole wheat bread flour that would be a good choice to use for this base, and you can skip the vital wheat gluten flour. Also you can reduce the all purpose flour to 1/2 cup and increase the quantity of whole wheat flour by the same quantity.

Bread machine instructions
Place all the ingredients in the bread machine pan in the order specified in the manual. Mine specifies, liquids first, then dry ingredients and lastly yeast. I used 1 tbsp bread machine yeast, and skipped the italian seasoning entirely. Set the bread machine to dough cycle, when completed, remove and proceed with the rest of the recipe.
Read more ...