Showing posts with label Tips. Show all posts

Wednesday, March 13, 2013

Vegetable Kolhapuri (Vegetable Medley curry) and a tip :)

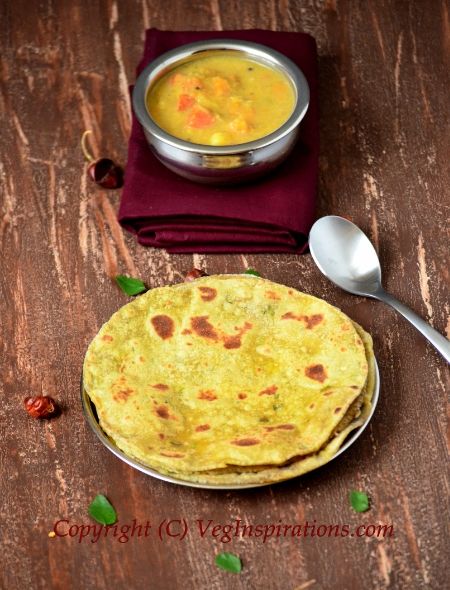
Veg Kolhapuri is a Maharashtrian curry made with a medley of vegetables. Typically a lot of dishes from this region use dry coconut in their masala. In addition to dry coconut, this curry also uses sesame and this fascinating combination lends this curry a very unique and interesting taste. This popular curry is offered in many Indian restaurants and even sometimes featured in wedding reception menus and I have tasted many variations of this curry over time. Invariably the restaurant versions or caterer versions always tend to be pretty oily, making me a little hesitant to taste more than a spoon of the curry at most. There were times when I could actually see the grease float on the top. Eeeeek!!! not quite what I would ever want to make at home :)

But then, that's the best part about recreating favorite restaurant recipes at home, isn't it? We get to control the ingredients and make healthier versions of our favorites for our families without compromising on taste :)
I love making this curry at home, it tastes perfect with phulkas/ rotis or even plain steamed rice. My only issue with making it often used to be availability of dry coconut. My local Indian grocer does stock dry coconut but it is sold in a large pack, which I am not able to use up entirely. And there were a few times that straight out of the packet, the coconut tasted a little old and I felt it spoiled the taste of the dish. Dry coconut has a fairly long shelf life but it cannot be stored forever, after a point it does turn rancid.

My solution to this has been to dry coconut in my oven. This has proved to be a very neat solution to my problem, I get to dry just as much coconut as I need and do not have to worry about wasting any leftover dry coconut. It tastes far fresher and tastier than the store bought version too.   And so long as I have fresh coconut on hand, I also have the ability to get dry coconut, so I do not have to worry about stocking up this ingredient separately. If you do not get dry coconut in your area or the kind you get is something that you dislike, you could try this tip to dry coconut too. Its simple and straightforward, just like this curry :)

Veg Kolhapuri-Mixed Vegetable curry

Click here for a printable view of this recipe

Ingredients and Method to make Vegetable Kolhapuri
For the curry
3 medium onions cut fine
3 medium tomatoes cut fine
1 green bell pepper (capsicum/ koda molagai) deseeded and cut into 1/4 inch pieces (can be substituted with red bell pepper too)
3 large carrots cut lengthwise into 1 inch pieces
1/2 head of cauliflower broken into florets
3 medium sized potatoes, peeled and cut into 1/2 inch pieces
1 1/2 heaped cups beans snipped and cut into 1 inch pieces
2 tbsp oil
salt to taste
1/2 tsp red chili powder (can be substituted with cayenne pepper) (or to taste)
3/4 tsp garam masala  (or any other curry powder) (my recipe for garam masala is here)

For the masala
1 inch piece of ginger
4 cloves of garlic
1/2 tsp fennel seeds (saunf/sombu)
1/2 tsp coriander seeds (dhania/kothamalli virai)
2 heaped tbsp sesame seeds
1/4 cup grated dry coconut (kopra) (if you do not have dry coconut see notes)
5 small whole dry red chilies (or to taste)

Grind all the ingredients mentioned under masala to a smooth paste in a small spice grinder/ blender using as little water as is needed and keep the paste aside.

Prep all the vegetables as required and keep aside. Heat oil in a heavy bottomed pan, add onions and saute until onions turn translucent.

Add the masala paste and stir on low to medium low heat until all the moisture from the paste evaporates and the paste dries, add tomatoes and stir until the tomatoes turn soft and mushy.
The copyright of this content belongs to Veginspirations.com

Add all the vegetables, chili powder, salt to taste and water as required and allow to simmer until the vegetables are cooked, yet not mushy.  Adjust water as required to achieve required consistency, adj salt and chili powder to taste and add garam masala and allow the curry to simmer until the flavors mingle.

Remove from heat and serve hot on a bed of plain steamed rice, or with a side of rotis/ phulkas/ chapathis (Indian flat bread)

Notes:
If you do not have dry coconut,  pre heat oven @ 250 deg F. Line a tray with parchment paper and spread approx  1/2 cup of fresh grated coconut on the lined tray and place in oven and bake for approx 25 to 35 minutes or until it turns a creamy golden color. Remove and use in recipe as required. You can easily dry more quantities of coconut at a time, I usually dry only so much because I hardly use dry coconut very much.
Read more ...

Wednesday, August 8, 2012

Palak Mung Dhal- Spinach with mung bean dhal version 2.0 and a tip:)

Some days all I want for dinner is some kind of comfort food that I can rustle up in under thirty to forty minutes. Usually these are the days that I turn to items like phulkas with some kind of gravy curry or some kind of dhal. Preferably the latter,  because in my book nothing says comfort food like a simple bowl of dhal. Anytime I can combine dhal with some kind of green veggie, that's another plus in my book :)   Earlier I had posted another version of spinach with mung bean dhal, this time I made dhal with a combination of mung bean lentil, split red lentils and spinach. As I normally do for dhals, I kept the seasoning and flavoring very simple, nothing too overwhelming.  This nutritious and low fat dhal is perfect for a simple meal, and tastes very good whether it is paired with phulkas/ rotis or plain steamed rice.

 Palak Mung Dhal- Spinach with mung bean lentil dhal

Before moving on to the recipe, the tip :) I am not big on using canned food in my cooking, but sometimes when I need stuff like coconut milk in my cooking I end up using the canned variety. The issue for me often is how to store the rest of the coconut milk so that it does not spoil until I use it again. I rarely use coconut milk and once opened, the contents of the can need to be used in a few days or it spoils. I came across a tip sometime back ( not sure where since I did not book mark the tip) that suggested that coconut milk can be frozen in an ice cube tray and used as required. I decided to give it a try and sure enough this is a very convenient way to freeze balance of coconut milk or even canned tomato paste or anything that can freeze well. The fringe benefit is that you can use just as many as you want when you cook and the balance remains frozen until the next use.

Here is my packet ready to be refrozen.......I usually write down on the bag itself how many tbsp are in each cube, it makes it easier to remove just as many cubes as I need when I use it a few weeks later :)


Click here for a printable view of this recipe

Ingredients and Method to make Spinach dhal
3/4 cup split mung bean lentil (mung dhal) soaked in sufficient water for at least 30 minutes
1/2 cup split red lentils (masoor dhal)
2 packed cups baby spinach (Palak) cut fine
1/4 tsp turmeric powder
1/2 tsp red chili powder
salt to taste
1/4 tsp dry mango powder (amchur )

1 tbsp of lemon juice (or to taste) (see notes)
Generous handful cilantro( coriander leaves)  cut fine for garnish

Seasoning
1 tsp oil
3/4 tsp cumin seeds
3 to 4 green chilies slit lengthwise
1/2 tsp garam masala (or to taste) (can be substituted with any other curry powder)
To make your own garam masala, check out this post

Soak the mung bean lentil in sufficient water for at least 30 minutes. Add split red lentils to the same container and swirl with hand and drain water. Fill with fresh water and repeat process. Place both the lentils in a medium/ large heavy bottomed pan along with sufficient water and place on heat.

Stir frequently and allow to cook until both the lentils are soft. You can use the pressure cooker for this if you want, just make sure it does not over cook, so that the lentils retain a little bit of their shape.

When the lentils are almost cooked, add finely chopped spinach, salt to taste, red chili powder, turmeric powder and dry mango powder, water as needed and allow to simmer for a couple more minutes until the spinach is cooked.
The copyright of this content belongs to Veginspirations.com

In a small pan, add oil and place on heat. Add cumin seeds to it, when the seeds sizzle add green chilies and when the chilies splutter a little (watch out..... some times the chilies can splatter so do keep a lid/ splatter screen handy) , add garam masala and stir a couple of time. Pour the entire seasoning on the dhal and mix well. Allow the dhal to simmer another minute or two for the flavors to mingle.

Remove from heat. Garnish with lemon juice and cilantro leaves and serve hot as a side dish to phulkas/ rotis or on a bed of plain steamed rice with some curry on the side.

Notes:
If  you use store bought lemon juice...you know the type that comes in that cute yellow container, you may need to use a little more of it. I juiced my lemon at home and find that fresh lemon juice tends to be a little more tart so a little goes a long way.
Read more ...

Wednesday, April 18, 2012

Orange Cranberry Muesli Bar and some more uses for Olive oil:)

Remember when I mentioned that I had come across a tip about using olive oil to polish stainless steel appliances. I was so surprised and happy to find an item that I use frequently in my kitchen could also substitute for chemical laden polish. I have been using olive oil to polish my kitchen appliances since then and am so happy with the results.

Today I learned that olive oil is even more versatile than I thought, I came across an article that suggested that olive oil can be used for many things including clearing up acne and cleaning greasy hands, who would have thought it?  If you want to read the entire article you can find the link here.  I haven't tried any of these tips, but they seem interesting, especially the one about using olive oil mixed with salt or sugar to clean greasy hands sounded like something I could use quite frequently. If you have used plantain in your cooking you know that handling it leaves a pretty dark stain on your hand (at least it does for me), that has always been one of my biggest issues with plantain:) I literally scrub my hands many times to get the stain out every time I finish using plantain.  Next time, I will definitely try using olive oil to see if it removes the stain faster and more easily:)

Anyway moving on to the muesli bar. As I mentioned in my vegan mango muesli muffin post , I have a fair quantity of unsweetened muesli in my pantry and I have been finding ways to use it up. Usually I end up using it in my baking, sometimes I use it in muffins, but most times I make some kind of bar with it. Since the combination of orange and cranberry is something I love, this time I made the bar with that combination. It turned out really well, it was a little crisp on the outside and chewy on the inside and I loved both the taste and the convenience of having these bars at home :)

Orange Cranberry Muesli Bar

Click here for a printable view of this recipe

Ingredients and Method to make Muesli Bar
Dry ingredients
1 1/2 cups no sugar added muesli
1/2 cup oat flour (see notes)
1/2 cup sugar (see notes)
1 cup walnuts chopped into small pieces (can be substituted with any other nut or combination of nuts)
1/2 tsp salt
1 cup dried cranberry (or orange flavored dried cranberry)

Wet Ingredients
3 tbsp flax seed meal (powdered flax seeds/ alsi/ ali virai) + 9 tbsp water
4 tbsp butter melted
1 tsp orange extract
6 tbsp milk

Line a large 8"X 12" oven pan with parchment paper and keep aside. Pre heat oven to 350 deg F
Combine all the dry ingredients in a large bowl and mix well.

Whisk together flax seed meal and water until gelatinous and keep aside for a few minutes.

Melt butter in the microwave or the stove top, add the melted butter to the dry mixture and mix well. Then add  flax seed meal +water mixture to it and mix well.

Add milk 1 tbsp at a time and mix. Finally add orange extract and mix again.

Spoon mixture on the pre lined oven safe pan, spread evenly and place in the oven. Bake for 20 to 22 minutes or until edges are brownish. Remove, cool and cut into squares or rectangle pieces with a shark knife.

Store in an air tight container and enjoy within a few days for the freshest taste

Notes:
You can use store bought oat flour, or just process 1/2 cup of rolled oats in a blender/grinder until it turns to fine powder. (I powder my own oat flour) 

If your muesli has added sugar, then you might need to adjust added sugar to taste. Since mine have no sugar added, I needed about 1/2 cup for the right sweetness.
The copyright of this content belongs to Veginspirations.com

The time required for baking will vary depending on the size of the container, if it is a smaller container and the bar is very thick it might take longer, if it is spread thinner it may take less time.

Read more ...

Tuesday, December 13, 2011

Keerai Oat Barley adai ~ Palak Dhal Dosa ~ Spinach Oat Savory Indian crepes

Can there be anything more boring and mundane than having to clean up the kitchen after cooking a large meal? After cooking a large meal, all I want to do is to finish up in the kitchen and move on to the next thing on my to do list, instead I have to devote this fair chunk of time to cleaning the kitchen. Sigh !! As I result, I am always looking for tips that make cleaning up simpler and quicker.

Here is an interesting article that I came across recently in readers digest, it had some interesting tips on kitchen cleaning. I haven't tried any of them but a few of them sound quite interesting. Especially the one about cleaning the blender with a drop of liquid dish detergent and water and just running the blender sounded really cool. Will definitely be trying some of these in the future.

Keerai Oat Barley Adai ~ Palak Dhal Dosa ~ Spinach Oats Savory Lentil crepes | Veg Inspirations

Of course, one simple way to avoid spending a lot of time on clean up is to make something simple, read that as a single dish meal :-) I do this occasionally and one of the dishes I like to make is adai (savory Indian crepe).  I have already explained what adai is in this post so I will not go into it again  This version of adai has brown rice, lentils, oatmeal , barley and spinach. In addition it takes very little time to make and is delicious, really, what's not to like :-) So if you are looking for ways to sneak in some oatmeal , barley or spinach, this adai here is yet another way to do it.......

 Keerai Adai/Palak Dhal Dosa/Savory Indian crepe with lentils oats and spinach


Click here for a printable view of this recipe

Ingredients and Method to make Spinach Oat adai

1 cup brown rice (or white rice) (Chawal/ arisi)
1 cup rolled oats
1/2 cup pearl barley
1/2 cup whole red lentils (masoor dhal)
1/3 cup split mung bean lentil (mung dhal)
1/3 cup split pigeon peas (tur dhal)

5 Thai or Indian green chilies (or to taste)
5 small whole dry red chilies (or to taste)
salt to taste
1/4 tsp asafoetida powder (hing/perungayam)
1 and 1/2 cups of packed spinach leaves (Palak/ keerai) 

In a large bowl mix together the first six ingredients, add water and swirl with your hand and drain water. Fill with sufficient water and allow the grains to soak for 3 hours.

Grind these soaked grains in batches along with red and green chilies adding only as much water as is required. The grains need only to be of a coarse texture so you do not need to grind it smooth.The batter needs to be on the thicker side, not runny so do not use water too liberally when grinding the batter.

Add a little spinach in each batch and give it another turn in the blender until the spinach is pureed too.

Add salt to taste and asafoetida powder to the batter and mix well.
The copyright of this content belongs to Veginspirations.com
 
When making adai, heat a flat pan/ griddle/ tawa on medium heat. When hot, pour a little batter on the center of the pan/ tawa and quickly spread it into a thin circle. Pour a few drops of sesame oil around the circumference of the adai. When the lower side is golden brown, flip over and cook the other side until it has a few brownish/golden spots on it.

Here is a video clip of the process of making adai. This clip is not of this particular but the consistency of the batter and the technique is similar so am attaching the video here, if you would like to get an idea of how it is done, take a peek....


Remove and serve hot with some Molaga Podi (spice powder) / chutney of choice/ honey or jaggery/ some aviyal :-)

Refrigerate unused portion of batter and use within a few days for freshest taste.
Yield will depend on the size and thickness of each adai.

Read more ...

Thursday, April 7, 2011

Bajji Dosai (Savory chick pea flour crepe ) and did you know olive oil could be used for this ?

Phew,  pretty lengthy title huh? There was just no avoiding it with all the things I needed to say in the title:-) Anyway going back to the question in the title, did you know that olive oil can be used to polish stainless steel appliances. Really I am not kidding, I heard this tip for the first time on a show on HGTV.  I  was thrilled to learn this, especially because it would mean a simple and chemical free way to polish appliances and I could not wait to find out if it really worked the way it was described. Sure enough my stainless steel appliance is now gleaming from the olive oil treatment. Who would have thought it :-)

If any of you are interested in trying this tip, here is how it works. Start with a clean appliance. Take a soft piece of cloth and pour just a drop or two of pure olive oil on it. Apply to the appliance in the direction of the grain and buff slightly when done. For this, a little olive oil goes a long way so there is no need to pour a lot on the cloth. Here is a link I found online for this tip if you want to check it out....

Moving on to the bajji dosai, this recipe, which I got from my father who saw it in a Tamil magazine, has been in my recipe book for a long while now. I tried it once when I first got it and liked it a lot, but somehow this one was forgotten and I never made it again...............that is....... until the other day when I was flipping through my book looking for some inspiration and this recipe just jumped out at me. This time when I made it I modified the recipe slightly, added flax for more nutrition and modified the spices a little for additional flavor.

Bajji refers to a deep fried south Indian snack and this bajji dosai probably got its name because the ingredients used in it are also used in making the batter for the bajji, it tastes similar to bajjis too :-) Now, anything that allows me to indulge in the taste of bajjis without the guilt is a winner in my book :-) This dosai also reminded me a little of the eggless omelette I used to make sometime back. This gluten free dosai is great for breakfasts/ tiffins/ snacks or even light dinners and can be made very quickly. So if you are looking for a quick dosai recipe for this weekend, give this one a try and tell me what you think :-)

Bajji Dosai-Savory Chick pea flour crepe

Click here for a printable view of this recipe

Ingredients and Method to make Bajji Dosai
2 cups Chick pea flour (besan/ kadalai maavu)
1/2 cup rice flour
1 small onion peeled and cut very fine
4 Thai or Indian variety green chilies cut very fine (or to taste)
1 tbsp finely grated ginger
1/4 tsp turmeric powder
salt to taste
pinch of asafoetida powder (hing/perungayam) (optional)
3 heaped tbsp of flax seed meal (powdered flax/ alsi) (optional)
handful of cilantro (coriander leaves/dhania/kothamalli) cut very fine
a little sesame oil to shallow fry the dosai

In a large bowl, mix together chick pea flour, rice flour and salt to taste.Add turmeric powder, asafoetida powder, flax seed meal if using and mix well. Add ginger, green chilies, finely cut onion and mix well.

Add water as required, a little at a time to make a batter that is thicker than buttermilk and is not too runny.  When in doubt always err on the side of a thicker batter as water can always be added just before making dosai if required.
Add finely cut cilantro to the batter and mix well.

Heat a tawa/ heavy flat pan/ griddle on medium  heat. When hot, pour a little batter in a wide circle. If you have made rava dosai in the past, this one needs to be poured on the way you do rava dosai. Quickly spread the batter with a light hand to fill in the gaps and spaces. Pour a few drops of oil around the circumference of the dosai. Allow to cook until the lower side is an even golden brown. Flip over and cook the other side until it begins to have light brownish spots.
The copyright of this content belongs to Veginspirations.com

Remove and serve hot with chutney of choice/ sambar or some molaga podi or any combination of these items. Or even just enjoy these on their own they are that flavorful:-)

Read more ...

Wednesday, March 16, 2011

Brown Rice and Lentil cutlets with peanuts and a neat tip :-)

When I was browsing the web looking for something else,  I came across a tip that tomato ketchup is very good for polishing copper. I do not remember where I saw it, and did not find it again when I searched, but the idea remained with me. I have a stainless steel pot with a copper bottom that has seen lots and lots of use. I thought it would never look as bright as it did when I first bought it. When I read this tip, that pot was the first thing I thought of and couldn't wait to try it.

So I applied regular tomato ketchup to the copper surface and let it sit for about 15 to 20 minutes. Then I washed it off with water and wiped dry and voila.....the copper looked beautiful. Scroll down to the bottom of this post if you want to see the before and after pictures of this experiment.....Apparently the acidic quality of the tomato helps in brightening the copper. I am so going to try this with all the other copper pots in my kitchen :-) 

Anyway moving on to the other reason for this post. Ever since I made this brown rice cutlet and this quinoa cutlet, any time I have some leftover cooked rice I always think of making some cutlets with it. This time I decided to use peanut powder to add flavor to the cutlets. I loved how this cutlet turned out, it tasted awesome both on its own and in a sandwich too.  If you like peanuts the way I do, give this simple and hearty cutlet a try, I am sure you will love it as much as I did :-)

Brown Rice and Lentil cutlets

Click here for a printable view of this recipe.

Ingredients and Method to make Brown Rice and Lentil cutlets
1/2 cup whole brown lentils rinsed and soaked in water for 15 to 30 mins
1/3 cup raw unsalted peanuts (or dry roasted unsalted peanuts )
2 cups cooked brown rice (can be substituted with any other type of cooked rice)
1 cup packed whole wheat bread crumbs (or any other type bread crumbs, I used oatmeal breadcrumbs)
3 Thai or Indian variety green chilies (or to taste)
1 inch piece of ginger
1 cup mixed vegetables (any combination of carrots, peas, cauliflower, beans etc)
salt to taste
1/2 tsp cumin powder
3/4 tsp garam masala (can be substituted with any other type of curry powder)
1/2 tsp red chili powder (or cayenne powder)
a few drops of oil to shallow fry the cutlets

Dry roast peanuts on low to medium low heat until evenly roasted. Cool, powder coarsely in the blender or spice grinder using short bursts of power until the powder resembles bread crumbs. Keep this powder aside.Mince green chilies and ginger together and keep aside.

In a heavy bottomed pan,  cook lentils using water as required until almost done. Add vegetables, minced ginger+green chilies and cumin powder, sprinkle a little water if required and allow the vegetables to cook until soft.

Add cooked rice, salt to taste, garam masala, chili powder if using and mix well.  Finally add peanut powder and bread crumbs and mix well. At this point the mixture will become a little stiff. Remove from heat, allow to cool until able to handle it. Shape into small cutlets of desired size.
The copyright of this content belongs to Veginspirations.com

Heat a flat pan/ griddle/ tawa, place two or three cutlets on it and pour a few drops of oil around it.
Cook until lower side of cutlets is evenly brown, flip over and cook the other side until evenly brown. Remove and serve cutlets with ketchup, chutney of choice or sauce of choice.
Or use cutlet as a sandwich filling, or in a wrap and enjoy.

Yield will depend on size and thickness of each cutlet.

Notes
Use water only as required when cooking lentils/ vegetables. This way when rice/ peanut powder and bread crumbs are added the mixture will thicken nicely and be easy to handle. If there is too much moisture you would need to cook it longer for the water to evaporate.


Here is a before and after picture of the copper dish that I discussed above......
Before trying the tip.....

And after....


Big difference, right ?.....
Read more ...

Monday, August 30, 2010

Pearl Onion Sambar ~ China Vengaya Sambar and a tip....

Sambar belongs to south Indian cuisine and can be easily described as a cousin to the more well known dhal. Among various types of sambar, there is a special place in my heart for pearl onion sambar. Soft and delicious pearl onions simmered and cooked in spiced tamarind water,  add so much flavor to sambar, taking it to a whole different level. And combine that with potato podimas (a type of mashed potato curry) and you have a classic combination that is difficult to resist.

My only reservation to using pearl onions in the past, was the amount of time it took to peel the onions.My friend B gave me this fabulous tip, which makes peeling pearl onions so very easy and quick. The idea is to soak pearl onions in hot water for about 10 to 15 minutes, then placing it in cold water. Cut of the root end and press the other end and out pops the onion. I used to hesitate to make pearl onion sambar, but after I tried out this tip from my friend, I make it far more often and in much less time :-)

Pearl Onion Sambar ~ China Vengaya Sambar

Click here for a printable view of this recipe

Ingredients and Method to make pearl onion sambar
3/4 cup split pigeon peas ( tur dhal/ tuvaram parappu) soaked in water for about 30 minutes
small lime or gooseberry sized piece of tamarind soaked in water for 30 minutes
10 oz (about 283 gms) pearl onions (yielded about 2 cups)
salt to taste
handful of cilantro (coriander leaves/hara dhania/kothamalli) cut very fine for garnish
8 to 10 curry leaves (kadipatha/karvapillai) torn into small pieces for garnish 

For the masala
Dry roast, cool to room temperature and powder
1/2 tbsp Split chick pea lentil (Chana dhal/ kadalai parappu)
2 tbsp Coriander seeds (Dhania/kothamalli virai)
3 dry red chilies (Lal mirch/molaga vathal) (or to taste)

Seasoning
1 tbsp oil
1 tsp mustard seeds (rai/kadagu)
1/8 tsp asafoetida (hing/perungayam)

Soak lentils in water for 30 minutes or so. Cook it in the pressure cooker or microwave or stove top until soft. ( I sometimes use the microwave, read more about cooking lentils here, and sometimes the cooker) . Mash the lentils well and keep aside

Soak tamarind  in just enough water to submerge the tamarind for about 30 minutes. Press the tamarind to extract juice from it, strain the tamarind juice and place in another bowl. Add some more water to the tamarind to extract juice from it. When all the juice is extracted, discard the pulp and seeds. Read this post on how to extract tamarind juice
The copyright of this content belongs to Veginspirations.com

In a large heat resistant bowl, place the pearl onions. Pour enough hot water over it to submerge the onions and allow the onions to sit for 10 to 15 minutes. Drain the hot water and fill the bowl with cold water. When the onions are cool enough to touch, cut off the root end and press the skin at the top. The onion just kind of pops out of its skin. Continue with all the onions, I got a yield of about 2 heaped cups of peeled onions)

Dry roast each of the ingredients separately until they turn aromatic. Cool to room temperature and grind to a fine powder. Keep this powder aside. You can even make this powder a couple of days prior to making the sambar and store in an airtight container.

Heat oil in a heavy bottomed pan, add mustard seeds. When the seeds begin to splutter add asafoetida powder. Stir a couple of times, then quickly add pearl onions and saute for a minute or two.  Add tamarind juice, salt to taste and allow it to boil until the tamarind loses its raw smell and the onions are cooked.

Add mashed cooked lentils and sambar powder and mix well. Add water as required to achieve required consistency and allow the sambar to simmer for a few minutes until all the flavors mingle. Garnish with cilantro and curry leaves and serve hot over a bed of plain steamed rice with a curry on the side.

For a classic combination, serve pearl onion sambar with potato podimas (a type of mashed potato curry) ( I will be posting my version of this curry soon )
Updated to add: My link for Potato Podimas can be found here.

Suggested variation
1 Tsp whole black pepper/peppercorn/miri/milagu can also be dry roasted and ground along with the masala, this adds a slightly different flavor. If you do add whole black pepper scale down the red chilies a tad bit, if you do not want to make the sambar too spicy.

Also 1/2 tsp of fenugreek seeds/methi dana/mendiyam can also be dry roasted until it turns slightly brownish and ground along with the other ingredients for the masala. 
Read more ...

Monday, June 21, 2010

Bittergourd in lentil gravy curry with Peanuts (Pahakai Pitla Kozhambu with Kadalai)

Pahakai pitla kozhambu or bittergourd in lentil gravy curry is a traditional curry type preparation originating from south Indian cuisine. I posted one recipe of this kozhambu along with a more detailed introduction to the dish here.  Sometime back when I was on the phone with my mother in law she mentioned that her sister made her this new variation of pitla with peanuts in it that she really liked. Just the mention of peanuts was enough for me and I was completely sold on the idea.

I could almost imagine the taste of the soft and juicy peanuts in lentil gravy even before I made it. Needless to say that this variation appeared in my kitchen very quickly after that conversation. The taste of this pitla was just as I imagined, delicious and the peanuts added a very unique texture and crunch to the kozhambu. Before I go on to the recipe here is a small tip on storing bittergourd that I discovered recently, some of you may already be knowing this.....In case you end up buying a lot of bittergourd that you are not able to use up immediately, cut lengthwise, remove the seeds and slice the bittergourd into 1/4 inch pieces. Place these pieces in a freezer safe plastic bag and place the bag in a freezer, the bittergourd stays for a good long while this way.

Photobucket

Click here for a printable view of this recipe

Ingredients and Method to make Pahakai pitla with peanuts
3/4 cup split pigeon peas (tur dhal) rinsed, drained and soaked in 1 cup of water for 30 minutes

1/2 cup raw peanuts
small lime sized tamarind soaked in sufficient water to submerge it.
1 1/2 cups sliced deseeded bittergourd
salt to taste
2 to 3 tbsp grated jaggery (can be replaced with 1 to 2  tbsp sugar)

Dry roast the following until reddish and aromatic
2 tbsp split yellow chick pea lentil (chana dhal/ kadalai parappu)
2 tbsp split black gram lentil (udad dhal/ ulatham parappu)
4 tbsp coriander seeds (dhania )
4 to 5 dry red chillies (or according to taste) to be dry roasted until it turns darkish.
grind (see notes below)  all of the above along with
8 tbsp fresh or frozen grated coconut (if frozen thaw to room temperature)

Seasoning
1 tbsp oil
1 tsp mustard seeds
1/8 tsp asafoetida powder (hing)

Extract juice from tamarind and discard the pulp and seeds. Yielded me about 2 1/2 cups of tamarind juice. (For a note on how to extract tamarind read this post )

Cook the lentils until soft and keep aside. I used the pressure cooker for this, and on a plate above the container I used to cook the lentils, I spread the raw peanuts and allowed it to cook in the steam too. ( you can use the stove top or m/w to cook lentils too, for a note on different styles of cooking lentils read this post)

In case you do not use the pressure cooker to cook lentils, then cook raw peanut on a stove top adding water as required until it is soft yet firm.

Make spice paste and keep aside. (see note below)

Heat oil in a heavy bottomed pan, add mustard seeds to it, when mustard seeds start to splutter add asafoetida powder, give it a stir.

Then quickly add tamarind juice, cut pieces of bittergourd and salt to taste and allow to cook until the raw smell of tamarind disappears.
The copyright of this content belongs to Veginspirations.comAdd cooked peanuts and allow it to simmer in this tamarind juice for a few minutes.

Mash the cooked lentils and add to the tamarind juice. Add spice paste to the tamarind juice too. Add jaggery to this mixture and  allow this mixture to simmer for a few minutes for the flavors to blend.

Serve hot on a bed of plain steamed rice with chips/ papad/ vadam on the side.

Notes
While grinding the spice mixture, first cool all the dry roasted lentil and red chilies to room temperature, then place in spice grinder and grind the dry ingredients first until they are powdered fine. Then add grated coconut, grind once, then add water as required and grind again until it forms a smooth paste.

Suggested variation:
In case you do not want to use bittergourd, you can substitute with small Indian eggplants cut into 1/2 inch pieces

I came across this hilarious piece of humor that I have posted here , check it out if you have a minute.
Read more ...

Sunday, April 11, 2010

Bean and Barley Soup

One of the questions I frequently get, is why I soak beans with a pinch of soda. One of the reasons for that is that it makes beans much softer and easier to cook. The other reason is that I have heard it makes beans more easily digestible. One thing to note when soaking beans with a pinch of soda is to make sure and  drain the water the beans have been soaked in and cook the beans in fresh water.

In any case I hear that throwing the water in which beans have been soaked is important. I got this tip in  a Sanjeev kapoor cookbook, which explains that soaking, draining and then cooking beans destroys the anti nutritional factors like tripsin inhibitors. Tripsin inhibitors reduce protein digestibility and by draining the bean soak water, the digestibility of beans improve. The tip specially mentions that draining water in which beans are soaked is good because that water can do more harm than good.

Moving on, this soup was something I created when I was in the mood for soup one day. I used pinto beans in this, because I love the texture of pinto beans and I thought it would go well with the other flavors and vegetables in this soup. It did work well and both R and I enjoyed this soup with some crusty store bought bread.

Pinto Bean and Barley Soup | Veg Inspirations


Click here for a printable view of this recipe

Ingredients and Method to make Bean and Barley soup

1 cup dried pinto beans soaked for 6 hours or so with a pinch of soda (the soda is optional) (see notes)

1 medium onion cut fine (pyaaz)
1/2 tsp minced ginger (see notes)(adrak)
1/2 cup pearled barley
2 medium tomatoes cut fine (tamatar)
2 large carrots cut into 1/4 inch pieces (gajar)
1 1/2 cup sweet corn kernels
2 small bay leaves (tej patta)
salt to taste (namak)
1 tsp red chili powder (or to taste) (lal mirch)
1 and 1/4 tsp cumin powder (or to taste)(jeera powder)
4 cups vegetarian vegetable stock or water (I used water)
2 Tbsp oil
1-2 tsp lemon juice (optional)
3-4 Tbsp finely chopped cilantro (coriander leaves/ hara dhania/ kothamalli ) for garnish

Drain the water that the beans were soaked in, fill container with fresh water and pressure cook or cook
on stove top until beans are soft but not mushy.( I use the pressure cooker ). Keep cooked beans aside.

Place pearl barley in a container, fill with water, swirl with hand a couple of times and drain water. Keep barley aside.

Heat oil in a large heavy bottomed pan, add onions and saute until onions are transparent.Add minced ginger and stir a few times.

Add tomatoes and stir until tomatoes are cooked and mushy.
The copyright of this content belongs to Veginspirations.com

Add bay leaves, all the spices and stir a couple of times.

Add carrots, corn, barley, salt to taste  and water or stock and allow the vegetables / barley to cook.

When the vegetables and barley get cooked and soft, add the cooked pinto beans, adjust water to achieve required consistency and let the soup simmer for another fifteen to twenty minutes for the flavors to come together.

Just before serving add lemon juice (if using)  and garnish with cilantro leaves and serve hot with a crusty bread of choice.

Serves approximately 3 - 4

Notes
You can substitute red kidney beans (rajma) instead of pinto beans if you want.
If you would like to use canned pinto beans, you would need approx 2 15 oz cans of pinto beans. Just rinse the beans thoroughly and add to the soup after the barley and vegetables are cooked and simmer for a few minutes for the flavors to mingle.
You can also use 1/2 tsp minced ginger + 1/2 tsp minced garlic instead of just ginger

If you are looking for other recipes with barley, here are a few more


Keerai Oat Barley Adai ~ Savory Spinach and Oat crepes

Curried Mung bean and barley soup ~ Whole moong soup

Quinoa Oat Barley Adai  ~ Savory Oat and Quinoa crepes


Read more ...

Tuesday, February 23, 2010

Avocado Roti (Indian flat bread)

Avocados, as you may already be knowing are extremely healthy, they contain oleic acid, a monounsaturated fat that helps in reducing cholesterol and also contain potassium, a mineral known to regulate blood pressure.

The best way to select a ready to eat avocado is one that is slightly soft but should not have any dark sunken spots or cracks.A firm avocado will ripen in a paper bag or fruit basket at room temperature within a few days. 

I have always wanted to use more of these healthy fruits but never seemed to get them into my regular day to day cooking. Recently my friend V had invited us over for dinner. She had made an awesome three course meal, and one of the items on her menu was avocado roti. I loved the roti and could not wait to try it myself.

The very next week, avocado went on top of my grocery list and I made rotis with it. Since then these soft flaky rotis appear regularly in my kitchen. The avocados really add a wonderful texture and softness to the rotis, so much so that any additional oil/ ghee, as is usually used for rotis, becomes unnecessary.  

Avocado Roti/Indian wheat flat bread with avocado

Click here for a printable view of this recipe
 
Ingredients and method to make Avocado Roti
2 cups whole wheat flour (atta)
1 1/4 tsp salt (or to taste)
1/2 tsp red chili powder
1/2 tsp cumin powder
2 Indian or Thai variety green chilies slit lengthwise and cut fine (optional)
1 large avocado peeled, deseeded and mashed well. (yielded approximately 3/4 cup mashed)
2 tbsp finely chopped cilantro (coriander leaves)
water as required (approximately 3/4 cup)

In a large bowl, mix together whole wheat flour, salt, red chili powder, cumin powder , green chilies, finely chopped cilantro and keep aside.

Peel an avocado, cut in half , remove the seed and mash the avocado into a pulp.

Mix the mashed avocado into the flour, add water as required and knead to form a soft and non sticky dough. It took me almost 3/4 of a cup of water, but you may need a little less or more depending on the size of your avocado and the type of flour you use.

Cover the dough and let sit for at least 30 minutes or so.

Divide dough into equal lemon sized balls.

The copyright of this content belongs to Veginspirations.com

With the help of flour roll out the dough into a circle of desired thickness ( I make mine pretty thin but even a thicker roti would taste just as good)

Heat a flat pan/ griddle/ tawa on medium heat. Place the rolled out dough on the tawa and cook on one side. When small light bubbles appear on surface and the lower side starts to get light pinkish/ brownish spots turn over and cook the other side.

When the other side begins to get light brown spots, remove from heat and serve hot with curry or dhal of choice.

This quantity of dough yielded me about 12 to 14 fairly large rotis. Yield will depend on the thickness and size of each roti.

Notes
This avocado roti is so soft as it is, that there is no need to use any oil/ ghee on it at all.

This Avocado Roti is off to the Healing Foods Avocado event  being hosted by Siri
Read more ...

Sunday, December 13, 2009

Cauliflower Potato Peas Dry curry (Poriyal)...and a tip

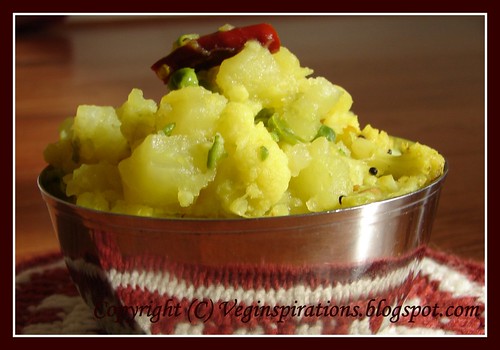
Poriyal is a south Indian term for a simple stir-fry like dry curry made with most types of vegetables. This one made with cauliflower, potatoes and peas is a simple and perfect side dish for any south Indian meal or even tastes great when served with Chappatti/ Roti (Indian flat bread) too.

Before moving on to the recipe here is a tip I got from my mother in law. You know how sometimes just washing cauliflowers under water is not enough, and we find that there is some insect hidden among the florets. To remove these insects, you can break cauliflower into florets and keep aside. Heat sufficient water to a near boil, add salt and a pinch of turmeric powder to it and submerge the florets in this water for a few minutes. I usually keep it for about five minutes, drain thoroughly and proceed with using it in cooking. This is supposed to help to remove the insects (if any) from the cauliflower florets.


Cauliflower curry 2

Click here for a printable view of this recipe

Ingredients and method to make Cauliflower Potato Peas Poriyal

1 head of cauliflower broken into florets
3 large potatoes peeled and cut into small cubes
1 cup of green peas frozen or fresh ( I used frozen)

1/4 tsp turmeric powder
salt according to taste
(a little extra salt and turmeric powder for soaking the cauliflower)

Seasoning
1 tbsp oil
1 tsp mustard seeds
1 tsp split black gram lentil (udad dhal)
4 Thai or Indian green chillies cut very fine (or according to taste)
1 dry red chilli cut into two

Heat water to near boil and add salt and a pinch of turmeric powder to it.

Add cauliflower florets to the water and let sit for a few minutes ( I waited about 5 minutes)

Drain cauliflower and keep aside.

In a heavy bottomed pan, heat oil add mustard seeds,when mustard seeds begin to splutter add black gram lentil.

Keep stirring lentils for a few seconds, when the lentils begin to turn reddish, add green chillies and stir for a few seconds.

When green chillies begin to turn whitish, quickly add red chilli and turmeric powder.

Then add cauliflower florets, potatoes and green peas, salt to taste and mix everything well.

Close the pan with a lid and let the vegetables cook on a low to medium low heat.

Sprinkle a little water if required ( I did not use any as the veggies usually cook well with their own water)

Stir occassionally for even cooking.

Serve hot with rice and sambar or rasam or any type of roti

Serves approximately 3
Read more ...

Thursday, October 22, 2009

Home Remedies for Cold

With the temperatures dropping rapidly, it seems like the weather is in a hurry to go from summer to winter with no intention to stop for fall in between. We are already facing frost advisories and are bracing ourselves for a cold winter. Sudden changes in the temperature and colder weather also mean that the dreaded cold season is upon us.

Having a cold can be such a drag on our daily activities, sneezing, sore throat, stuffy nose and a heavy head are only some of the symptoms that we have to contend with while trying to go about our daily routine. Here are some home remedies that are simple and effective for some of the symptoms of cold using common items from around the home.

Turmeric milk 3


Click here for a printable view of this article

For that lousy heavy head feeling that almost always arrives at the first sign of cold...

Heat a flat heavy dry clean pan to a medium heat, roll a fresh clean dry terry wash cloth or napkin and place one end of the towel on the pan for a second or two. Remove, feel with your palm to see if it is warm ( Caution it should NOT be hot just warm) then place the warm part of the towel on your forehead. Repeat this process and place the warm part of the towel from side to side on your forehead. Also place this warm part of the towel on your throat. This helps in soothing your throat and reduces the heavy headed feeling caused by cold.

For a heavy headed feeling that persists despite the above treatment...

Heat a flat heavy pan, dry roast 2 tbsp of rock salt. When the salt gets warm roll it in a dry terry wash cloth or napkin or even a muslin cloth. Place the rolled cloth or napkin from side to side on your forehead and on your throat ( Make sure the rolled cloth or terry towel is warm not hot before placing it on your forehead)

For a persistent cough,

Warm 1/4 cup water on the stove top or microwave, add a teaspoon of honey to it. Mix thoroughly and drink it up. Do this preferably at night before going to bed for a cough free sleep.
The copyright of this content belongs to Veginspirations.com
For a sore throat,

Warm 1/2 cup or water on the stove top or microwave, mix 1/2 teaspoon of salt in it thoroughly. Pour a small amount of this mixture in your mouth and gargle for a few seconds. Spit out the water and continue until the rest of the water is used up. Do this 3 to 4 times a day for a quick relief from sore throat. A point to remember is that you should avoid doing this immediately after any meal. Wait at least 30 minutes after a meal to try this method.

For a stuffy nose,

Heat a large pot half filled with water and allow the water to come to a boil. When the water starts boiling, add 1/2 to 1 teaspoon of Vicks vaporub to it and remove from heat, Place the container on a flat, heat resistant surface and place your face as close as is bearable for you and cover your head and the vessel with a large sheet or towel completely, so the heat does not escape from it. Inhale this steam for about 2 to 3 minutes, slowly raise your head when done. Try this and see how much better that makes you feel, this is a great way to clear up stuffy nose.

And finally....

Warm a cup of milk, add 1/4 teaspoon turmeric powder, a pinch of freshly ground pepper, half to one teaspoon of sugar and mix well. Drink this once or twice a day for soothing your throat and a quicker recovery from the cold. Turmeric is known for its anti infection properties and this turmeric milk is a great way to beat the cold and get well sooner.

Most of these home remedies are something that we have followed since childhood and they are surprisingly effective despite its simplicity. I am sure there are many more simple home remedies that are followed in different households, if you know any such remedies that you would like to share, please feel free to leave them in your comments, I am sure all of us will benefit from more such ideas this season.
Read more ...

Thursday, March 26, 2009

Baked Falafel

Do you use brown sugar ? If yes, then you know that brown sugar shows a marked tendency to turn lumpy and a little hard. I use only brown sugar and find myself trying to break out the lumps in them with the back of a spoon before measuring it out for either tea or other cooking. I came across this tip recently in a book (I cannot remember which one ) which has now made this struggle with brown sugar a thing of the past for me. The book suggested that to break up the sugar we should place the sugar in a microwave safe bowl and place it in the microwave beside a mug filled with water and zap it for about 2 minutes on high heat. I tried this, a little nervously initially, since I had this fear that heating the sugar would cause it to start melting. But I was wrong, in a couple of minutes the hardest lumps from the sugar disintegrated. So try this if you are having problems with your brown sugar forming lumps, only do remember to cool the sugar to room temperature before storing it back in an airtight container.

Moving on, falafel is a fried ball or patty made out of spiced chickpeas. Wikipedia classifies falafel as a fast food from the middle east.  For those of you who have not tried this but are familiar with Indian cuisine, this dish may remind you a little of masala vadai. Falafel though classified as a fast food can be quite healthy except for the fact that it is fried. So when I came across this recipe on Kalyn's site, the idea of baking the falafel appealed to me a great deal. I tried it and was really glad I did, the falafel turned out crunchy on the outside and soft on the inside, just the way I like it. 


Ingredients and Method to make the baked Falafel

1 cup dry chickpeas (kabuli channa) soaked in sufficient water with 1/8 tsp of baking soda for 8 hours (the soda is optional)
1 small yellow onion (cut fine)
half a handful of parsley (cut fine)
half a handful of cilantro (cut fine)
1 tsp cumin powder
2 tsp minced garlic
1 1/2 tsp salt (or according to taste)
1 tsp baking powder
All Purpose Flour (Maida) as required to bind (it took me about 4 to 5 tsp all purpose flour)
1 tbsp crushed red pepper

about 1 tsp of oil to brush on top of the falafel (optional)


Soak the dry chickpeas in sufficient water with 1/8 tsp of baking soda (the soda is optional ) for about 8 hours or overnight.

Drain the soaked chickpeas well.

Place the soaked chickpeas along with cut onions, parsley, cilantro, cumin powder, minced garlic, crushed red pepper,cumin powder, baking powder and salt in a  food processor and grind to get a coarse thick bread crumb like texture.

Add the all purpose flour and use the pulse feature on the food processor until it binds together slightly.

Add more flour if the mixture does not seem to bind. If you take the mixture in your palm and make a fist, the mixture should hold together.

Chill this mixture in the refrigerator for about 2 to 3 hours ( I placed this mixture in the refrigerator overnight and made the falafel patty the next day)

Preheat oven to 400 deg F. Line a baking sheet with parchment paper.

Form the mixture into lemon sized balls and flatten it a little and place it on the lined baking sheet about half an inch apart. If you plan to use oil you can brush a little on each patty at this point.

Bake about 20 to 30 minutes turning once in between.

Remove from the oven and serve hot with any yogurt dip of choice, or use in a wrap or for some fusion use this patty in a burger.

The number of patties will depend on the size of each of them.

Notes

I tried one batch with oil and one without oil and frankly did not see the oil enhancing the taste very much, so you can easily skip this if you wish.

It is important that the chickpeas are drained thoroughly before being placed in the food processor. If the water is not drained then the chick peas may turn a little mushy and may need more flour to bind. 


Read more ...

Tuesday, March 10, 2009

Vegetarian Minestrone Soup

Sometimes, even though I try and plan my meals around the vegetables I have on hand, I find that there are one or two veggies that go bad before I get to them. This frustrates and upsets me quite a bit because I feel guilty about the wastage. I try my level best to collect tips and tricks that increase the shelf life of veggies and fruits. I thought it may be useful to share some of these tips that I have picked up over time with my readers. In the interest of keeping this post to a reasonable length I am sharing just a few tips in this post, I will continue to share some more tips in my forthcoming posts. So here goes....

The best way to store celery is to remove it from plastic cover and firmly wrap it in aluminum foil and store in the refrigerator. I tried this one and the celery lasted a couple of weeks for me. I was not able to test it longer since I always tend to use up my celery in a couple of weeks time :-)

Honey dew and cantaloupe melons should always be stored separately as they react and rot faster if stored together. I realized when I came across this tip that I have never had a chance to put this one to test because I seem to purchase these melons one at a time and never together :-)

The third and last one is that leaving stalks on foods like tomatoes and strawberries lengthen their shelf life. I have tried this for tomatoes and it really does work. 

Another idea that works for me is to use up veggies that I have in small quantities in making soup. This way the veggies that are not sufficient for a stand alone dish gets used up along with a lot of others and helps clear out the refrigerator.It also helps that soups are one of my favorite foods, especially when the weather is cold. We had some really cold weather last week when a storm system dumped snow in our area.This turned out to be the perfect occasion for this minestrone soup which just happens to be one of my favorites. I have made this soup often since the first time I tasted this at a restaurant and decided I loved the soup enough to try and make it at home. The recipe has evolved over time and this is how I make this soup regularly now.

  photo cfecd181-04ab-404d-b64d-21ce15c5cb50_zps1590fbe0.jpg


Ingredients and Method to make Minestrone soup

1/2 cup dried cannelini or any other white beans soaked in water with a pinch of baking soda for about 6-8 hours (the soda is optional) (alternatively you can use equal quantity of red kidney bean (rajma) )
1/2 cup any small type dried pasta (I usually use multi grain shell or elbow pasta for this soup)
2 medium sized onions
2 medium carrots
4 stalks of celery (or 3 large zucchinis cut into 1/2 inch pieces)
3 very large tomatoes
1 tsp minced garlic
2 bay leaves
1 tsp Italian seasoning
freshly ground black pepper powder to taste (optional but recommended)
3 cups of water/ vegetable stock
2 tbsp oil
Garnish with crushed red pepper to taste (optional) 

Drain and rinse the soaked beans and place in a pot, cover with sufficient fresh water and let it simmer until the beans are cooked. ( I filled  water for about 1/2 an inch above the beans and it was sufficient for me until the beans were cooked.) Or for faster cooking, cook the beans in a pressure cooker until soft yet not mushy.Keep the cooked beans aside
In a heavy bottomed pan heat oil and add onions and saute until the onions are transparent.
Add minced garlic and saute for a minute.Add tomatoes and saute until the tomatoes are cooked and are soft and mushy.
The copyright of this content belongs to Veginspirations.com
Add carrots, celery if using or zucchini, Italian seasoning, salt to taste and about 3 cups of water or stock and let the vegetables cook.
When the vegetables are cooked and slightly soft, add the cooked beans and freshly ground black pepper powder and let it simmer for a few minutes (about 10 minutes) Add water to achieve required consistency
Add the dried pasta and cook for an additional 10 minutes until the pasta is cooked. 
Serve hot with any bread of choice. I usually serve this with wheat rosemary focaccia bread

Serves approximately 3 to 4


Read more ...

Friday, February 20, 2009

Schezuan Fried Rice

Are you one of those persons that tear up at the mere thought of cutting onions, if yes, you may find this post interesting. I have seen people at both ends of the spectrum, some who do not shed one tear while cutting onions and some who tear up when others are cutting onions across the room.  I consider myself to be somewhere in the middle,  I tear up when I am cutting onions and if I am standing close to the person cutting onions.   And when I tear up I really do,   I never shed dainty tears the way some do,  I tear up to the point where my eyes look like I have been bawling for an hour :-)  

So when I came across a tip that may reduce tears when cutting onions I was obviously interested. The tip is to place the onion you are planning to cut,  in the freezer for about 15 to 20 minutes before starting to cut it. So the last time I was using onions,  I first placed one onion in a plastic cover (like the zip loc covers) zipped it closed and placed it in the freezer while I was doing the prep work for the rest of the dish. About 20 minutes later I removed the onion from the freezer and cut it and sure enough, I cut the entire onion without a single tear....Yea I am always happy with tips that make my life easier in the kitchen:-)   My only suggestion when you try this tip is to make sure that your onion is in a tightly sealed plastic bag so that the onion smell does not get into your freezer.

Moving on,  R loves Indo-Chinese cuisine, and would love to have it more than once a week if possible. But we do not have it as much as we used to, buying Indo- chinese from restaurants got complicated when I started learning about MSG and how it is not good for us. Making this cuisine at home does not happen as regularly as R would like it. So when I came across this recipe  on Chitra's site for Schezuan rice, I thought this might be something R would like and decided to surprise him with it. This was a simple and spicy dish that was much appreciated by both of us. I made it using brown basmati and loved the taste of it. The convenience of using brown rice in this is that brown rice holds its shape and texture more easily, so I do not have to wait for the rice to cool down thoroughly as I would if using white rice.


Ingredients and Method to make Schezuan Fried Rice 

1 1/4 cup brown basmati rice soaked in 2 cups of water for about 1/2 an hour and cooked until done
I cooked this in a rice cooker but you can use a pressure cooker for this too.

1 yellow onion cut fine
2 cups cabbage cut fine
3 cups of other veggies ( I used cauliflower florets+ peas+ carrots)
1 tbsp sesame oil
2 tbsp schezuan sauce (recipe below)
1 tbsp soy sauce
salt to taste

Soak basmati rice for about 1/2 an hour and cook it either in a rice cooker or pressure cooker until done.

Spread it out on a plate to cool 

Heat oil in a heavy bottomed pan and add onion to it and saute until transparent.

Add cabbage and all other vegetables and saute until cooked and still crisp (Do not add any water in the process of cooking vegetables)

Add the schezuan sauce, soy sauce and mix well with vegetables.

Add cooled rice and salt to taste and mix well and heat on a low to medium heat until ready to serve.

Serve with steamed vegetables  or any other chinese style veggie preparation. This one was hearty enough to be had on its own too.

Serves approximately 3-4 

Schezuan sauce
Soak 12 dry red chillies in warm water for 15 minutes. Remove from water and drain
2 tsp minced garlic, 
3 tbsp white vinegar 
2 tsp sugar 
1 tsp salt 
1 tbsp sesame oil

Grind the drained red chillies with all of the above ingredients EXCEPT  sesame oil and keep aside.
Heat sesame oil to smoking point and pour over the ground mixture and mix well.
Keep in an airtight container and refrigerate and use as required. For the quantity of schezuan rice I made this sauce lasted for two rounds of use.

Notes 
If using white rice, cook it earlier and cool thoroughly before using in this dish.

Mix very gently with white rice since it tends to break faster.

If using white rice, short grain rice may be more effective than basmati.

Also if using white rice you may need to use lesser amount of sauce.

Read more ...

Wednesday, February 11, 2009

Lemon Pasta Salad

After all the cold and freezing temperatures we have had recently, this week we saw a surprising warm up. The weather was almost spring like, so what did I do to celebrate? Other than using the opportunity to go for long walks that I missed a lot these past few weeks, I also made a light summery lemon pasta salad. The idea was to recreate a dish I remember having in a  restaurant once, and I put together ingredients that I thought would have been used in the original recipe. The bad news was that this was not exactly what I was looking for,  and the good news....this tasted pretty good too and I am looking forward to making this many more times in the spring and summer. I thought the earthy taste of celery and the light citrusy taste of the lemon provided an interesting contrast in flavors and the spice from the crushed chilli flakes added the right hint of spice without making it spicy. 

Before moving on to the recipe I just wanted to share a tip I picked up from my mother in law. Just before extracting juice from a lemon, place the lemon (uncut) on a flat counter or a flat surface and with the palm of your hand exert gentle pressure and roll the lemon a few times. Then cut the lemon and proceed to extract the juice as usual. This makes it easier to juice the lemon and yields more juice from the lemon. Try this tip the next time you use a lemon, it really does make a difference :-)

Photobucket


Ingredients and Method to make Lemon Pasta Salad
250 gms (8.8 oz ) of whole wheat spaghetti  (half of a regular pack of spaghetti) (can be substituted with equal quantity of angel hair pasta too)
1 large carrot grated
2 stalks of celery cut very fine
2 tbsp olive oil
Juice of 1 small lemon (or to taste) (see notes)
handful Italian parsley (cut fine)
1/2 tsp Italian seasoning
Crushed red chilli flakes (according to taste)
salt according to taste

Cook spaghetti as per manufacturers instructions and drain and keep aside.
In a large bowl add grated carrot and cut celery and mix together.
Add cooked spaghetti to this and mix well.
In a separate bowl add olive oil and juice of one lemon,salt according to taste and Italian seasoning and give it a good mix.
 The copyright of this content belongs to Veginspirations.com
Pour this mixture on the pasta  + vegetables and mix well.
Add crushed red chilli flakes as per taste and mix again.
Garnish with Italian parsley and serve cold.
Serves approximately 3

Notes
In case you do not plan to use red chilli flakes, you may need to reduce the amount of lemon juice slightly maybe use half the quantity
You can also use other types of multi grain spaghetti or even plain regular spaghetti for this dish.

I am sending this pasta off to Its a Vegan World - Italian being hosted by Vaishali
Since this pasta got created entirely in my kitchen this one also is off to the Original Recipe Event being hosted by Lore


Lemon-dill Lentil Orzo Salad on Foodista

Read more ...