Showing posts with label Sandwich stuffing. Show all posts

Tuesday, June 25, 2013

Paneer Bhurji ~ Crumbled Indian cottage cheese curry

Paneer or Indian cottage cheese is one of those items that is almost always well liked, and is usually a crowd pleaser making it a good choice for when family/ friends get together. But a lot of paneer curries usually tend to be ones with gravy like this paneer masala ,  and tend to be a little more time consuming to make. Perfect for weekends but not really a great choice for a quick weeknight meals or when you are short on time :)

My favorite choice in paneer curries that can be made really fast is definitely paneer bhurji. Paneer Bhurji is a curry made with crumbled paneer. It is a very versatile, flavorful curry that can be made in jiffy, and requires no exotic masalas or spices. No elaborate steps either, just stir, mix,  cook and you are done. This curry can be served with some phulkas/ rotis (Indian flat bread) or in a wrap / grilled sandwich. My personal favorite thing to make with this curry is definitely grilled sandwiches, it tastes so good , just place a little curry between two slices of bread, apply a little oil/ butter on the outside and grill. Yum :)  If you are looking for a quick curry and have some paneer on hand, give this one a try and tell me what you think :)

 Paneer Bhurji ~ Crumbled Indian Cottage Cheese Curry | Veg Inspirations


Click here for a printable view of this recipe

Ingredients and Method to make Paneer Bhurji
1 medium sized  red onion (pyaaz/ vengayam)
1 green bell pepper (capsicum/koda molagai) deseeded and cut fine
3 cups of crumbled paneer (Indian cottage cheese) (400 gms of paneer)
For step by step directions to make your own paneer, check out this post
2 tbsp oil
1 tsp cumin seeds (jeera)
3 Thai or Indian variety of green chilies cut very fine (or to taste)
1/2 tbsp finely grated ginger (adrak/ inji)
1/4 tsp red chili powder (or to taste) (optional) (lal mirch)
1/4 tsp turmeric powder (optional) (haldi / manjal podi)
salt to taste (namak/ uppu)

for garnish
1 tsp lemon juice (or to taste)
4 tbsp finely cut cilantro (coriander leaves/ dhania/ kothamalli)

Crumble paneer, prep the vegetables and keep aside.

Heat oil in a large heavy bottomed pan on medium heat, add cumin seeds, when the seeds sizzle add onions and saute until the onions are transparent/ translucent. Add turmeric powder (if using), ginger and green chilies and stir a few times.

Add bell pepper and stir until the bell pepper is cooked, yet firm. Lower heat, add  crumbled paneer, salt to taste, red chili powder (if using) and mix well. Stir and allow the mixture to heat for a few minutes for the flavors to mingle and for the paneer to heat through.
The copyright of this content belongs to Veginspirations.com

Remove from heat, garnish with lemon juice and cilantro and serve hot with some phulkas/ plain rotis (Indian flat bread) or use this mixture in a wrap or a grilled sandwich.

If you are looking for paneer/ Indian cottage cheese recipes, here are a few more


Paneer Masala

Easy Kadai Paneer

Tandoori Paneer Pizza
Read more ...

Wednesday, May 8, 2013

Chilli Cheese toast- Open sandwich with onions and bell pepper

Every time I traveled to southern India, I was fascinated by the kind of stuff offered in the bakeries there, it just seemed so totally different from the kind of stuff offered in bakeries back in Bombay.  For one, there seemed to be a lot more savory breads and stuffed breads being offered there. One such item that seemed unique to southern India at the time was a savory preparation made with sandwich bread called chilli cheese toast.

Essentially chilli cheese toast is a slice of bread topped with cheese, chillies, a small amount of onions and sometimes bell pepper, a kind of open sandwich. It is a fun tea time or even as an any time snack :) My version of this sandwich is a bit different from the ones I came across in bakeries in southern India.  Mine tends to be a bit heavier on the veggies, and I go light on the chillies. I feel like the one I make feels more "sandwich like" and a little less "toast like" :) This sandwich tastes great as a snack or even as a side to any kind of soup.


Chilli cheese Toast ~ Open sandwich with onions and bell pepper

Click here for a printable view of this recipe

Ingredients and Method to make Chilli cheese toast
6 slices of wheat bread
2 to 3 tsp extra virgin olive oil
1/2 onion cut fine
1/2 green bell pepper (capsicum/ koda molagai) cut fine
salt to taste
1 Thai or Indian variety green chilli cut fine (or to taste) (see notes)
2 tbsp finely chopped cilantro (coriander leaves/ hara dhania/kothamalli) (optional)
approx 1 to 1 and 1/4 cup of shredded cheese of choice (or more or less according to taste)(I used a combination of pepper jack cheese and mozarella cheese) (I have also used pizza blend cheese, cheddar and mozarella blend cheese for this sandwich in the past)

Pre heat oven to 350 deg F. Line a tray with parchment paper and keep aside.

In a small bowl add onions, bell pepper, green chilli, cilantro and salt and mix well. Add shredded cheese to this and mix again.
The copyright of this content belongs to Veginspirations.com

Apply olive oil on one side of each slice of bread and place the side with the oil facing down on the pre lined tray.

Spoon two to three heaped tbsp of vegetable and cheese mixture on each slice of bread. Place tray in oven and bake until cheese has melted or until the lower side of the bread becomes an even golden brown.

I prefer my bread and the cheese on it to be "well done" so I bake the bread for approx 20 to 25 minutes or so. If you want it a little softer, take it out as soon as the cheese has melted or a couple of minutes after that.  The baking time will also depend on how much "stuffing" you place on each slice, if you use very little it could get done way faster.

Cut the bread slices in half, either diagonally or straight and serve hot with ketchup. This can also be served as a side for any kind of soup.  

Notes:
If you want to avoid green chillies for any reason, you can also season this sandwich with black pepper powder or with red pepper flakes as per choice. Alternatively you can also add finely chopped jalapeno for a slightly different flavor and taste in this sandwich.
Read more ...

Tuesday, November 22, 2011

Eggless Omelet with Sundried tomatoes (Savory chickpea flour pancakes)

With the intention of making sundried tomato pesto, I had purchased a pack of sundried tomatoes that was lying in my pantry waiting for the day when I got around to making pesto. Somehow making pesto never figured very high on my list of things to do in the last couple of months and I felt guilty every time I saw the sundried tomato packet languishing in my pantry. 

One day when I was planning to make eggless omelet, it suddenly struck me that sundried tomatoes might be an interesting addition to the omelet. Have you ever tried an eggless omelet? I know it sounds a little strange to even think of an omelet without eggs but I have been making some variation of this omelet for a long time now and enjoy it each and every time. Eggless omelet is essentially a savory pancake made with chick pea flour and a combination of veggies and cilantro for flavor. Just to be clear it does not really taste exactly like an omelet with eggs in it, quite different but it definitely tastes delicious !!  I think I came across this idea a long time ago in some magazine and had noted it down in my book. Every time I make this I have been varying it a bit and the latest change to my version of omelet is the addition of yogurt and baking soda.

The addition of both these ingredients improves the taste and texture of the omelet significantly. The addition of sundried tomatoes added a very intriguing and interesting taste and it was a huge winner with my family:-)
One of the times I made this I used it as a sandwich stuffing and I loved how it tasted, especially since I used some sundried tomato chutney in the sandwich and the combination of flavors worked out really well.

Egg free Omelet with Sun-dried tomatoes-Savory Chickpea flour pancakes


Click here for a printable view of this recipe

Ingredients and Method to make Eggless omelet
1 1/2 cups chick pea flour (besan/kadalai maavu)
2 cups plain yogurt (curd/dahi/thayir) (see notes)
1 green bell pepper (capsicum/ koda molagai) de-seeded and cut very fine
6 halves of sundried tomatoes cut very fine
2 Thai or Indian variety green chilies (or to taste)
1/2 of a large red onion or a small red onion cut very fine
handful cilantro (coriander leaves/dhania/ kothamalli) cut very fine
salt to taste (I used approx 1 1/4 tsp)
1/2 tsp baking soda (optional but recommended) (see notes)
a little extra virgin olive oil to shallow fry the pancakes/ omelet

Mix together chick pea flour and yogurt (or water if making a vegan version, see notes) in a bowl. Using a whisk or hand blender makes this process easier. Mix until little bubbles are seen on the surface and make sure there are no lumps 

Add to it finely cut onions, green bell pepper, green chilies, sundried tomatoes, cilantro, salt to taste and mix well. Add water only if required, this batter needs to be a little thick. When in doubt err on the side of thicker batter, you can always add more water later if required to get the right consistency. I did not add any water to this batter with these proportions.

Heat a flat pan/ tawa/ griddle on medium heat. Just before making the omelet add baking soda and mix well. Pour a small quantity of batter on the pan/ tawa/ griddle in a small circle. Pour a few drops of olive oil around the circumference of the omelet.Cook the omelet on a low to medium low heat, so that it cooks all the way through, otherwise the outside gets brown and the insides are still not done. When the lower side turns golden brown, flip over and cook the other side. When the other side gets light golden brown spots remove from heat.
The copyright of this content belongs to Veginspirations.com

Serve hot with a chutney/ dip/ ketchup or use as a stuffing in a sandwich.  Sometimes we have this on its own and sometimes I use it in a sandwich as a sandwich stuffing. This time around, I made sundried tomato chutney ( I plan to post that recipe soon) and used that along with this omelet in a sandwich and we loved the result. In the past I have also tried this sandwich with some cilantro mint chutney/ cilantro peanut chutney and even pesto. It tastes good in all versions :)

Updated : Here is the link for the sundried tomato chutney

The balance of the batter can be stored in the refrigerator and used within a day or so. If you plan to store this any longer, I would suggest storing the veggies and the batter separately and adding the veggies to it just before using the batter, this way veggies like onions do not release water and make the batter thinner. 

Notes:
I have noticed that using 2 cups of yogurt is not absolutely necessary, it could be reduced to 1 1/2 cups too and a little water can be added to get the right consistency. Also a few tablespoons of sour cream can be added in addition to the yogurt to give the omelet a little more richer taste but that is completely optional. If you do add some sour cream make sure to adjust the quantity of water and yogurt to get the right consistency

For a vegan version, this pancake can be made completely omitting the yogurt too. I have made vegan version of this pancake in the past. It tastes a little different but tastes pretty delicious. 

I have also made this with and without the baking soda and find that adding baking soda gives it a little rise and the pancakes/omelets taste way better with the soda than without :-) 
Read more ...

Wednesday, March 16, 2011

Brown Rice and Lentil cutlets with peanuts and a neat tip :-)

When I was browsing the web looking for something else,  I came across a tip that tomato ketchup is very good for polishing copper. I do not remember where I saw it, and did not find it again when I searched, but the idea remained with me. I have a stainless steel pot with a copper bottom that has seen lots and lots of use. I thought it would never look as bright as it did when I first bought it. When I read this tip, that pot was the first thing I thought of and couldn't wait to try it.

So I applied regular tomato ketchup to the copper surface and let it sit for about 15 to 20 minutes. Then I washed it off with water and wiped dry and voila.....the copper looked beautiful. Scroll down to the bottom of this post if you want to see the before and after pictures of this experiment.....Apparently the acidic quality of the tomato helps in brightening the copper. I am so going to try this with all the other copper pots in my kitchen :-) 

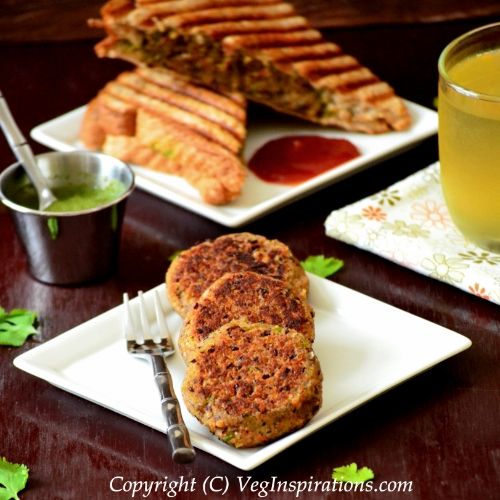
Anyway moving on to the other reason for this post. Ever since I made this brown rice cutlet and this quinoa cutlet, any time I have some leftover cooked rice I always think of making some cutlets with it. This time I decided to use peanut powder to add flavor to the cutlets. I loved how this cutlet turned out, it tasted awesome both on its own and in a sandwich too.  If you like peanuts the way I do, give this simple and hearty cutlet a try, I am sure you will love it as much as I did :-)

Brown Rice and Lentil cutlets

Click here for a printable view of this recipe.

Ingredients and Method to make Brown Rice and Lentil cutlets
1/2 cup whole brown lentils rinsed and soaked in water for 15 to 30 mins
1/3 cup raw unsalted peanuts (or dry roasted unsalted peanuts )
2 cups cooked brown rice (can be substituted with any other type of cooked rice)
1 cup packed whole wheat bread crumbs (or any other type bread crumbs, I used oatmeal breadcrumbs)
3 Thai or Indian variety green chilies (or to taste)
1 inch piece of ginger
1 cup mixed vegetables (any combination of carrots, peas, cauliflower, beans etc)
salt to taste
1/2 tsp cumin powder
3/4 tsp garam masala (can be substituted with any other type of curry powder)
1/2 tsp red chili powder (or cayenne powder)
a few drops of oil to shallow fry the cutlets

Dry roast peanuts on low to medium low heat until evenly roasted. Cool, powder coarsely in the blender or spice grinder using short bursts of power until the powder resembles bread crumbs. Keep this powder aside.Mince green chilies and ginger together and keep aside.

In a heavy bottomed pan,  cook lentils using water as required until almost done. Add vegetables, minced ginger+green chilies and cumin powder, sprinkle a little water if required and allow the vegetables to cook until soft.

Add cooked rice, salt to taste, garam masala, chili powder if using and mix well.  Finally add peanut powder and bread crumbs and mix well. At this point the mixture will become a little stiff. Remove from heat, allow to cool until able to handle it. Shape into small cutlets of desired size.
The copyright of this content belongs to Veginspirations.com

Heat a flat pan/ griddle/ tawa, place two or three cutlets on it and pour a few drops of oil around it.
Cook until lower side of cutlets is evenly brown, flip over and cook the other side until evenly brown. Remove and serve cutlets with ketchup, chutney of choice or sauce of choice.
Or use cutlet as a sandwich filling, or in a wrap and enjoy.

Yield will depend on size and thickness of each cutlet.

Notes
Use water only as required when cooking lentils/ vegetables. This way when rice/ peanut powder and bread crumbs are added the mixture will thicken nicely and be easy to handle. If there is too much moisture you would need to cook it longer for the water to evaporate.


Here is a before and after picture of the copper dish that I discussed above......
Before trying the tip.....

And after....


Big difference, right ?.....
Read more ...

Monday, January 10, 2011

Quinoa Burger Patty / Cutlet

On a trip at the end of last summer, I visited a restaurant that had quinoa burger on their menu. I was quite intrigued and immediately ordered it, only to feel very disappointed when I actually tasted it. The burger was a little too bland and boring for my taste, yet the idea of using quinoa in burgers appealed to me and stayed  in my mind. After I returned, I decided to try and make my own variation of quinoa burger, only a tastier and healthier version.

To this effect, I decided to add some cooked brown rice,  mung lentil and some veggies to amp up the nutrition content. I also added a slight Indian touch to this cutlet/patty by adding some curry powder to it. The result...........the patty/ cutlet turned out to be very tasty and versatile. I used it in a sandwich, in a burger and on its own and it never disappointed in each of these avatars. I have already made this a few times since that first time and look forward to making it often in the future too :-)


Quinoa Burger Patty

Here is another closer view of the cutlet...............

Quinoa Patty~Cutlet

Click here for a printable view of this recipe

Ingredients and Method to make Quinoa cutlet (see notes)
1 cup quinoa washed and rinsed
2 carrots cut fine
1 large green bell pepper (capsicum/ koda molagai) cut fine
1/2 heaped cup frozen green peas
1/2 cup split mung lentil (moong dhal) (washed and rinsed)
1 1/2 cups cooked brown rice (see notes)
salt to taste
1/2 tsp cumin powder (or to taste)
1/2 tsp red chili powder (or to taste)
1/2 tsp garam masala (or to taste) (can be substituted with any other curry powder)

a little oil to shallow fry the cutlets

On the stove top or the microwave steam cook the carrots until cooked yet crisp. 

In a large heavy bottomed pan, add washed and drained lentil and enough water to submerge the lentils and place on heat. Once it comes to a full boil, lower heat and allow the lentils to cook.

When the lentils are half cooked, add quinoa and more water if required and cook until both quinoa and lentils are fully cooked.

Add the steamed carrots, bell pepper and peas, sprinkle a little water if required and cook until the vegetables are done.

Add all the spices, salt to taste and mix well.

Add the cooked brown rice and mix well. Mash the entire mixture, a little coarsely using the back of the spatula or using a potato masher. At this point the mixture should quite thick and a little stiff .

Allow it to cool, then shape into patties/ cutlets of desired thickness and size. Heat a flat pan/griddle/ tawa and place two or more cutlets on it. Pour a few drops of oil around the patties and allow the lower side to turn golden brown, flip over and cook until the other side becomes golden brown.
The copyright of this content belongs to Veginspirations.com

Use this as a sandwich stuffing, or in a burger or just serve with some ketchup as a snack or something additional to go with a hearty soup. 

Suggested variation
Mince a couple (or more or less, according to taste)  of Thai or Indian variety of green chilies and add to the cooked quinoa for a slightly different flavor and a little more heat.


Notes:
I had some leftover collard greens brown rice that I never got around to posting on this site. I used that in this recipe and since the rice had had its own spices and flavors, I used less spices in the burger patty/cutlet. In case you use plain cooked brown rice, you may need to increase the quantity of each spice according to your preference.

When hot this patty/cutlet is a little fragile, but in a minute or two it becomes easier to handle. I would recommend using a large spatula to flip it over  so that it does not break in the process. If you find that it is a little too fragile, you can use whole wheat bread crumbs to make the mixture a little stiffer and make it easier to handle. I did not need anything extra so I haven't added it to my ingredient list.
Read more ...

Monday, November 22, 2010

Grilled Veggie Panini and a surprising discovery about my plant :-)

Some of you may remember this pretty dahlia  picture that I posted in summer, it was my very first dahlia bloom. I fully expected that with the arrival of fall, my dahlia plant would stop blooming completely. I was surprised to discover that not only does the plant continue to bloom, the blooms amazingly have changed color and are now a beautiful deep golden color. I am not quite sure what to make of it.....but I am enjoying the sight of these blooms every chance I get. If any of you experienced gardeners have an idea if dahlia commonly changes color in the cooler weather, do let me know .......

 Grilled Veggie Panini

Moving on to the grilled veggie panini, ever since we got this panini maker, I have been making and enjoying  many varieties of panini. This is the first time that I used the panini maker to grill vegetables and I was very nervous about it, but it worked out really well. The vegetables grilled evenly and  turned out flavorful.

Grilled Veggie Panini

In fact the veggies tasted so good straight out of the panini that I thought of tossing it together like a salad or side dish and eating it just as it is.....only this time I ended up using it entirely in the paninis. If you like veggie paninis, this simple, quick and flavorful panini may be something that you might be interested in....

Grilled Vegetable panini photo 952c1159-1696-4516-a682-d4d76e8baf8d_zps0f60659b.jpg


Click here for a printable view of this recipe.

Ingredients and Method to make Grilled Veggie Panini
1 zucchini
1 small yellow squash
1 Japanese eggplant (can be substituted with other types of eggplant
1 green bell pepper (capsicum/ koda molagai)
All vegetables except bell pepper cut into 3 parts, then sliced lengthwise.Bell pepper deseeded and cut into thin lengthwise strips.

4 tbsp extra virgin olive oil
1/2 tsp salt ( or according to taste)
3/4 tsp crushed red pepper (or according to taste)
1/4 tsp paprika (optional)
1/4 tsp dried basil.

Sliced Italian bread as required
Sun-dried tomato pesto as required. Updated to add: You can find my recipe for sun-dried tomato pesto here
a little extra virgin olive oil to apply on the bread

In a small bowl, mix together oil, salt, crushed red pepper, paprika if using and dried basil and mix well.

In a small bowl with a lid, add 1 tbsp of the above mixture, then slices of one vegetable, then toss it so that  each slice is evenly coated with this mixture.Remove and keep aside.

Proceed in this manner for all the vegetables. Grill the vegetables in batches in the panini maker or a grill if you have one. Make sure not to grill more than one type of vegetable at one time in the panini maker to ensure even grilling.

Apply sun dried tomato pesto on one side of two slices of bread. Layer one bread with a few slices of each type of vegetable, then place the other bread on top. Brush a little olive oil on the outer side of each bread slice and place in pre heated panini maker. Remove when golden and serve hot with choice of soup or salad.
The copyright of this content belongs to Veginspirations.com

I was able to make approximately 4 paninis with this quantity of vegetables. The quantity of paninis will depend on how much vegetables you stuff into each one :) If you have leftover veggies you can serve/eat it like salad or a side dish, it tastes pretty delicious.

Notes:
If you go not want to grill the vegetables, you can also bake it in the oven. Pre heat oven @ 400 deg F (approx 200 deg C) toss the vegetables in the oil flavor mix until evenly coated, line a large tray or two trays with parchment paper/ aluminum foil. Place the vegetables in it in a manner that it does not overlap. Place in oven and bake for 15 to 20 mins or until the vegetables are cooked yet firm. Remove and proceed with the rest of the recipe in the same manner.
Read more ...

Wednesday, September 29, 2010

Oat Potato Cutlets

There are days when I am running late, have yet to start on dinner and have no clue what I am going to make for it. On such days, I wish that I could wave some type of magic wand and find dinner ready. I know....it is completely wishful thinking :-) Anyway the reason I mentioned this is because last week I had a few days like this, when I was running late and had to come up with something simple and quick for dinner.

This oat potato cutlet was the result of my rushed preparations. I made this cutlet to use as a sandwich stuffing in a sandwich much like this one,  and it tasted awesome in the sandwich. It also tasted very good on its own too. You cannot make out that there is oatmeal in this cutlet making it ideal for those of you who want to sneak in oatmeal to picky eaters. Hmm......I never knew rushing around in the kitchen to get dinner ready could produce such yum results, maybe I should get late more often :-)

Oat Potato cutlets- Burger Patty/Sandwich stuffing


Click here for a printable view of this recipe

Ingredients and Method to make Oat Potato Cutlets
5 medium white potatoes (cooked until soft) or 7 slightly smaller potatoes
1/2 cup rolled oats
2 cups frozen peas (thawed to room temperature)
1 tbsp oil
3/4 tsp cumin seeds (jeera/ jeeragam)
4 Thai or Indian variety green chilies cut very fine (or to taste) (hara mirch/ pachai molagai)
1/2 tsp garam masala (or any other curry powder)You can find my recipe for garam masala here
1/2 tsp red chili powder (or to taste) (optional)
salt to taste

Dry roast and powder
1/2 tsp cumin seeds
3/4 tsp coriander seeds

a little extra oil to shallow fry the cutlets

Cook the potatoes, cool to room temperature, peel the skin, mash roughly and keep aside.

Dry roast rolled oats, cool to room temperature and grind to a fine powder. Keep this powder aside.

Dry roast cumin seeds and coriander seeds until aromatic, cool and grind to a fine powder. Keep this powder aside.

In a heavy bottomed pan heat oil, add cumin seeds to it. When the seeds begin to sizzle add green chilies, stir a couple of times, then quickly add green peas. Stir a few times, cover the pan with a lid and allow the green peas to cook until soft.
The copyright of this content belongs to Veginspirations.com 

Add garam masala, red chili powder and salt to taste and mix well.

Add the mashed potatoes and mix thoroughly.  Mash this mixture a little with a potato masher. Finally add powdered oats and mix well. At this point the mixture will get a bit thick and stiff. Cool the mixture to room temperature or until you can comfortably hold it in your hand. Shape into cutlets, heat a griddle/tawa/flat pan and place the cutlet on it. Add a few drops of oil and allow the lower side to cook until golden brown, flip over and cook the other side to golden brown as well.

Remove and serve hot with ketchup or any other sauce or use the cutlet as a sandwich stuffing.

Notes
I used this cutlet as a sandwich stuffing in a sandwich similar to this one, only without the chutney. Tasted awesome, in case you plan to make this as an appetizer or you plan to use spicy chutney in your sandwich, you can scale down the spice levels slightly if you want. In a sandwich without chutney, this level of spice worked out perfectly.
Read more ...

Wednesday, August 25, 2010

Brown Rice and Lentil Cutlets

Leftover rice can sometimes provide a bit of a challenge to me. Sufficient quantities of rice quickly get turned into a rice dish and consumed. But if there is very little leftover it cannot be used in rice dishes and I have to rack my brains trying to figure out what else I can make with it to use it up. Sometimes I use up the rice by making muthias, but this time around, I came up with the idea of making some cutlets with leftover rice.

I added some lentils and vegetables to make it more nutritive. I was a bit wary that the rice would stand out in the cutlet especially because I used brown rice. But surprisingly the ingredients blended together amazingly well, the rice did not stand out at all. We enjoyed these cutlets as a snack and equally enjoyed the cutlets stuffed in a sandwich. If you have been wanting to start using brown rice in your diet, this cutlet could be a great place to start.......

Photobucket

Click here for a printable view of this recipe

Ingredients and Method to make Brown Rice and Lentil cutlets

2 cups mixed vegetables ( I used a combination of carrots, peas, beans and corn)
1/2 cup split red lentil (masoor dhal) (see notes for substitutions)
3 cups pre cooked brown rice ( I used brown basmati)
1 cup loosely packed whole wheat bread crumbs (can be substituted with any other kind of bread)

1/2 tsp red chili powder (or cayenne pepper) (or to taste)
1/2 tsp coriander powder (dhania)
3/4 tsp cumin powder (jeera)
1/2 tsp garam masala (or any other curry powder)
2 pinches dried fenugreek leaves (kasuri methi ) (optional)
salt to taste
2 tbsp lemon juice (or to taste) (optional)
A few drops of oil to shallow fry the cutlets

Cook the vegetables in the microwave or the stove top, only adding water as required, until the veggies become soft but not mushy, keep aside.
Cook the lentils on the stove top or in the microwave, only adding water as required until the lentils are cooked and mushy.
 The copyright of this content belongs to Veginspirations.com

Place a medium/ large pan on heat. Add cooked vegetables, all the spices, salt to taste and mix well. Add precooked rice and lentils and mix well.
Add breadcrumbs and mix well. When the bread crumb is added it will make the entire mixture a little thick and firm. Add more breadcrumbs if required, I did not need any more this quantity worked perfectly.

Allow this mixture to cool to room temperature, then shape into cutlets. Heat a flat pan/griddle/tawa and place a few cutlets on it, add a few drops of oil and allow the cutlets to cook for a few seconds. When the lower side turns golden brown, flip over and cook the other side. When the other side is golden brown as well, remove and serve hot with ketchup/sauce as an appetizer or snack, or stuff in a sandwich or use in a burger or even serve it with some hearty soup to make a complete meal.
Yield will depend on the size and thickness of each cutlets.

Notes:
Red lentil can be substituted with split pigeon peas (tur dhal) or split mung bean lentil (moong dhal). The reason I chose red lentils was because it cooks really fast.
Read more ...

Tuesday, August 10, 2010

Potato with Anaheim pepper curry ~ Aloo ki subzi

Peppers of all kinds makes our food interesting don't you think?  Even imagining food without any kind of peppers seems boring. But peppers do more than lend flavor to food, here are some cool facts about peppers that might surprise you....

Peppers of all kinds are rich in vitamins A,C and K. Specifically with regard to hot peppers, the substance that gives hot peppers their heat is known as capsaicin. The capsaicin in hot peppers has been to shown to reduce blood cholesterol and triglycerides and boost immunity. Both hot and sweet peppers have been shown to increase body's heat production and oxygen conyumption for twenty minutes after eating which means that it helps the body to burn more calories

Cool huh? Usually I use a lot of bell peppers in my cooking, in everything from pastas to curries. But I cannot remember if I have ever used anaheim peppers in any sort of cooking. In fact I am pretty sure that I haven't. This time too, these peppers made it into my grocery cart only because of R. He egged me on to pick these up when we saw it in the store and I did....... without having any idea of what I would make with it when I got home. On an impulse I decided to use it in a curry......and loved how the curry tasted. Now I know I am going to go look for these peppers the next time I go grocery shopping. Hmm...maybe I should ask R to go grocery shopping with me more often :-)

 Potato with anaheim pepper curry ~ Aloo ki subzi

Click here for a printable view of this recipe

Ingredients and Method to make Potato with pepper curry
5 to 6 medium white potatoes (aloo/ urilakizhangu) cooked until soft (peeled and cut into 1 inch pieces) (yielded approx 4 and 1/2 cups of potatoes
2 to 3 large Anaheim peppers deseeded and cut into 1/2 inch pieces (yielded approx 1 and 1/2 cups of pieces) (can be substituted with banana peppers/or any other type of bajji molagai, see notes)
1 large onion cut fine

1 Tbsp oil
3/4 tsp cumin seeds (jeera/ jeeragam)
1/4 tsp turmeric powder (haldi/ manjal podi)
1/2 tsp chili powder (lal mirch/ molaga podi) (or to taste)
salt to taste (namak/ uppu)
1/2 tsp cumin powder (jeera/ jeeragam)
1/2 tsp coriander powder (dhania)
1 tsp lemon juice (limbu/ elumbichampazham) (or to taste)

Cook potatoes until soft. Cool, peel the skin and cut into 1/2 inch pieces and keep aside.

Heat oil in a large heavy bottomed pan, add cumin seeds. When the seeds begin to splutter, add onion and saute until onions are transparent. Add turmeric powder and stir a couple of times.
The copyright of this content belongs to Veginspirations.com

Add Anaheim peppers, cumin powder, coriander powder and stir. Keep stirring until the peppers are cooked yet a little firm and a little crisp.

Add cooked potatoes, salt to taste, red chili powder if using and mix well.
Remove from heat, add lemon juice, mix well and serve hot with rotis/phulkas or use as a stuffing in sandwiches like this one
Serves approximately 2 to 3

Notes
Anaheim peppers have a fair level of heat/ spice in them, so keep that in mind when you are adding red chili powder. If you do not want a very spicy curry just skip the red chili powder

Anaheim peppers can also be substituted with banana peppers or even bell peppers/ capsicum. If you do use banana peppers (bajji molagai) or bell peppers (Capsicum/ simla mirch/ koda molagai) these kind of peppers tend to be much milder than anaheim so make adjustments to the red chili powder to achieve required spiciness/ heat.
Read more ...

Monday, June 15, 2009

Red Kidney Bean and Vegetable Cutlets (Rajma Cutlets)

How would you like it if you could sleep and help yourself maintain a healthy weight or even lose a little weight because you slept, that would be really cool wouldn't it? If you think that is impossible, read on to know a little more about an interesting connection between sleep and weight loss that might surprise you.

Did you know that people who slept less than five hours gain more weight over time than those that sleep seven to eight hours . Studies have found that sleep deprivation causes the body to increase production of the hunger hormone causing us to crave more food during the day. Some studies also show that when we are deprived of sleep we tend to crave more fattening foods.So if you are among those that sleep less than five hours here is a good reason to sleep a little longer....you don't have to feel bad about missing those late night shows on television anymore...after all health comes first doesn't it ? :-) If you would like to read a more detailed article on this topic click here

Moving on here is a healthy and protein rich cutlet made with red kidney beans (rajma) that I made to use as a filling in sandwich made with my oat pav (bread). Try this for a healthier version to the regular all potato / bread cutlets, this one does not compromise on taste and it is quick and simple too.

Red Kidney Bean/ Rajma Cutlets


Ingredients and Method to make red kidney bean cutlets

1 cup red kidney beans soaked for about 8 hours with a pinch of soda (soda is optional)
4 small potatoes
2 cups mixed vegetables ( I have used any combination of green beans, corn, green peas, and carrot)
4 slices of day old bread (powdered in a spice grinder to a coarse mixture) (yielded approx 1 and 1/2 cups of bread crumbs)
1/4 to 1/2 cup fine semolina (semolina flour/ rava) (see notes)
1/2 tsp red chilli powder (optional) (or according to taste)
1/2 tsp garam masala (optional or to taste) (my recipe for homemade garam masala can be found here) 
salt according to taste

1 tbsp oil
1 tsp cumin seeds
3 Thai or Indian green chillies (or to taste)
1 inch piece ginger grated fine/ minced

a little extra oil to shallow fry the cutlets

Soak red kidney beans for about 8 hours or overnight with a pinch of soda (the soda is optional)

Drain red kidney beans and place in a pot with fresh water and simmer on a low heat until cooked. Alternatively drain red kidney beans and place in a pressure cooker with sufficient water and cook until soft. Drain any excess water after cooking the kidney beans and keep the beans aside.

Cook potatoes with skin either in the pressure cooker or stove top or microwave until soft and keep aside.

When the potatoes are cool, peel potatoes, mash them and keep aside.

In a heavy bottomed pan heat oil and add cumin seeds to it. When cumin seeds begin to sizzle, add green chilies and ginger and stir a couple of time. Add mixed vegetables, salt to taste, chilli powder, garam masala, sprinkle a few drops of water and cook on a low flame until the veggies are tender crisp. 

Add mashed potatoes to the cooked vegetables and mix well.

Add cooked red kidney beans to this mixture and mix well. Using the back of you spatula or a potato masher, mash the mixture gently until most of the vegetables, beans and potatoes get mashed. Alternatively, cool all the vegetables, add to a food processor and process until the veggies all break down into coarse mixture.

Add bread crumbs to this mixture and mix well. Add semolina a little at a time, mixing well. At this point, the mixture will be thick and you should be able to form a patty/ cutlet with it.
The copyright of this content belongs to Veginspirations.com 

Cool slightly and form into lemon sized or orange sized balls,depending on how large a cutlet/ patty you want to make, and flatten it slightly.

Heat a flat pan/ griddle/ tawa on medium high, place the flattened cutlets on them and add a few drops of oil around the cutlets. Turn over and fry the other side similarly.

Serve hot with ketchup as a snack/ appetizer or use as a patty in your burger or in a sandwich

Yield will depend on the size of the cutlets.

Notes:
The quantity of semolina will depend on how moist the mixture is, too moist may need 1/2 cup, lightly moist may need just 1/4 cup or a little more. Add the semolina a little at a time assessing once or twice to see if you are able to form a patty/ cutlet with the mixture. 

Read more ...