Showing posts with label Nutrition facts. Show all posts

Tuesday, July 1, 2014

Dudhi/ Lauki sabzi ~ Bottlegourd in peanut gravy curry ~ With Stepwise Pictures

Here's the thing I like most about bottle gourd/ calabash or lauki/ dudhi , it is a great veggie to consume when counting calories. This gourd has one of the lowest calorie counts,  100 gms of the vegetable only has about 14 calories or so. It is one of those veggies that contains mostly water, yet it is also rich in vitamins and minerals. This vegetable is also said to be heart healthy,  benefits in weight loss and is supposed to be good for aiding digestion.

If all the above reasons aren't enough, here is one more reason to like dudhi....it's very versatile. It works well in a good range of recipes. Usually I make this kootu with it if I am planning for a south Indian menu or if I am planning to make dudhi to go with phulka I make a curry that is somewhat similar to this curry. But recently I wanted some kind of "different" curry to make with dudhi, but was not in the mood for something elaborate like kofta. So I decided to make a curry with a gravy that is similar to the one I used in this capsicum/ bell pepper masala.  We loved this curry, it was rich, creamy and tasted amazing with phulkas. It is really quick and easy to make too, so that's an added bonus. So if you have dudhi on your menu this week or weekend, give this recipe a try and enjoy it with some phulkas/  flat bread or even plain steamed rice:)


Click here for a printable view of this recipe

Ingredients and Method to make Dudhi/ Lauki sabzi
5 and 1/2 cups Bottlegourd pieces of about 3/4 inch each (lauki/ dudhi/ sorakkai) (about 2 small bottlegourds)
2 medium tomatoes cut fine (tamatar/ thakkali)
1 Tbsp oil
3/4 tsp cumin seeds (jeera/ jeeragam)
1/4 tsp turmeric powder (haldi/ manjal podi)
1/4 tsp red chili powder (optional, or to taste) (lal mirch/ thani molaga podi) 
salt to taste

Garnish
2 Tbsp finely cut cilantro (coriander leaves/ hara dhania/ kothamalli)

For the masala ( dry roast each ingredient separately and grind into smooth paste)
3 Tbsp raw peanuts (groundnuts/mungphali/verkadalai)
1 Tbsp sesame seeds (til/ ellu)
1/2 Tbsp coriander seeds (dhania)
3 dry red chilies (or to taste) (lal mirch/ molagai vathal)
3 Tbsp grated coconut (nariyal/ thengai poo)

Peel and cut bottle gourd into 3/4 inch pieces and keep aside. Prep all other veggies and keep aside.

Dry roast each of the items mentioned under masala separately and keep aside to cool. The peanuts until light pinkish, sesame seeds until it splutters a little, coriander seeds until aromatic, red chilies for just a few seconds until it is warm and coconut until it turns lightly creamy golden. Coriander seeds and red chilies can be roasted together. Cool to room temperature and grind together with a little water until it is a smooth paste.


Heat oil in a heavy bottomed pan, add cumin seeds. When the seeds splutter, add tomatoes and stir until tomatoes are cooked and soft.

Add turmeric powder and stir a couple of times. Add bottle gourd pieces, salt to taste, chili powder if using and a little water and allow the bottle gourd to cook until it is soft but retains its shape.

Add masala paste, water as needed to achieve required consistency and simmer for a few minutes until the flavones mingle. Garnish with cilantro.

Remove from heat and serve hot with phulkas/ rotis/ chapathis/ Indian flat bread. 
Read more ...

Tuesday, March 25, 2014

Cabbage Carrot Curry ~ Poriyal ~ With Stepwise pictures

Recently I came across this article on cabbage that really amazed me. I mean, I always knew that cabbage is a very healthy vegetable and that it is a vegetable that has one of the lowest calories when compared to other vegetables. I have even mentioned its cancer fighting properties and other health benefits in this earlier post. But the article I came across was even more detailed than a lot of other articles I have read about this vegetable. It explains that cabbage prevents blood pressure from getting high, it has anti inflammatory properties and that it also regulates blood sugar. Not only is it so good internally, apparently it is also said to be very good for healthy hair, nails and skin. Amazing isn't it? I think I need to use cabbage much more frequently in my kitchen than I do now :)

And if you think the same thing, than here is a super easy curry that I make often when I plan a south Indian menu. This curry is a perfect side dish for plain steamed rice and either sambar, rasam or mor kozhambu (south Indian kadhi) on the side. But it is not necessary that it should be paired with rice only, it  tastes just as well with a phulka/ chapathi (Indian flat bread) if you do not want to fuss with rice. 


Click here for a printable view of this recipe

Ingredients and Method to make Cabbage Carrot Curry
Half a head of cabbage (band gobi/muttaikos) cut fine (yielded about 3 and 1/2 cups of cabbage)
4 large carrots (gajar) cut into small pieces (yielded 3 cups of cut pieces of carrots)
1/4 tsp turmeric powder (haldi/ manjal podi)
salt to taste (namak/ uppu)

Seasoning
1 Tbsp coconut oil
1 tsp mustard seeds (rai/ sarson/ kadagu)
1 tsp split black gram lentil (udad dhal/ ulatham parappu)
pinch of asafoetida powder (hing/ perungayam)
1 sprig of curry leaves (kadi patha/ karvapillai ) (about 8 to 10 leaves)
2 dry red chilies (lal mirch/molaga vathal)

Garnish with
4 Tbsp freshly grated coconut (or frozen thawed to room temperature)

Prep the vegetables and place in a heavy bottomed pan. Add turmeric powder, salt to taste and about 1/4 cup of water. Place on medium heat, cover with a lid and allow the vegetables to cook until soft. Stir a few times in between to ensure even cooking.


In another small pan, heat oil on medium heat. Add mustard seeds, when the seeds begin to pop, add split black gram lentil and stir a few times. When the lentils begin to redden slightly, add asafoetida powder, curry leaves and red chilies and stir a few times. Remove from heat and pour the entire seasoning on the cooked vegetables.


Adjust salt to taste if required, mix well and allow the curry to heat through. Garnish with coconut, remove from heat and serve hot with plain steamed rice and sambar/ rasam/ or any other kozhambu. This time I served it with this Thakkali mor kozhambu/south Indian style kadhi/ Tomato buttermilk curry and plain steamed rice.


Read more ...

Wednesday, May 15, 2013

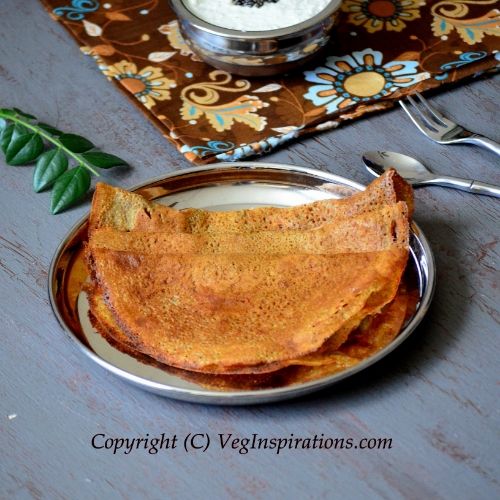
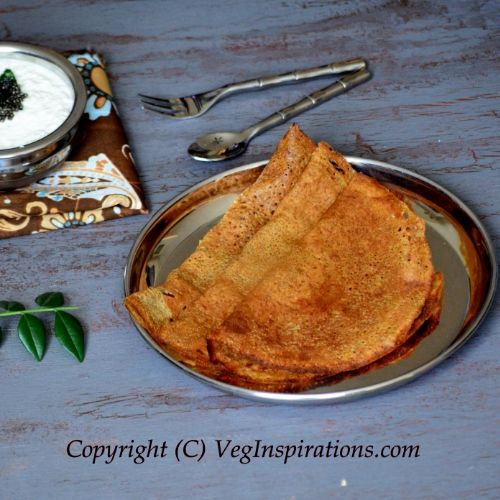
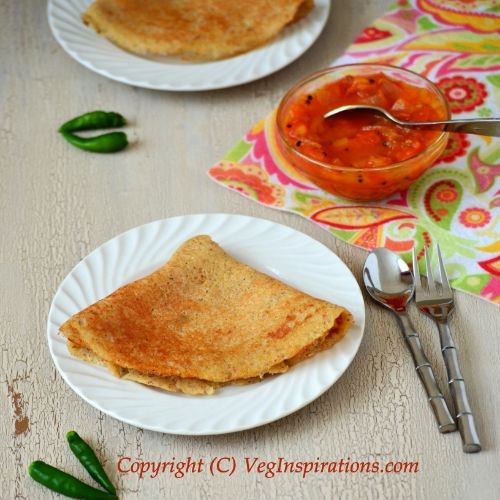
Instant Multigrain dosai (Savory Indian crepes)

Pearl Millet which is known as bajra/ kambu in Hindi/ Tamil has numerous health benefits. Pearl Millet is a good source of protein, fiber and has many essential minerals like magnesium, phosphorous and zinc.   Studies show that magnesium is not only important for good heart health but has also proven beneficial in reducing the severity of asthma attacks, reducing blood pressure and in reducing frequency of migraine attacks.

Pearl millet is also recommended for stomach ulcer as it has alkaline properties and ulcers are often caused by excess acidity. So consuming pearl millet is supposed to help in reducing the effect of ulcers and in preventing the formation of ulcers. All kinds of  millets including pearl millet are said to help in reducing the risk of cancer. Amazing isn't it that this grain has such amazing benefits. For a while now I have been wanting to include some form of pearl millet into our regular diet.

Instant Multigrain dosa

I decided to start with pearl millet flour with the intention of trying it out in something like thalipeeth (a flat bread from Maharashtra, a region in western India)  But before I got around to doing that I decided to use it in dosai. Dosai (Savory Indian crepe), as regular readers of this space might have already guessed is my favorite kind of food :) And I never seem to get tired of trying out different kinds of dosai, especially the instant kind that comes in so handy for weekend morning breakfasts :) This one has all the goodness of oats, finger millet (nachni/ ragi) , buckwheat and pearl millet (bajra) and the best part, you can never tell from the taste that everything in it is so super healthy. It turns out thin and with crisp edges and softness in the center. Just perfect :) Pair it with your favorite chutney/ sambar or potato masala curry and enjoy :)

 Instant Multigrain dosa- Savory Indian multigrain crepes

Click here for a printable view of this recipe

Ingredients and Method to make Instant multigrain dosai
1/2 cup buckwheat flour (kuttu ka atta)
1/2 cup oat flour (see notes)
1/4 cup rice flour (chawal ka atta/ arisi maavu)
1/4 cup millet flour (bajra/ kambu )
1/4 cup finger millet flour (nachni/ ragi)

salt to taste
1/2 tsp cumin seeds
1/4 tsp turmeric powder (optional)
1/2 tsp red chili powder (or to taste) (can be substituted with cayenne powder)
pinch of asafoetida (hing/ perungayam) (optional)
3 tbsp finely chopped cilantro (coriander leaves/ kothamalli) (optional but recommended)
a little sesame oil to shallow fry the dosai/ crepes

In a large bowl add all the flours and mix well. Add all the spices except cilantro and mix well again.

Add water to make a batter of pouring consistency. When adding water, add a little at a time and err on the side of a thicker batter, if needed water can be added later to adjust consistency. Finally add cilantro and mix well.
The copyright of this content belongs to Veginspirations.com

Allow this batter to "rest" for an hour or two.  This step is important because as soon as the batter is ready if you try to make dosai with it, it tends to roll a little and comes out thicker and chewier, but after an hour or two, the dosai comes out thin and crispy.

Heat a flat pan/ griddle/ tawa on medium to medium high heat. Mix batter thoroughly again, as some settling can occur for this batter. When hot,  pour a ladle of batter in the center and quickly spread into a circle. Spread very thin for a crispier dosai and a little thicker if you want a soft dosai. Add a few drops of oil around the circumference of the dosai.  When the lower side is golden brown,  flip over and cook the other side until it has small brown spots.

Remove from  heat and serve hot with chutney of choice/ sambar of choice or this potato masala curry

The balance of the batter can be stored in the refrigerator and used up in two to three days. If you plan to make this for breakfast and do not want to wait for the batter to "rest" in the morning, you can make the batter  a day ahead and stick it in the refrigerator too :)

Notes:
If you do not have oat flour, you can just powder quick cooking oats/ 1 min oats in the spice grinder/ mixer/ blender until you have fine powder and use it in this recipe
Read more ...

Tuesday, March 19, 2013

Buckwheat Upma

Buckwheat, despite its name is not related to wheat in any way. It is actually a grain like fruit seed, from a plant that is called Fagopyrum esculentum, and is related to plants like sorrel and rhubarb. Buckwheat is known to have some amazing health benefits, it is said to lower the risk of developing high cholesterol and high blood pressure. Some studies find that the nutrients in buckwheat may contribute to blood sugar control and may be helpful in the management of diabetes. Buckwheat is also a great source of magnesium, iron, potassium, zinc, selenium and is also very high in fiber.

 Buckwheat upma ~ Buckwheat pilaf | Veg Inspirations

Recently on a trip to my local health food store I  came across roasted buckwheat and decided to give it  a try. As with some other grains I have tried in the past, in this instance too I had no clue what I would use it in, or how it tastes. I just knew that it was very healthy and that I wanted to try something with it. After discarding many ideas I finally decided on trying a simple upma with it. Upma is a savory Indian snack, traditionally served as a light dinner or at breakfast usually made with many different ingredients, the most popular version made with semolina.

I didn't really know what to expect and was pleasantly surprised that the upma turned out so well. Buckwheat has a slightly nutty and chewy taste when cooked and the flavors of this upma worked very well with the nutty taste of buckwheat. The upma had an almost pilaf like feel to it and this was a very filling and satisfying dish. I can't wait to try buckwheat in a host of other dishes, I definitely plan to use a lot more of it in my kitchen :)

Buckwheat upma-Kuttu upma

Click here for a printable view of this recipe

Ingredients and Method to make Buckwheat upma
1 and 1/2 cups roasted buckwheat (kasha/kuttu) (can be substituted with raw buckwheat )(see notes)
1 red onion cut fine
2 medium tomatoes cut fine
1/4 head of cauliflower broken into florets
1 large red bell pepper deseeded and cut into 1/4 inch pieces (can be substituted with green bell pepper/capsicum/koda molagai)
1/2 cup fresh or frozen peas (if frozen thaw to room temperature)

2 tsp oil + 1 tbsp oil
4 Thai or Indian variety of green chilies cut fine (or to taste)
7 to 8 curry leaves
1 tsp mustard seeds
1 tsp split chick pea lentil (chana dhal/ kadalai parappu)

Salt to taste
4 tbsp finely chopped cilantro/ coriander leaves for garnish
1 and 1/2 tbsp lemon juice for garnish (or to taste)

Roast the buckwheat in 2 tsp oil on low to medium low heat in a heavy bottomed pan. This just took a couple of mins (if you have raw buckwheat, see notes) Remove and keep aside.

In the same pan heat the rest of oil on medium heat, add mustard seeds, when the seeds begin to splutter, add chick pea lentil and stir until it turns reddish. Then add green chilies and curry leaves (keep a lid handy as sometimes, curry leaves splutter a little and cause oil to splatter slightly. Stir a couple of times, then add onions and saute until it turns translucent. Add tomatoes and stir until the tomatoes turn soft and mushy.

Add all the vegetables, salt to taste and about 1 cup of water and allow the vegetables to cook until soft, yet not mushy.
The copyright of this content belongs to Veginspirations.com

When all the vegetables are cooked, add water as required (see notes for quantity of water) , salt to taste and bring to a boil. When water is boiling,. lower heat and add buckwheat and allow it to cook until soft, stirring in between to ensure even cooking.

Finally garnish with cilantro and lemon juice to taste and serve hot with chutney or pickle or even on it's own.

Notes:

I purchased roasted buckwheat, so the roasting I did just before making upma was just to enhance flavor. If you get raw buckwheat, you may need to roast over low heat for a few minutes more, until it achieves a  golden brown color and is evenly roasted.

To cook buckwheat, water is added at twice the ratio of buckwheat. That is, one cup of buckwheat requires 2 cups of water to cook it.  After the vegetables are cooked, if there is plenty of water left in the pan, adjust the water you add, bring to boil, then add buckwheat. I had approx 1/4 cup of water left in the pan, so I added 2 and 3/4 cups of water, brought it to a boil and added buckwheat to it.

This Buckwheat Upma is off to the Healthy Me & Healthy Us event being hosted by my friend Priya
and to the HITS – Diabetic friendly and HITS page"
Read more ...

Tuesday, September 4, 2012

Vegan Peanut Salad

As I mentioned in this post, peanuts are very, very nutritious. Peanuts are known for being good sources of monounsaturated fats which make peanuts great for heart health. But I was surprised to learn that peanuts are also a great source of antioxidants. The antioxidants in peanuts rival the antioxidants found in fruits like blackberries and strawberries and surprisingly enough the antioxidant content of peanuts is actually greater than the antioxidants content found in apples, carrots and beets.

When I read the article about peanuts being a good source of antioxidants, I thought "good, here's another reason to munch on peanuts" :) Not that I need many reasons to munch on peanuts, since peanuts are one of my favorite snacks. I always keep some roasted peanuts at home and love to grab a handful of peanuts whenever the mood to munch on something hits me:) My friend Akila regularly makes peanut salad for our get together's and I enjoy her version every single time. Since I like it so much I have begun to make peanut salad at home more often. Over time my salad has evolved a little and my version now also included cooked corn and carrots in it.

A lot of the versions of peanut salad that I see online specify that peanuts have to be added just before serving but I like my peanuts a little soft and a little crunchy, so I mix the peanuts with the rest of the ingredients and allow the peanuts to absorb a little of the moisture released by the other veggies so that it attains that slightly juicy, soft and crunchy texture that I love so much :) This salad can also be pretty filling since it has the protein from peanuts too making it ideal for a light lunch or dinner :)

Vegan Peanut Salad

Click here for a printable view of this recipe

Ingredients and Method to make Peanut Salad
2 cups cooked corn
2 cups dry roasted unsalted peanuts without skin
2 large carrots grated
2 to 3 mini cucumbers with skin cut into small pieces
salt to taste
2 jalapenos cut fine (or to taste) (see notes)
1 tsp oil (see notes)
juice of half a lemon ( or to taste)
2 to 3 tbsp finely cut cilantro (coriander leaves) for garnish.

In a large bowl assemble cooked corn, cut cucumbers and grated carrots and mix well. 

Heat oil in a small pan and add jalapenos to it, when the jalapenos sizzle a little remove and pour this oil+jalapenos on the assembled vegetables.
The copyright of this content belongs to Veginspirations.com

Add peanuts, salt to taste and mix well. Garnish with lemon juice and cilantro leaves and mix well.

Keep the salad covered for about 30 minutes or so. Serve chilled or at room temperature.

Notes:
Jalapenos can be substituted with  Thai or Indian variety of green chilies. If using green chilies, one might be sufficient in place of two jalapenos since jalapenos tend to have less heat (spiciness) as compared to green chilies. Adjust the use of green chilies/ jalapenos to taste to achieve required level of heat. My salad is a bit mild since we like it that way:)

If completely avoiding the use of jalapenos/ green chilies the use of oil can also be excluded

Suggested variation:
Finely cut red / yellow onions can be added to this salad too :) 
Read more ...

Wednesday, June 6, 2012

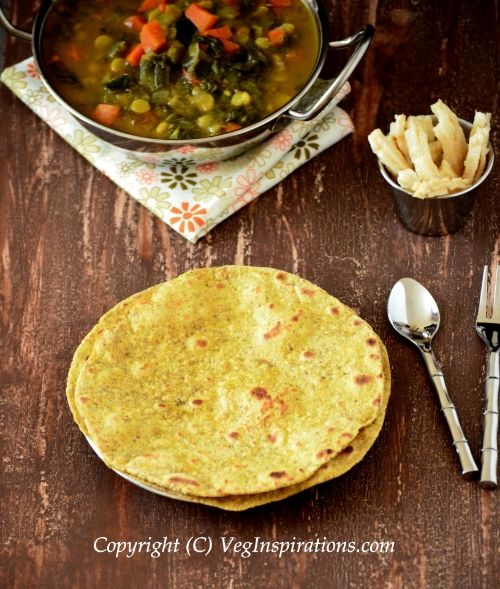
Chia Seeds Roti ~ Indian flat bread

Have you heard about chia seeds ? Until a couple of months back , the only time I heard anything about chia seeds was during the chia pet commercial that played often during the holidays. Never ever gave it a thought and definitely never thought of it as something edible let alone as something nutritious. So I was utterly surprised when my cousin Sandhya who always shares healthy tips with me,  mentioned that they had begun to use chia seeds. She said that chia seeds were a kind of super food and a great source of omega-3. 

Never one to miss out on a chance to include more healthy ingredients in our diet, I started looking up chia seeds online. From various sources, here is what I learned about these seeds. Chia seeds are said to have originated in south America and was a staple in the diets of ancient Mayans and Aztecs. Like flax seeds, chia seeds also have high levels of omega-3 fatty acids along with protein, fiber and anti oxidants. When it comes to omega-3,  2 tablespoons of chia seeds has more than 4000mg of omega, whereas 2 tablespoons of flax has about 2700 mg of it. And 2 tablespoons of chia seeds has 6.9 grams of fiber vs 4 grams of fiber in flax for the same quantity. Chia seeds also are a good source of calcium, phosphorous and manganese. It is also said to be good for stabilizing blood sugar because it slows down the rate at which carbs are assimilated by the body. It is also said to have anti inflammatory properties,  helps boost metabolism and is said to aid in weight management.

Now that I know that chia seeds are such a powerhouse of nutrients, I have been trying to get some chia seeds in our diet regularly.  Since chia seeds do not have a very pronounced taste, it is easy to include chia seeds in our diet by simply sprinkling some on cereal or salads. But I have also used it in breads and Indian flat breads. I especially love chia seeds in this version of roti. It tastes so, so good. The seeds add a touch of crunch to the roti that makes the roti so very interesting. So if you are in the mood for trying something new and have a packet of chia seeds in your pantry this might be something that interests you, give it a try and tell me what you think :)

 Chia Seeds Roti-Indian Wheat flat bread with chia and spices

Here is a pic of the chia seeds...................

Chia seeds photo d4447b95-2c08-4735-b4cd-000b6723658a_zpsd768146b.jpg

Click here for a printable view of this recipe

Ingredients and Method to make Chia seeds Roti
2 cups whole wheat flour (atta/ godumai maavu)
3 tbsp whole chia seeds soaked in 1/2 cup of water for about 30 mins (can be substituted with milled chia seed/ chia seed powder, see notes)
salt to taste
1/4 tsp turmeric powder
1/2 tsp red chili powder
1/2 tsp cumin powder
1/2 tsp garam masala (or to taste / can be substituted with any other curry powder)
water as needed
1 tsp oil
a little extra flour for dusting
a few drops of oil/ clarified butter (ghee/nei) (optional) (use oil for a vegan version)

Soak chia seeds in approx 1/2 cup of water for 30 mins or so. Mix once halfway to ensure even soaking, the chia seeds become gelatinous and kind of thick.

In a  large bowl, assemble all the dry ingredients and mix well.  Add the soaked chia seeds along with the water and mix into the flour. Add water as needed to knead into a soft and non sticky dough, add 1 tsp oil and knead again.
The copyright of this content belongs to Veginspirations.com

Keep dough covered and allow it to "rest" for at least thirty minutes

Divide dough into equal lemon sized balls. Using a little flour for dusting roll the dough into an even circle of desired thickness.

Heat a flat pan/ griddle/ tawa on medium heat. When hot place rolled out dough on it and allow it to cook until light brown spots appear on the lower side. Flip over and cook the other side until light brown spots appear on it.

 If you plan to use clarified butter/ ghee/ oil, it can be applied to the side facing upwards after flipping the roti and flip back again for the other side to cook for another few seconds. Using oil/ ghee is not required at all, since this roti is pretty soft as it is, especially if served immediately after making.

Remove and serve hot with curry of choice/ dhal of choice

Notes:
You can also used milled chia seeds / chia seed powder for this recipe. If you do, then just mix the powder into the flour along with the spices, then add water and knead into a soft non sticky dough. Proceed with the rest of the recipe as mentioned above. I've used both and notice that when using ground chia seeds, it blends in better and the roti tastes more conventional, whereas when using the whole chia seeds it adds a light crunch to the roti that I personally like but which definitely cannot be described as conventional :)


If you are looking for roti varieties, here are a few more


Spring onion Roti ~ Hare pyaaz ki roti

Carrot Roti ~ Gajar Roti

Avocado Roti 


Read more ...

Wednesday, May 9, 2012

Vegan Italian Lentil Soup

Buying anything other than fruits and veggies seems to require quite a bit of time spent in reading labels these days. And labels have become so much more complicated haven't they? There are so many new ingredients used in each type of food that you feel like you need a degree in chemistry to figure out what is really used in the food. When I read about instances such as this one, it doesn't help much either and makes me feel like  I really need to learn much more about a lot of ingredients I see in labels of different foods.

One of the ingredients I see frequently is something called carrageenan. I have seen it in some ice cream labels and fruit flavored yogurt packs too. I knew carrageenan was used in place of gelatin but did not know anything about what it was made of, whether it is vegan or vegetarian, that kind of thing. Finally a few days back I got around to looking it up and found that carrageenan is a kind of  seaweed extract. There are several types of it that are used in baking and cooking, some have a gelatinous property and some don't. It is said to be a vegetarian and vegan substitute for gelatin. If you want to get more details, here is the wiki entry for it.

I was relieved to learn that carrageenan was vegan/vegetarian. I have been avoiding buying anything with it because I did not have any information about it. That said I am still a little on the fence about it and would like to know more about it before I start to buy stuff that has this ingredient. If you have come across this ingredient and know more about it do share the information below, I would love to hear your opinions on this ingredient :)

Moving on, usually whenever I plan to make some soup I start to think of which bread will be good with it. This time it happened the other way around :)  I wanted to make rosemary foccacia bread and I wondered which soup would taste good with it. After taking stock of my pantry and vegetable bin, I decided upon this lentil soup that seemed quick and simple. I tweaked the recipe a little, skipped the cheese to make this a vegan soup and changed out the herbs a bit. The result was this hearty delicious soup that tasted very good with the wheat foccacia bread I made to go with it. We loved the soup so much I have already made this a few times now and I am sure will make it frequently in the future too :)

Vegan Italian Lentil Soup

Click here for a printable view of this recipe

Ingredients and Method to make Italian lentil soup

1 1/2 cups whole dry lentils (whole masoor dhal)  soaked for 30 mins in sufficient water (the same kind used in this salad)
1 medium onion cut fine
1 can 14.5 oz diced tomatoes
2 large carrots cut into 1/4 inch pieces
3 celery sticks cut very fine
3/4 cup dry multi grain elbow pasta (or any other small pasta)
2 tbsp extra virgin olive oil
1 tsp minced garlic
1 tsp Italian seasoning
1/2 tsp dried rosemary (optional)
salt to taste
pepper powder to taste

Soak lentils in sufficient water for about 30 minutes.

In a large heavy bottomed pan heat oil, add onions and saute until transparent. Add minced garlic and stir a couple of times. Add  diced tomatoes, carrots, celery, soaked and drained lentils and water (or vegetable stock) as required and allow the vegetables and lentils to cook until almost done.
The copyright of this content belongs to Veginspirations.com

Add elbow pasta, salt to taste, Italian seasoning, dried rosemary, pepper to taste and allow the soup to simmer until pasta is cooked. Adjust water/ stock if required and simmer for a few more minutes until the flavors mingle.

Serve hot with bread of choice. I served this with rosemary foccacia bread.

Read more ...

Tuesday, January 31, 2012

Thai Eggplant Curry

If you workout regularly then you know that sometimes it can get a little more intense than planned, resulting in aching muscles. At least that's how it turns out for me sometimes, I decide to workout a little more than usual and my muscles protest the next day. I usually ignore it and make sure not to push too much the next few times I workout. I have never thought of using or including particular foods in my diet as a way to soothe sore muscles, frankly I was quite surprised to learn that there are some foods that can actually help in soothing sore muscles.

Curious about which foods help? According to an article I came across recently, the foods that are supposed to help are blueberry, tart cherries, pomegranates and ginger. Blueberries, cherries and pomegranates contain a lot of antioxidants that may help in warding off muscle fatigue. In case of ginger, it contains a lot of inflammation fighting compounds such as gingerols that may soothe sore muscles. Cool, huh? I am going to keep this in mind for the next time I have sore muscles from too much workout :-)

Moving on to the Thai eggplant curry.....it was just something I came up with for a quick dinner one day. I used a combination of some Indian eggplants and bell pepper along with red curry paste and served it up on a bed of plain steamed rice. The picture was taken in a hurry and doesn't do this curry any justice, but trust me the curry was way more delicious than it looks in the picture :-) I also loved how quick it was to put this curry together, the entire dinner got ready in something like just thirty or so minutes . So if you are looking for a quick curry and you like eggplant, maybe this curry is something you would enjoy :-)

Thai Eggplant curry

Click here for a printable view of this recipe

Ingredients and Method to make Thai Eggplant Curry
1 large red onion cut into 1/4 inch pieces
1 large green bell pepper (capsicum/ koda molagai) deseeded and cut into 1/4 inch pieces
12 to 13 medium sized Indian eggplants cut into 1/2 inch cubes

2 tbsp oil (preferably coconut oil)
1 inch piece of ginger minced
4 tsp red curry paste (or to taste)
salt to taste
1 tbsp low sodium soy sauce
1/2 tsp red chili powder (optional) (or to taste)
1/2 cup coconut milk (or to taste)
handful cilantro cut fine (for garnish)
water as needed

Heat oil in a large heavy bottomed pan, add onions and on medium heat saute the onions until they are transparent.

Add minced ginger and stir a few times. Then add green bell pepper, eggplant, salt to taste, soy sauce, chili powder (if using) , red curry paste and water as required to cook the vegetables until soft.
The copyright of this content belongs to Veginspirations.com

When the vegetables are cooked, add coconut milk. Simmer for another couple of minutes until the flavors mingle.

Finally garnish with cilantro and serve hot with plain steamed rice.
Read more ...

Wednesday, January 25, 2012

Oat Bran Muffin (Egg Free)

Oat bran is the edible, outermost layer of the oat grain. Like oatmeal, oat bran contains a good amount of heart healthy soluble fiber. It also contains a considerable amount of minerals including magnesium, copper and manganese. Just as with oatmeal, oat bran is also said to help in reducing cholesterol and is said to help in stabilizing blood sugar.

For a while now I have been wanting to use more bran in my diet. During my last visit to the health store I finally picked up both oat bran and wheat bran intending to use them in my baking. Initially I started using oat bran in small quantities in my yeast breads. Then I moved on to using it in muffins. This muffin is the first kind that I made with so much bran and I have to admit, I was a little wary about the texture of the muffin. But the muffin turned out to be very soft,not too chewy and definitely not very dense either.This is a pretty filling muffin because of the fiber in it and would make for a good option for breakfast on the go, or a travel snack too. If you have some oat bran lying around in your pantry, give this one a try and tell me what you think:-)

 Egg Free Oat Bran Muffin

Click here for a printable view of this recipe

Ingredients and Method to make Oat Bran Muffins
Dry Ingredients
1 cup oat bran
1/2 cup whole wheat flour
1/2 cup all purpose flour
1/2 tsp salt
1/2 cup sugar
2 tsp baking powder
3/4 tsp baking soda
1/2 cup plump dark raisins

Wet Ingredients
3 tbsp flax seed meal (alsi powder/ali virai)  + 9 tbsp water
1/4 cup oil
1/2 cup milk
1 1/2 tsp orange extract

Pre heat oven to 375 deg F. Line a muffin tray with muffin liners and keep aside.

In a large bowl add all the dry ingredients, mix well and keep aside.

In a small bowl whisk flax seed meal and water until it becomes gelatinous. Let sit for a couple of minutes, then add oil to it and mix well.
The copyright of this content belongs to Veginspirations.com

Add this mixture to the dry ingredients and mix well. Add milk to this mixture and mix gently. Finally  add orange extract, mix well.

Spoon mixture into the lined muffin tray until it is 3/4th full. Place in the oven and bake for 15 to 20 minutes or until it turns golden and a toothpick inserted in the center of the muffin comes out clean.

Remove, cool and enjoy. Store in an airtight container and use up within a couple of days for freshest taste.
Yielded approximately 10 regular sized muffins.

Read more ...

Thursday, June 9, 2011

Adzuki bean (Red chori) curry

Adzuki beans pronounced as "azuki" beans are also known as red chori or red cow peas.  According to wiki these beans are widely grown throughout East Asia and the Himalayas. These beans when cooked have a sweet and nutty flavor and like other beans are a good source of soluble fiber. Also these beans are said to be a good source of folate, potassium, phosphorous, magnesium, iron and zinc. If all the above health benefits does not make you want to put these beans on your next grocery shopping list, here is another...............these beans taste awesome in curries.

Adzuki bean curry-Red chori curry

I have been experimenting with these beans in different curries for a while now. Some of the recipes almost made it into this site too, sadly I missed taking pictures of the curries and couldn't post them here........ sigh !  Anyway this time I managed to snag a few pictures of this curry. Though the pictures did not turn out too well and do not do justice to this curry, at least it kind of gives you an idea of how the curry looks. The taste of this curry was definitely far better than the picture seems to suggest, you will just have to take my word on that :-) Or better still give this curry a try yourself, it is versatile enough to be paired with just about anything, plain steamed rice, any type of Indian flat bread like phulkas, rotis or naans or even breads like dinner rolls, pav or ciabatta!  


Adzuki Bean curry/ Red chori Curry

Click here for a printable view of this recipe

Ingredients and Method to make Adzuki bean curry
1 1/4 cup adzuki beans (red chori / red cowpeas)  soaked in sufficient water for 6 to 8 hours with a pinch of soda (soda is optional)
2 small onions cut fine
2 medium tomatoes cut fine
2 tbsp oil
1 inch piece of ginger minced
1/2 tsp minced garlic
4 Thai or Indian variety green chilies (or to taste)
1/4 tsp turmeric powder
1 tsp garam masala (or to taste) (can be substituted with any other curry powder)
Check this post for the recipe of homemade garam masala
salt to taste
1/4 cup whisked yogurt (optional) (can be skipped for a vegan version, see notes)
handful of cilantro (coriander leaves/ kothamalli) cut very fine

Soak adzuki beans for 6 to 8 hours in sufficient water. I usually add a pinch of soda to this while soaking because I feel the beans tend to be softer, but the soda can be skipped. Drain the water the beans were soaked in, fill with fresh water and pressure cook until the beans are soft but not mushy. Alternatively the beans can be cooked on the stove top until it is soft yet not mushy.

In a large heavy bottomed pan, heat oil. When hot add onions and saute until onions are transparent. Add minced ginger and garlic and stir a few times. Add tomatoes and stir until tomatoes soften and become mushy.
Add green chilies and stir a couple of times.
The copyright of this content belongs to Veginspirations.com

Remove this mixture from heat and allow to cool. Puree the onion + tomato mixture until smooth. Pour the pureed mixture back into the pan. Add turmeric powder, garam masala and the pre cooked adzuki beans.

Add salt to taste and allow the adzuki beans to simmer in this gravy for about 10 to 15 minutes. Do not skip this step as the flavors get infused into the adzuki beans while it simmers, and the resulting curry is that much more flavorful.

Finally remove from heat and just before serving add whisked yogurt if using and garnish with cilantro.

Serve hot with any type of Indian flat bread like naan/ tandoori roti, phulkas/ rotis or even breads like pav/ dinner rolls/ ciabatta bread.

Serves approximately 2 to 3

Notes:
Pureeing onion and tomatoes is not necessary, but pureeing it results in a smoother gravy. This step can be skipped if you are not particular about a smoother gravy. Only thing, if you plan to skip this step make sure the vegetables and chilies are cut very fine.

Adding yogurt is optional, this curry tastes pretty good even without it. I just add it to add a touch of creaminess. If you want to make a vegan version of this curry, you can just skip the yogurt completely.
Read more ...

Thursday, March 10, 2011

Sweet Potato and Peas in coconut gravy curry (Kootu) and an interesting fact about bananas...

An interesting fact that I came across recently about bananas, is that they are loaded with resistant starch, a healthy carb that fills you up and speeds up your metabolism. Cool huh?  This is definitely one more very good reason to grab a banana when we are hungry I guess.....for more reasons read this post.  To know more about other foods with resistant starch in them read this wiki article.  Also here is another detailed article on how resistant starch is different from regular starches and how it aids in weight loss.

Moving on, kootu usually refers to a curry from south Indian cuisine, that is made with a coconut based gravy. I have tried  a lot of vegetables in this style of curry including asparagus, red swiss chard and cabbage , but I have never tried sweet potatoes in this style of curry. When my mother in law suggested this variation of kootu the other day, I was very keen to try it. Luckily all the items required for this curry are staple pantry items and I tried this the very next day after our conversation.

The verdict.... this sweet potato curry was just loaded with flavor. The combination of sweet, spices and coconut flavor was just irresistible and the curry was so delicious that I could have eaten bowlfuls of this curry on its own if I wanted.... :-)  If sweet potatoes are on your menu this week, give this curry a try and enjoy its pleasantly unique taste:-)

 Photobucket

Click here for a printable view of this recipe

Ingredients and Method to make Sweet Potato peas in coconut gravy curry
2 large sweet potatoes (Meethe aloo/sakkarai vellikizhangu) peeled and cut into 1/4 inch cubes (yielded 4 heaped cups of cut pieces)
2 cups frozen peas (matar/pachai pattani) (thawed to room temperature) (see notes)
2 large tomatoes cut fine (tamatar/thakkali) (yielded 2 cups of tomatoes)
1/4 tsp turmeric powder
salt to taste

For the masala
2 tsp (preferably coconut oil)
1 tbsp split black gram lentil (udad dhal/ ulatham parappu)
1 tsp cumin seeds (jeera/jeeragam)
1 tsp coriander seeds (dhania)
2 tbsp sesame seeds (brown variety) (til/ ellu)
2 dry red chilies or to taste (lal mirch/ molaga vathal)
1/2 cup freshly grated coconut (nariyal/thengai) (can be substituted with frozen grated coconut thawed to room temperature

Optional seasoning
2 tsp oil (preferably coconut)
1 tsp mustard seeds (rai/ kadagu)
1/8 tsp asafoetida powder (hing/perungayam)
1 stalk of curry leaves

In a heavy bottomed pan heat 2 tsp oil and add black gram lentil and stir on low to medium low heat until it gets reddish. Then add cumin and coriander seeds and stir for a few seconds. Add sesame seeds and stir for a few seconds. Then add red chili and saute until it starts to turn color. Remove these items and place on a plate to cool. Add grated coconut to the balance oil and roast until it turns light golden color. Remove and grind to a fine paste along with the other spices in a chutney attachment/ spice grinder adding a little water as required

Add tomatoes, turmeric powder and water (approx 1/2 cup) on heat and allow the tomatoes to cook until soft and mushy. Add sweet potatoes and peas, salt to taste and some more water ( I used approx 1 cup) and allow the vegetables to cook on medium heat. This does not take very long, just a few minutes.

When cooked, add ground paste, water as required to achieve required consistency and allow the curry to simmer for a few minutes until the flavors blend a little.
The copyright of this content belongs to Veginspirations.com

If seasoning,  heat 2 tsp oil in a small pan. Add mustard seeds, when it begins to splutter add asafoetida powder and  curry leaves torn into little pieces. Curry leaves splutter in the oil and can cause some of the oil to splatter, so be careful when doing this and keep your hands and face away from the oil. When the curry leaves begin to get whitish spots, remove and pour entire seasoning on the curry.

Remove curry from heat and serve hot with rice and rasam or sambar or even to go with phulkas, rotis or any other type of Indian flat bread.
Notes:
Fresh green peas can be substituted in place of frozen peas. If you do, cook the fresh peas separately until almost cooked and then proceed with the rest of the recipe
Read more ...

Thursday, February 10, 2011

Carrot Cucumber Raita

You may have heard cucumbers being recommended as a diet food because they consist of mostly water and are low in calories. But did you know that cucumbers are also packed with nutrition. The flesh of cucumbers is said to be a very good source of vitamins A, C and folic acid. And their hard skin is rich in fiber and has a variety of minerals including magnesium, silica and potassium. In fact the reason why cucumbers are considered good for maintaining healthy skin is because it contains silica, which is said to enhance skin tone and its texture.

Sadly I come under the category of people that peel cucumbers before using them in some dishes. A habit that I am trying to break......I have resolved to try and find more ways to include the skin of cucumbers along with the flesh in the future :-)  In the meanwhile here is a simple raita (a yogurt based salad) with a combination of cucumbers and carrots that I find very refreshing, quick, delicious and colorful. This raita works really well along with any type of north Indian rice recipe like pulao or with parathas (Stuffed Indian flat bread) or even just by itself.


Carrot Cucumber Raita~Indian style yogurt based salad

Click here for a printable view of this recipe

Ingredients and Method to make Carrot Cucumber Raita
1 large cucumber (kakadi/Kheera/veldrikkai) peeled and grated
2 large carrots grated fine
1 1/2 cups whisked plain yogurt (dahi/thayir)
salt to taste (namak/uppu)
1/2 tsp red chili  powder (or to taste)
1/4 tsp cumin powder (jeera/jeeragam powder)
2 tbsp very finely chopped cilantro (coriander leaves/hara dhania/kothamalli) for garnish.

In a large bowl, mix together cucumber, carrot, salt, chili powder and cumin powder.
The copyright of this content belongs to Veginspirations.com

Add whisked plain yogurt and mix well. Garnish with chopped cilantro and serve chilled along with pulao, or other rice dishes, or with paratha.
Read more ...

Monday, February 7, 2011

Asparagus lentil coconut curry ~ Kootu

While reading about the health benefits of different vegetables, I discovered that asparagus has some amazing health benefits. This vegetable among other things,  is known for being rich in folate, for its anti inflammatory properties, anti cancer properties, anti aging properties and is also said to help in detoxifying our bodies. In addition this vegetable is also said to be good for the eyes and heart. Really what more can we ask for from our vegetables.... :-)

Once I learned that asparagus is so healthy I resolved to include it far more often in our diet.In the past I used asparagus very occasionally and when I did, it was usually in recipes like this one or in soups. I have never tried asparagus in an Indian style curry. I wanted to try asparagus in a kootu like preparation so that I could combine some protein with my veggies and get a more complete dish. Since I have already explained what kootu is in this post, I will not go into it again. Suffice to say that this asparagus kootu turned out to be a huge success and I have already made this quite a few times since the first time I tried it.....

 Asparagus Lentil Curry ~ Kootu


Click here for a printable view of this recipe

Ingredients and Method to make Asparagus Kootu
1/4 cup split pigeon peas (tur dhal/ tuvaram parappu)
1/4 cup split chick pea lentil (chana dhal/ kadalai parappu) (soaked for 20 to 30 minutes)
1 bunch asparagus ends cut off and cut into 1/8 inch pieces (yielded approx 3 1/2 cups of pieces)
1/4 tsp turmeric powder (haldi/manjal podi)
salt to taste

Grind together to a smooth paste
1/4 cup grated fresh or frozen coconut (if frozen thaw to room temperature)
3/4 tsp cumin seeds (jeera/ jeeragam)
3 dry red chilies (lal mirch/molaga vathal) (or to taste) (I used byadgi variety)

For the seasoning (optional, see notes)
1 Tbsp oil (preferably coconut oil)
1 tsp mustard seeds (sarson/ rai/ kadagu)
1 tsp split black gram lentil (udad dhal/ ulatham parappu)
pinch of asafoetida powder (hing/ perungayam)

Cook the split pigeon peas using the pressure cooker or the stove top until it is soft and mushy. Mash these lentils with the back of a large spoon and keep aside.

Grind, coconut, cumin seeds and dry red chilies to a smooth paste and keep aside.

Soak the split chick pea lentil for 20 to 30 minutes.In a large heavy bottomed pan cook the chick pea lentils adding water as required until it is soft, yet firm and retains its shape. When split chick pea lentil is ready, add asparagus, turmeric powder and more water if required and allow it to cook until asparagus is soft, yet firm.

When the asparagus is cooked, add salt to taste and allow to simmer for an additional couple of minutes.
The copyright of this content belongs to Veginspirations.com

Add cooked and mashed lentils, coconut paste and allow to simmer for a few minutes until all the flavors blend.

In a small pan, heat oil, add mustard seeds, when the seeds begin to splutter, add split black gram lentil. When the lentils begin to turn reddish, add asafoetida powder, mix once or twice and pour entire seasoning on the asparagus curry. Allow to simmer another additional minute or so and  remove from heat.

Serve hot with rice and rasam or sambar, or serve to go with some phulkas/ rotis.

Notes: 
If you want to skip the seasoning, add 1 Tbsp of coconut oil to the curry when it is simmering in the end and add 8 to 10 curry leaves torn into small pieces for garnish

Read more ...

Thursday, September 9, 2010

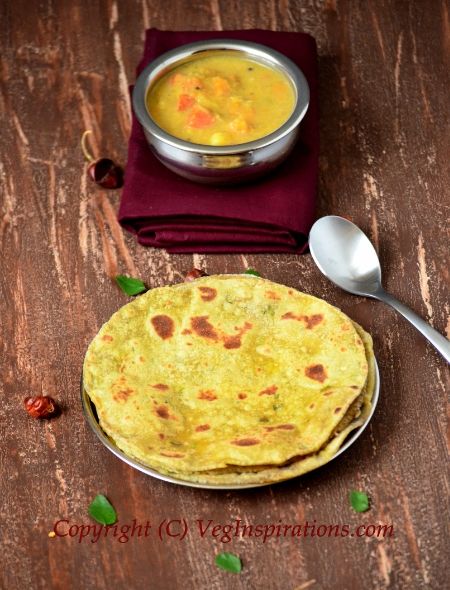
Swiss Chard Roti (Indian Flat Bread)

Recently we took a road trip and the place we visited had among other things, this amazing, large kitchen garden. Obviously I could not resist walking through the garden and checking out the different fruits, vegetables and greens planted there. Everything looked so fresh, green and inviting. One thing that caught my eye and my interest was the Swiss chard.

It surprised me when I gave it some thought, that I had not used this interesting green in my cooking ever before. I decided to remedy that immediately, and after I returned one of the first things I did was to go and buy a bunch of chard to try. Chard belongs to the same family as beets and spinach and is said to have some amazing health benefits.  It is said to be an excellent source of  Magnesium, Potassium, Iron, fiber and Vitamins A, C and E.

I couldn't resist trying out chard in rotis first. In addition to some spices I also added some cilantro to the dough for additional flavor. We enjoyed this chard flavored roti a great deal and I am certain that chard is going to feature more prominently in my grocery list from now on :-)

 photo 76940a2b-00eb-4b92-a8da-d9cc35f130e1_zps2bde29ea.jpg

Click here for a printable view of this recipe

Ingredients and Method to make Swiss Chard roti
2 cups whole wheat flour
2 cups loosely packed cut swiss chard leaves (the chard I bought had red stalks)
1/4 cup loosely packed cut cilantro leaves (coriander leaves)

1/2 tsp Carom seeds (Ajwain/ Omam)
1/2 tsp garam masala (or any other curry powder) (or to taste)
salt to taste
1/2 tsp red chili powder or cayenne powder (or to taste)
1/2 tsp cumin powder
a few drops of oil/ ghee( clarified butter) (optional) (use oil for a vegan version)

In a large bowl add all the dry ingredients. Mix well. Add swiss chard leaves and cilantro and mix into the dry flour.

Add water as required,a little at a time and knead into a non sticky,  not too soft,  not too stiff dough ( I used almost 1 cup of water for this quantity of flour) Keep the dough covered and allow it to sit for about 30 mins to an hour.

The dough softens a little more in this time. Knead the dough gently one more time. Divide into equal lemon sized balls and with the help of a little flour roll out into as thin or thick a circle as required. Make sure to roll out the dough evenly.
The copyright of this content belongs to Veginspirations.com

Heat a flat pan/ tawa/griddle. When hot, place rolled out dough on it and allow the roti to cook until the lower side gets light brown spots. Flip over and cook the other side, if you plan to use ghee/clarified butter or oil spread a little on the top and a few drops around the circumference of the roti.

Remove when the other side begins to get brown spots too and serve hot with curry of choice.

I served it with this mushroom peas curry

I made 12 rotis with this quantity of dough. But yield will depend on the size of each roti.
Read more ...

Monday, July 19, 2010

Eggplant with Bell Pepper Curry ~ Baingan Simla Mirch Sabzi

Did you know that bell peppers are excellent sources of vitamin C & A, vitamin B6 and folic acid. The fiber found in bell peppers is also said to reduce the risk for certain types of cancer. Cool huh?  It doesn't hurt that bell peppers also taste great and can be used in virtually everything from salads, pizza toppings to curries making them as versatile as they are healthy.

In curries, I usually tend to use bell peppers in combination with other vegetables. It adds a certain flavor and taste to the curry that I like. In this case, I used it in combination with eggplants and in my book, this is a winning combination. This simple and quick curry is perfect with either phulkas or rotis but you could just as easily use it as a side dish to go with rice and dhal too.

Eggplant Bell Pepper curry ~ Baingan Simla Mirch Sabzi


Click here for a printable view of this recipe

Ingredients and Method to make Eggplant Bell pepper curry
12 small Indian eggplants cut lengthwise Or 1 medium large eggplant  (baingan/ katrikai)
1 green bell pepper (capsicum/ simla mirch/kodamolagai) cut into 1/2 inch pieces
1 large onion (pyaaz/vengayam) cut fine
2 medium tomatoes (tamatar/ thakkali) cut fine ( I used roma tomatoes)

2 tbsp oil
1 tsp cumin seeds (jeera)
2 Thai or Indian green chilies (cut fine) (or to taste)
1 inch piece of ginger (adrak/inji) minced
1/8 tsp turmeric powder
1/2 tsp garam masala (can be substituted with any other curry powder) 
salt to taste

Heat oil in a heavy bottomed pan. Add cumin seeds, when the seeds begin to crackle, add green chili stir a few times. Then add onion and saute until it is transparent.Add minced ginger, turmeric powder and garam masala and stir for a few seconds.

Add tomatoes and stir and allow to cook until soft and mushy.
The copyright of this content belongs to Veginspirations.com

Add bell pepper , eggplant, salt to taste and mix well. Put a lid on the pan and allow the bell pepper and eggplant to cook on a low to medium low heat.

When cooked, remove from heat and serve hot with rotis of choice. I served these with tomato multigrain rotis.
Serves approximately 2 to 3
Read more ...

Monday, May 24, 2010

Chana Masala ~ Chick peas curry

Chana Masala or Chick pea curry is such a popular and well known curry that it hardly needs any introduction at all. There are many variations of making this curry and the one below is my take on the curry. Among northern Indian cuisine chana masala has always been a favorite of mine. It is healthy, quick to make, delicious and very versatile, what more can you ask for from your curries :-)

Before moving on to the recipe, a couple of interesting facts I recently came across....did you know that chili peppers do more than add heat to your food. It seems chili peppers help in increasing metabolism which in turn helps us to burn more fat. Also it seems an average chili pepper contains more vitamin C than an orange, amazing isn't it? If you are interested in finding out more about the health benefits of chili pepper here is the entire article

Chana Masala ~ Chickpeas curry

Click here for a printable view of this recipe

Ingredients and Method to make Chana Masala
2 cups dried chickpeas soaked overnight in sufficient water with a pinch of soda (the soda is optional)
2 medium onions cut fine (pyaaz/vengayam)
2 large tomatoes cut fine (tamatar/ thakkali)

2 Thai or Indian variety green chilies (or to taste) (hara mirch/pachai molagai)
1 tsp chopped ginger (mince green chilies and ginger together) (adrak/inji)
1 1/2 tsp chole masala (or to taste) (available in most Indian groceries)
1/2 tsp red chili powder (lal mirch/molagai podi)
1/4 tsp turmeric powder (optional)
salt to taste (namak/uppu)
2 tbsp oil

handful cilantro (coriander leaves/hara dhania/kothamalli) cut fine
1 1/2 tsp lemon  juice (or to taste) (nimbu ka ras)

Drain the chickpeas and discard the water in which chickpeas have soaked overnight. To know more about why I soak beans with a pinch of soda and why bean soak water needs to be drained read this post.

Place chickpeas along with fresh water in a container and pressure cook until soft. Or place chickpeas along with fresh water in a large heavy bottomed pan and cook on stove top until soft.

Mince ginger and green chilies together using the mortar and pestle or using a spice grinder attachment.

Heat oil in a large heavy bottomed container, add onions and saute until onions turn transparent, add minced ginger and green chilies and saute for about a minute or so.
The copyright of this content belongs to Veginspirations.com
Add tomatoes and cook until tomatoes turn soft and mushy.

Add all the spices and stir for a few seconds. Now add the cooked chickpeas, salt to taste and water as required and allow the chickpeas to simmer until all the flavors blend together.

Using the back of the spatula, mash about a handful of chickpeas so that it allows the gravy to thicken a little and also adds some texture to the gravy.Adjust water as required at this point to achieve required consistency.

Garnish with cilantro and lemon juice just before serving.

Serve with plain rice or any Roti (Indian flat bread) of choice or puris or even wheat bread.

Serves approximately 3 to 4
Read more ...

Tuesday, May 11, 2010

Cumin seeds and a simple digestive aid.

When I first started cooking, I never gave any thought to why particular ingredients were used in any recipe. If you had asked me, the most I might have guessed was flavor. But now I realize that so many of the ingredients used in traditional recipes offer so much more than just flavor to food. Take cumin seeds for example, I am sure you already know that cumin seeds are widely used in various types of cuisines from around the world. But did you know that these little seeds have a lot more to offer than just taste and flavor to food.

Cumin seeds have been found to be a great source of iron, and research shows that it has anti cancer properties too. Traditionally cumin seeds have always been recognized as an aid to digestion and recent research has shown that this is because cumin seeds stimulate the secretion of pancreatic enzymes. Pancreatic enzymes are compounds that are necessary for digestion and nutrient assimilation

Photobucket

I was surprised to know that cumin seeds are a good source of iron and have anti cancer properties. On the other hand, the part about cumin being a digestive aid does not surprise me at all. It has always been common wisdom in our home that cumin seeds are a great aid to digestion. My mother used to make jeera rasam whenever any of us were not feeling too well, because it was good for digestion. Jeera rasam is a light soup like dish made with tamarind and spices like cumin (I haven't posted the recipe for this yet, but plan to do so in the future)

In addition to jeera rasam, my mother in law also makes jeera/cumin water regularly. Especially when we have been traveling a lot, or when occasions like weddings or festivals come up or we have elderly visitors. This quick and effective remedy has now become part of some of the simple home remedies that I have come to depend on.......

Photobucket


Click here for a printable view of this entire article

Ingredients and Method to make Jeera/Cumin water
2 cups filtered/drinking water
3/4 tsp cumin seeds (jeera)
2 pinches of  Carom seeds (ajwain/omam) (optional but recommended)
1/4 tsp ground ginger powder (sukku) (optional but recommended)

Bring the filtered water to a boil, add cumin seeds, carom seeds and ginger powder to it.
The copyright of this content belongs to Veginspirations.com
Let it simmer for a minute or two. Remove from heat, cool to lukewarm. Strain and drink the water warm.

This can be had anytime of the day. This quantity serves 2 to 3 .

Reference links : WHFoods
Read more ...

Sunday, April 11, 2010

Bean and Barley Soup

One of the questions I frequently get, is why I soak beans with a pinch of soda. One of the reasons for that is that it makes beans much softer and easier to cook. The other reason is that I have heard it makes beans more easily digestible. One thing to note when soaking beans with a pinch of soda is to make sure and  drain the water the beans have been soaked in and cook the beans in fresh water.

In any case I hear that throwing the water in which beans have been soaked is important. I got this tip in  a Sanjeev kapoor cookbook, which explains that soaking, draining and then cooking beans destroys the anti nutritional factors like tripsin inhibitors. Tripsin inhibitors reduce protein digestibility and by draining the bean soak water, the digestibility of beans improve. The tip specially mentions that draining water in which beans are soaked is good because that water can do more harm than good.

Moving on, this soup was something I created when I was in the mood for soup one day. I used pinto beans in this, because I love the texture of pinto beans and I thought it would go well with the other flavors and vegetables in this soup. It did work well and both R and I enjoyed this soup with some crusty store bought bread.

Pinto Bean and Barley Soup | Veg Inspirations


Click here for a printable view of this recipe

Ingredients and Method to make Bean and Barley soup

1 cup dried pinto beans soaked for 6 hours or so with a pinch of soda (the soda is optional) (see notes)

1 medium onion cut fine (pyaaz)
1/2 tsp minced ginger (see notes)(adrak)
1/2 cup pearled barley
2 medium tomatoes cut fine (tamatar)
2 large carrots cut into 1/4 inch pieces (gajar)
1 1/2 cup sweet corn kernels
2 small bay leaves (tej patta)
salt to taste (namak)
1 tsp red chili powder (or to taste) (lal mirch)
1 and 1/4 tsp cumin powder (or to taste)(jeera powder)
4 cups vegetarian vegetable stock or water (I used water)
2 Tbsp oil
1-2 tsp lemon juice (optional)
3-4 Tbsp finely chopped cilantro (coriander leaves/ hara dhania/ kothamalli ) for garnish

Drain the water that the beans were soaked in, fill container with fresh water and pressure cook or cook
on stove top until beans are soft but not mushy.( I use the pressure cooker ). Keep cooked beans aside.

Place pearl barley in a container, fill with water, swirl with hand a couple of times and drain water. Keep barley aside.

Heat oil in a large heavy bottomed pan, add onions and saute until onions are transparent.Add minced ginger and stir a few times.

Add tomatoes and stir until tomatoes are cooked and mushy.
The copyright of this content belongs to Veginspirations.com

Add bay leaves, all the spices and stir a couple of times.

Add carrots, corn, barley, salt to taste  and water or stock and allow the vegetables / barley to cook.

When the vegetables and barley get cooked and soft, add the cooked pinto beans, adjust water to achieve required consistency and let the soup simmer for another fifteen to twenty minutes for the flavors to come together.

Just before serving add lemon juice (if using)  and garnish with cilantro leaves and serve hot with a crusty bread of choice.

Serves approximately 3 - 4

Notes
You can substitute red kidney beans (rajma) instead of pinto beans if you want.
If you would like to use canned pinto beans, you would need approx 2 15 oz cans of pinto beans. Just rinse the beans thoroughly and add to the soup after the barley and vegetables are cooked and simmer for a few minutes for the flavors to mingle.
You can also use 1/2 tsp minced ginger + 1/2 tsp minced garlic instead of just ginger

If you are looking for other recipes with barley, here are a few more


Keerai Oat Barley Adai ~ Savory Spinach and Oat crepes

Curried Mung bean and barley soup ~ Whole moong soup

Quinoa Oat Barley Adai  ~ Savory Oat and Quinoa crepes


Read more ...

Sunday, April 4, 2010

Sugar Free Carrot Ginger Juice

Do you ever worry about the amount of daily activity all of us do on the computer and the effect it may have on our eyes ?  Scary thought I know, but it just struck me, these days I seem to spend an awful amount of time within a few feet of the computer screen staring at it while I work. I used to be the kind of person who used to carefully measure the distance from the television and make sure I never came within six feet from the screen while viewing it, because I was afraid it may impact my vision. It seems unavoidable though, since so much of our lives and activities, now revolve around the computer.

I decided to research........where else......online... of course, to see if I was doing all that I could to help my eyes stay healthy. In the course of my research I came across some interesting finds, apparently blueberries, red onions, sweet potatoes and spinach are good for our eyes.I was also surprised to find one article suggest that going for brisk walks at least four times a week helps in preventing or curing some types of eye conditions. Read the entire article here for more tips and suggestions to prevent eye strain and improved eye health 

And of course, including more carrots in our diet is a no-brainer when it comes to eye health. I avoid the carrot juices available in the store, because they do not taste as fresh as the homemade ones and some of them have added sugar in them too. Instead I prefer to make my own sugar free carrot juice with a touch of ginger, lemon, salt and pepper in it. If you plan to try this and like me, do not want to waste the extracted pulp, then you can use it in this carrot roti or in carrot cookies which I plan to post tomorrow :-)

Photobucket

Click here for a printable view of this recipe

Ingredients and method to Make Sugar free Carrot Juice
4 large carrots chopped into 1/4 inch pieces
1 tbsp finely chopped ginger
1/2 tsp salt (or according to taste)
dash of freshly ground black pepper powder (or to taste)
1 tsp lime juice
2 cups of filtered/ drinking water

Using a blender, blend together carrots and ginger along with the drinking water.

Strain the juice using a fine sieve. Press the pulp with the back of a spoon to make sure all the juice has been extracted.
The copyright of this content belongs to Veginspirations.com


Add lime juice, salt and pepper to the extracted juice and mix well. Pour and serve, or refrigerate and serve cold later. This yields 2 cups of juice.


The pulp can be used in this carrot roti or can be used in a cookie recipe, which I will be posting tomorrow.


Notes
Carrot juice tastes best fresh or within a few hours of making it.
Read more ...

Tuesday, March 30, 2010

Southwestern Style Pasta Salad

Cilantro(coriander leaves) has always been one of my favorite herbs. The fragrance and flavor it adds to food is just incomparable, and I use this herb extensively in my daily cooking to add flavor.In a general sense I always believed that cilantro like all other green leafy herbs and vegetables must have some good in them, but I never really looked it up to confirm what those health benefits could be......

So I was pleasantly surprised when I came across an article in a recent Health magazine issue that explained exactly how healthy cilantro really is.......Did you know.... that cilantro is said to aid digestion and prevent nausea. It also is said to contain essential oils in it that kill bacteria like e-coli making food safer. After reading that article I went online to check and found that in addition to these, cilantro has been credited with a host of other health benefits, everything from having anti inflammatory properties, to help in reducing LDL cholesterol (the bad kind),to being a good anti oxidant and is also said to help stimulate the endocrine glands. Who would have thought that cilantro could be this beneficial and have such an important role to play in our diet.......

I definitely did not....and now that I do, I reach for the cilantro in my herb tray with an added sense of enthusiasm and use it wherever I can. Like in this southwestern style pasta salad that I first tasted at a restaurant. I loved it and thought it would be great to try making this at home. In addition to being very colorful and flavorful, this salad is also very hearty and filling.

Southwesternpastasalad edited

Click here for a printable view of this recipe
 
Ingredients and Method to make Southwestern style Pasta Salad

1/2 cup dry red kidney beans soaked for 6 to 8 hours with a pinch of soda (soda is optional)
1/2 cup dry black beans soaked for 6 to 8 hours with a pinch of soda (soda is optional)

3 1/2 cup dry any type of pasta like rotini or penne ( I used Barilla plus multi grain rotini)

1 large onion cut lengthwise
1 cup sweet corn kernels
1 green bell pepper cut fine
3 stalks celery cut fine (optional)
2 tbsp oil

For the dressing
1/3 cup olive oil (see notes)
1/4 cup lime juice/lemon juice (or to taste) (see notes)
salt to taste
1 tsp paprika
2 tsp cumin powder
2 tsp chili powder (or to taste)

generous handful cilantro cut very fine for garnish

Drain the water the beans were soaked in, fill with fresh water and cook the beans seperately until soft either using the stove top or pressure cooker. Keep the cooked beans aside.

Cook dry pasta as per the instructions given in the packet, remove from heat, drain and keep aside.

Heat oil in a large heavy bottomed pan, add onions and saute until transparent.

Then add celery and sweet corn and saute until the sweet corn is softer and cooked. Remove from heat.

In a small bowl, add oil, spices, salt and lime juice and mix well.

Add cooked pasta to the onions,celery and corn and mix well. Add finely cut bell pepper to it and mix well. Now drizzle the oil + lime+ spices mixture on it and mix well.

 The copyright of this content belongs to Veginspirations.com

Garnish with cilantro.

Serve at room temperature or chilled.

Serves approximately 4

Notes
Preferably when cooking the beans, add just enough water to cook it. I fill my container containing beans with water upto 1/4 of an inch above the beans and pressure cook it, that works out fine for me. In case you use the stove top keep adding water as required while cooking the beans. In case there are a few teaspoons of water remaining you can use it as is in the salad. In case there is a lot more water than that, then drain the water before adding beans to the salad.
If you use store bought lime or lemon juice you may need a little more, if you use fresh lemon/lime then a couple of tbsp may be sufficient.
Update: When I made this subsequently I started using only about 2 to 3 tbsp olive oil instead of 1/3 cup for the dressing and still think the salad tastes very good.

Suggested variance:
Reduce chili powder and instead saute 1 jalapeno cut fine along with the onions and add to the salad

This salad is off to the Healthy Inspirations Salad Event going on at this site and to Sowmya's Cooking with Pasta Event 

Read more ...